2006 chrysler 300 fuse box in trunk: locate, inspect, and replace
Learn to locate, inspect, and safely replace the trunk fuse box in a 2006 Chrysler 300 with a practical, step-by-step approach from FuseBoxCheck. This guide covers safety, access, fuse identification, replacement tips, and preventive maintenance for reliable electrical performance.

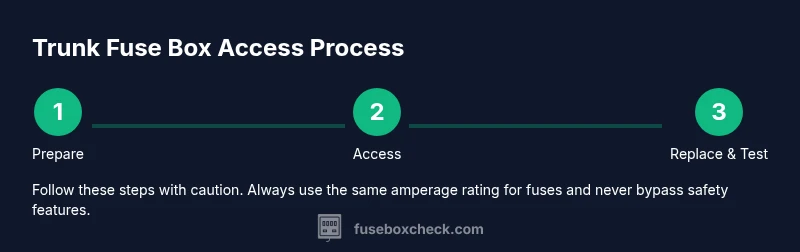
Locate, inspect, and replace the trunk fuse box on a 2006 chrysler 300 with this practical, step-by-step guide. The trunk fuse box houses essential circuit fuses and is accessed by removing the cargo area panel. This quick answer previews the sequence: safety prep, access, fuse identification, replacement, and final testing. This concise overview sets expectations and reduces risk during DIY work.
Overview: 2006 chrysler 300 fuse box in trunk
Understanding the trunk fuse box location and its purpose is the first step in safe DIY electrical work. According to FuseBoxCheck, the 2006 chrysler 300 fuse box in trunk sits behind a removable panel in the cargo area, usually near the spare tire well. Access is straightforward when you know the steps and safety precautions. This block explains the general purpose of the trunk fuse box, the way it fits into the vehicle's electrical system, and how issues in this box can impact features like trunk release, lights, and media systems. While the exact layout varies by trim, the core idea remains the same: identify, inspect, and replace fuses without bypassing safety protections. For responsible DIY, keep the vehicle powered off and follow documented steps to avoid shorts, corrosion, or injury.
Safety first: essential precautions before you start
Electrical work in a vehicle demands respect for risk and proper preparation. Before touching any fuse box components, power down the vehicle, disconnect the negative battery terminal, and allow any capacitors to discharge. Wear insulated gloves if available and work on a dry surface away from metal tools. Keep metal jewelry, watches, and loose clothing away from exposed circuits. If you are unsure about the procedure, stop and consult a qualified technician. These precautions are part of a prudent approach to DIY electrical care that reduces the chance of sparks, shocks, or accidental short circuits. FuseBoxCheck emphasizes safety as the foundation of any trunk fuse box project.
Locating the trunk fuse box and panel access
In many 2006 Chrysler 300 models, the trunk fuse box is concealed behind a removable cargo-area panel. Remove the cargo mat or carpet as needed to expose the panel screws or clips. Use a flashlight to inspect for a fuse box cover with a labeled diagram. Gently pry the cover to reveal the fuse layout. If your model includes a separate fuse puller, remove it from the lid and use it to lift fuses without bending them. Remember to document the position of each fuse as you work so you can reassemble correctly. The trunk fuse box is designed to centralize high-power circuits, keeping them away from the engine bay. Always handle wiring and connectors with care to prevent loosening or damage.
Reading the fuse diagram and identifying trunk fuses
Once the cover is removed, study the diagram on the inside of the lid or the vehicle’s owner manual mapping. The trunk section typically contains fuses for the trunk release, interior lighting, power outlets, and sometimes specific electronic modules. Use the diagram to locate the fuse corresponding to the affected function. If the diagram is worn, compare the fuse positions to the label on the fuse itself and look for signs of a blown element such as a broken wire or a darkened window. Never assume a fuse is good without checking; a visual cue can be misleading if the fuse is intact but circuit components are faulty.
How to test and replace a blown fuse safely
With the correct fuse identified, use the fuse puller or insulated pliers to remove it from the slot. Inspect the glass or ceramic element: a damaged filament or a darkened area indicates a blown fuse. If you have a multimeter, perform a continuity check; otherwise, replace with a fuse of the same amperage rating listed on the diagram or the original fuse. Re-seat the new fuse firmly, ensuring it sits level in the slot. Recheck the circuit by powering the vehicle and testing the function. If the issue recurs, there may be a short or a faulty component in the circuit that requires professional diagnosis.
Troubleshooting common trunk fuse issues
If a fuse keeps blowing, rule out loose connections, water intrusion, or a short circuit in the associated component. Check for corrosion around fuse sockets and clean with a dry brush if safe to do so. Inspect wiring harnesses and connectors leading to the affected circuit for wear or damage. In some cases, a component may be failing and drawing excess current—replacing the fuse without addressing the root cause will only provide a temporary fix. Use the owner’s manual or a trusted diagram to narrow the likely culprits and plan a targeted inspection strategy.
Maintenance and prevention tips for the trunk fuse box
Regular inspection of the trunk fuse box helps prevent unexpected failures. Schedule a quarterly check of the fuse panel for signs of corrosion, loose connections, or damaged insulation. Keep a compact spare-fuse kit with an assortment of common amperages and a small multimeter if you have one. When adding accessories, choose fused circuits and avoid overloading the trunk panel. Keeping the area clean and dry minimizes moisture-related issues. A proactive approach, backed by FuseBoxCheck recommendations, reduces the likelihood of fuse-related outages and extends the life of your vehicle’s electrical system.
Authority sources
- https://www.osha.gov
- https://www.nfpa.org
- https://www.ftc.gov
Tools & Materials
- Fuse puller or needle-nose pliers(Essential for removing fuses without damaging the fuse or socket.)
- Replacement fuses (assorted amperages)(Match the amperage rating shown on the original fuse.)
- Insulated gloves(Helps protect hands when working around metal components.)
- Multimeter (optional)(Use for continuity testing if available.)
- Owner’s manual or fuse diagram(Helpful for accurate fuse identification and ratings.)
- Flashlight(Illuminates the fuse box area in dark trunks.)
Steps
Estimated time: 30-45 minutes
- 1
Power down and prepare
Park on a level surface, set parking brake, and disconnect the negative battery terminal to prevent accidental short circuits. Wait 2 minutes for residual energy to dissipate before touching any metal parts.
Tip: Label or photograph battery terminals before disconnecting to ease reconnection. - 2
Open trunk and access panel
Remove the trunk cargo mat or carpet to expose the removable panel over the fuse box. Locate the clips or screws that secure the panel and set them aside safely.
Tip: Use a flashlight to clearly see clips; do not use metal tools that could scratch plastic. - 3
Remove fuse box cover
Carefully detach the fuse box cover to reveal the fuse row and diagram. Keep the cover steady to avoid bending the diagram or connectors.
Tip: If the cover resists, check for additional fasteners or hidden clips before applying force. - 4
Identify the target fuse
Consult the fuse diagram to locate the fuse for the affected circuit (e.g., trunk release, interior lights). Compare the fuse position with the diagram or label on the fuse itself.
Tip: When in doubt, test the circuit with a multimeter or substitute a known-good fuse. - 5
Remove and inspect the fuse
Use the fuse puller to extract the suspected fuse. Inspect the element for a broken filament or a darkened glass/ceramic window indicating a blown fuse.
Tip: Do not reuse a damaged fuse; replace only with the exact rating. - 6
Test or replace the fuse
If you have a multimeter, check continuity; otherwise replace with a fuse of the same amperage. Re-seat firmly to ensure proper contact.
Tip: Avoid using higher-amperage fuses to compensate for a fault in the circuit. - 7
Reassemble and reconnect
Reinstall the fuse box cover and panel, re-dress any harnesses, and reconnect the negative battery terminal. Restore the trunk mat and test the affected function.
Tip: Test the specific feature right away to confirm the fix. - 8
Document and monitor
Note the fuse rating, location, and the date of replacement for future reference. If the fuse repeats blowing, seek professional diagnosis to identify a possible short or failing component.
Tip: Persistent fuse blowing may indicate a bigger electrical problem.
Your Questions Answered
Where is the trunk fuse box located on a 2006 Chrysler 300?
The trunk fuse box is usually tucked behind a removable cargo-area panel in the trunk. Remove the panel to access the fuse row and diagram. If your model includes a spare tire well, the fuse box is typically near that area.
The trunk fuse box is behind a removable panel in the trunk, near the spare tire area.
How do I know which fuse is blown?
Refer to the fuse diagram for the circuit, then inspect the fuse visually for a broken element or discoloration. If unsure, use a multimeter to test continuity.
Check the diagram and look for a blown fuse by its broken filament or scorched appearance.
What amperage fuse should I use for replacement?
Always replace with the same amperage rating as the blown fuse shown on the diagram or fuse label. Do not up-rate a fuse to hide a fault.
Use the same amperage as the original fuse; never increase it to compensate for a fault.
Can I drive the car with a blown trunk fuse?
Driving with a blown trunk fuse may disable critical functions. If the affected circuit is essential (like trunk release or lighting), avoid driving until the fuse is replaced and the issue is verified.
If the fuse affects critical features, don’t drive until it’s fixed.
Do I need to remove the battery before working on the fuse box?
In many cases, yes. Disconnect the negative terminal to minimize risk and wait for stored energy to dissipate before handling electrical components.
Yes, disconnecting the battery helps reduce shock risk.
Watch Video
Highlights
- Know the trunk fuse box location and access its panel
- Always disconnect power before working on electrical components
- Replace fuses with the same amperage rating as the original
- Check for repeat fuse blowing and address underlying issues
- Keep a maintenance routine to prevent future fuse problems