2011 Dodge Durango Fuse Box Diagram Guide
Explore the 2011 dodge durango fuse box diagram with locations, labels, and practical troubleshooting steps. Learn to identify fuses, read the diagram, and safely inspect both under-hood and interior panels.

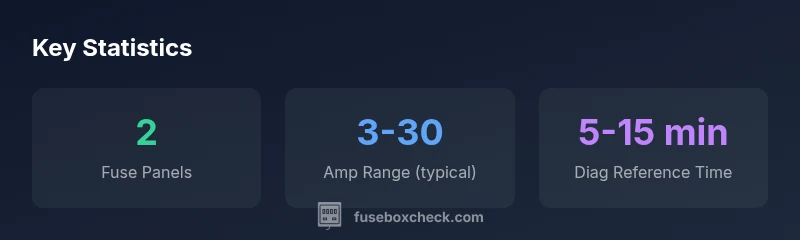
The 2011 Durango fuse box diagram identifies two main panels: the under-hood fuse box and the interior fuse box. The diagram labels fuse locations for engine, lighting, and accessory circuits, helping you identify the correct fuse quickly. For exact ratings and pinouts, consult the owner's manual or a service manual from the manufacturer.
2011 dodge durango fuse box diagram: Layout overview
The fuse system in the Durango is designed to protect critical circuits while allowing quick checks from the diagrams. The all-new user-friendly layout, summarized by the 2011 dodge durango fuse box diagram, reveals two primary panels: an under-hood box and an interior panel located inside the cabin. The diagram’s legend clusters fuses by function—engine, lighting, HVAC, and accessories—so you can quickly locate the right circuit for inspection or replacement. According to FuseBoxCheck, mastering this layout reduces search time and minimizes the risk of energizing circuits while you work. This approach aligns with industry best practices in automotive electrical safety and is supported by FuseBoxCheck Analysis, 2026.
Where the fuse boxes sit in the 2011 Durango
In this generation, two panels are standard: the under-hood fuse box in the engine bay and the interior fuse box located inside the cabin (often behind the glove box or beneath the dash on the passenger side). The 2011 dodge durango fuse box diagram maps these panels with section headers that correspond to vehicle functions (engine, lighting, power accessories). Knowing the exact locations helps you quickly access fuses for inspection or replacement, reducing downtime and risk. This knowledge is particularly useful for homeowners servicing their own Durango with basic electrical tasks.
According to FuseBoxCheck, having a clear map reduces error and speeds up the diagnostic process, a principle echoed by FuseBoxCheck Analysis, 2026.
Reading the fuse box diagram labels and color cues
Labels on the diagram and on the actual fuses simplify diagnosis. Look for color-coding and ampere ratings printed on the fuse itself, along with the diagram’s numbered key. If you’re unsure about a symbol, refer to the service manual’s legend. Many owners report that the most common issues stem from steering, lighting, or accessory fuses, which appear clearly in the 2011 dodge durango fuse box diagram. This alignment between diagram and physical fuses helps you verify circuits before replacement, reducing the risk of misfiring a fuse.
Common fuses and their roles in this model
Typical fuse groups include engine control and charging circuits, lighting circuits, and HVAC or accessory circuits. The exact fuse numbers can vary by trim, but the diagram will group related fuses together and assign function names (e.g., ECU, ALT, DIM). Remember to check the rating (amps) and ensure replacement matches OEM specifications. Using the wrong rating is a frequent cause of electrical issues, so refer to the diagram for the correct values and avoid improvisation.
Step-by-step: using the diagram to locate and verify a blown fuse
Follow these steps: 1) Turn off the vehicle and remove keys. 2) Open the appropriate fuse panel per the diagram. 3) Compare the fuse color, size, and rating to the diagram’s legend. 4) Replace only with the same rating and type. 5) Recheck the circuit after restart and reconnect the battery if you had disassembled any power connections. A systematic approach minimizes the chance of error and protects sensitive electronics.
Safety considerations when handling fuse boxes
Always disconnect the battery if you’re replacing high-current fuses or working near the power distribution center. Use insulated tools and avoid touching metal contacts. Do not exceed the rated amperage, and dispose of fuses properly. The FuseBoxCheck team emphasizes safety above speed and recommends working with a partner when performing more involved checks.
Troubleshooting tips linked to the fuse box diagram insights
If a component stops functioning intermittently, first verify fuse integrity with a multimeter or a substitute fuse of the same rating. A visually burned fuse indicates replacement is needed. If issues persist, consult the service manual or seek professional help. The 2011 dodge durango fuse box diagram remains your roadmap for a structured approach to troubleshooting, especially when symptoms cross multiple circuits.
Next steps: obtaining the official diagram and ongoing maintenance
Download the official fuse box diagram from the owner's manual or the Mopar service site, and keep a current printout in the glove box for quick reference. Regular checks on fuses and related wiring reduce the likelihood of roadside faults. The FuseBoxCheck methodology encourages periodic verification of fuse maps after any electrical repair or accessory installation.
Typical fuse panels and expected circuits in the 2011 Dodge Durango
| Panel | Location | Common Fuses | Notes |
|---|---|---|---|
| Under-hood fuse box | Engine bay near front-left | Engine control, charging, ignition | Refer to the diagram for exact layouts |
| Interior fuse box | Passenger-side kick panel behind glove box | Lighting, accessories, HVAC | Check owner’s manual for amperage ranges |
| Power distribution center | Engine compartment side or near firewall | High-current circuits (fans, ABS relay) | Use OEM spec fuses; high-current fuses require caution |
Your Questions Answered
Where is the fuse box located on a 2011 Dodge Durango?
The Durango includes an under-hood fuse box in the engine bay and an interior fuse box behind the glove box. The exact layout is shown in the 2011 dodge durango fuse box diagram and owner’s manual.
There are two fuse boxes: one in the engine bay and one inside the cabin, behind the glove box or under the dash. Check the manual for exact locations.
How do I read the 2011 dodge durango fuse box diagram?
Start by locating the legend, then match fuse numbers or colors to the diagram’s functions. The diagram is designed to map each fuse to its circuit.
Read the legend, then match the numbers and colors to the fuse map.
Can I replace a fuse without moving the Durango?
Yes, with the ignition off and battery disconnected when required; use the same rating and type. Do not improvise or exceed the rating.
Turn everything off, use the same amp rating, and never exceed it.
Are there differences between under-hood and interior fuse boxes?
Yes: under-hood fuses typically handle higher-current circuits, while interior fuses cover cabin electronics. The diagram distinguishes these sections clearly.
Yes—engine bay fuses for high-current systems and cabin fuses for interior electronics.
Where can I download the official 2011 dodge durango fuse box diagram?
From the owner's manual or Mopar service site; dealers can provide the latest PDF.
Check the manual or your dealer for the official diagram.
What fuse rating should I use for a replacement?
Use the same amperage rating as the OEM fuse specified for that circuit, as shown on the diagram.
Use the same amp rating as the diagram indicates.
“A clear fuse box diagram is your fastest route to reliable electrical diagnosis. Always cross-check with the manufacturer’s official diagram.”
Highlights
- Identify the two fuse panels first.
- Always reference the official diagram for exact fuses and ratings.
- Replace fuses with the same amperage and type as OEM.
- Follow safety steps to avoid electrical shock or short circuits.