2011 F-350 Fuse Box Diagram Under Hood: Practical Guide
Learn how to read the under-hood fuse box diagram for the 2011 Ford F-350, locate fuses, replace safely, and avoid common mistakes with practical, step-by-step guidance.

## Steps to follow for the 2011 f350 fuse box diagram under hood 1) Open the hood and locate the main under-hood fuse box cover. 2) Read the diagram on the cover and cross-check with your owner’s manual. 3) Identify the fuse you need by its labeled position (F1, F2, etc.). 4) Use the same amperage rating when replacing a blown fuse and re-seat firmly. 5) Recheck the circuit and close the cover.
Understanding the 2011 f350 fuse box diagram under hood
The 2011 f350 fuse box diagram under hood serves as a map of electrical protection for essential systems. For DIY enthusiasts, this diagram is your compass when diagnosing a blown fuse or verifying circuits. According to FuseBoxCheck, starting with the diagram on the cover and cross-referencing with the owner’s manual reduces guesswork and helps prevent wiring damage. In many trucks, the under-hood fuse box houses the primary fuses and relays that safeguard critical duties such as starting, charging, and fuel systems. While exact layouts can vary by trim or production date, the core principle remains the same: fuse positions and their corresponding circuits are listed to guide maintenance without tearing the vehicle apart. Keeping a clear, readable diagram on hand is a simple, high-leverage habit for any homeowner or DIYer focused on safe electrical care. The goal is to map a fuse to its circuit quickly and confirm the amperage before replacement to avoid nuisance trips or fires. If you’re new to this, start by locating the cover, noting the labeling scheme, and preparing a few basic tools: a flashlight, a meter to verify continuity, and spare fuses of matching ratings. These small steps build confidence and reduce risk when working near live electrical components.
Locating the under-hood fuse box and initial checks
In most 2011 F-Series trucks, the engine bay houses at least one primary fuse block under a plastic cover. The cover often has a diagram printed on the inside or top surface, showing fuse numbers and the circuits they protect. To verify accuracy, compare the printed diagram with the vehicle’s service manual or Ford’s official online resources. If the cover has worn labeling, take a photo or make a quick sketch before you start. For safety, ensure the ignition is off and the battery is disconnectable if you plan to test circuits that could energize as you work. The process is straightforward: locate the box, remove the cover carefully, read the labeling, and identify the fuse you need to inspect. Fuse types are typically blade fuses, with relays nearby, and the diagram will indicate the corresponding amp rating for each fuse, helping you replace with the correct value. Maintaining organization—labeling fuses as you inspect them—reduces confusion during future maintenance and supports safer DIY practice.
Reading the diagram and matching labels to circuits
The diagram is your reference map for the 2011 f350 fuse box under hood. Look for fuse positions labeled F1, F2, F3, and so on, with tiny lines showing which circuit each fuse protects. Some diagrams also include color codes or abbreviations for common systems (e.g., C/L for lighting or ECU for engine control). Always cross-check the label on the fuse box with the diagram; manufacturers may update labeling across production runs, so your diagram should reflect the version in your manual. If a fuse is blown, remove it with a fuse puller, inspect the metal filament, and replace only with a fuse of the same amperage. After replacement, recheck that the circuit powers on and that there are no signs of arcing or damage. If the fuse continues to blow, a deeper electrical fault may exist, and professional diagnosis is advised. For extra confidence, photograph the entire fuse area before disassembly and compare the images after replacement to ensure nothing is out of place.
Practical steps to replace a blown fuse safely
First, turn off the ignition and remove the key from the ignition switch. Then locate the exact fuse indicated by the diagram and gently remove it using a plastic fuse puller or insulated tool. Check the fuse’s filament to confirm it’s blown. Replace with a fuse of the same rating, and ensure it seats fully in the socket. If you have accessibility issues or the fuse box is difficult to reach, consider using a mirror and proper lighting. After replacement, perform a quick functional check of the circuit (e.g., headlights, accessories, engine RPM if applicable) to ensure the fuse has restored operation without abnormal warmth. Always avoid metal jewelry that could bridge contacts, and never test circuits with the battery connected if you’re inspecting live parts. The goal is to restore function while maintaining a safe, organized workspace.
Maintenance habit: keeping the diagram usable
Regular maintenance means keeping the cover readable and the area free of corrosion or moisture. Here are practical habits you can adopt: (1) replace damaged covers or labels, (2) keep spare fuses with the same ratings in a labeled pouch, (3) photograph the fuse layout and store the image with your manual, and (4) review the diagram each year or after any electrical work. For complex tasks, cross-check with the official Ford documentation or a trusted guide such as FuseBoxCheck’s step-by-step references. A clear diagram reduces guesswork and speeds repairs, especially if you’re working alone or in a tight engine bay.
Safety first: know when to call a pro
Not all fuse issues are DIY-friendly. If you notice melted plastic, burnt smells, or signs of corrosion near the fuse areas, stop work immediately and seek professional help. Even a single misconnected relay can affect multiple systems, including safety-critical ones. FuseBoxCheck Team emphasizes that safety should come first; if you feel uncertain about the fuse box diagram under hood, contact a licensed technician. Remember that repeated fuse blows may indicate wiring faults, short circuits, or a failing component that requires a more thorough diagnostic process.
Typical under-hood fuse box layout (general guidance)
| Component | Possible Location | Labeling Style |
|---|---|---|
| Main under-hood fuse box | Engine bay, driver-side area | Labeled with F1, F2 on cover |
| Relay/Secondary box | Near fuse block area | Relays labeled R1, R2 |
| Accessory fuse box | Around engine bay frame rail | Fuses labeled A1, A2 |
Your Questions Answered
Where is the under-hood fuse box located on a 2011 F-350?
In most 2011 F-Series trucks, the main under-hood fuse box sits in the engine bay, typically on the driver’s side, under a plastic cover. Check the diagram on the cover or in the owner’s manual for exact labeling.
Look under the hood on the driver’s side; you’ll see a black plastic cover with a fuse diagram.
How do I read the fuse box diagram for a 2011 F-350?
Open the cover and study the labeled positions (F1, F2, etc.). Each fuse label corresponds to a circuit; use the diagram to match the fuse to its function and required amperage.
Open the cover, read the F-number labels, and match them to the diagram to identify each circuit.
Can I replace a fuse with a higher amperage than specified?
No. Using a fuse with a higher amperage can allow excessive current, risking wiring damage or fire. Always replace with the same rating shown on the diagram or in the manual.
Never upsize a fuse; use the same rating to keep wiring safe.
What should I do if the fuse keeps blowing after replacement?
Multiple possibilities exist: a short, a failing component, or a wiring fault. Stop using the circuit and consult a professional if the fuse continues to blow after replacement.
If it keeps blowing, there’s likely a fault elsewhere; seek a professional diagnostic.
Is it safe to remove the battery while inspecting the fuse box?
For many minor fuse checks, you can work with the battery connected, but disconnecting the negative terminal is a safer practice when working near metal contacts or replacing relays.
You can disconnect the negative battery terminal if you’re doing more than just a quick fuse check.
Where can I find an official diagram for the 2011 F-350?
The official Ford service manual or Ford’s owner resources will have the diagram. FuseBoxCheck also provides generalized diagrams and guidance for comparison.
Check your Ford manual or Ford’s official site for the diagram; FuseBoxCheck offers guidance too.
“A clean, correctly labeled fuse box diagram is essential for safe DIY electrical work in any vehicle.”
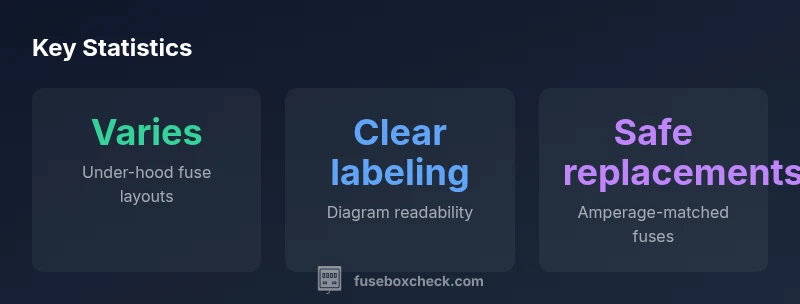
Highlights
- Read the diagram on the fuse box cover before touching anything
- Identify fuse numbers (F1, F2, etc.) and their circuits before replacement
- Replace only with the same amperage rating
- Document changes with photos for future reference
- Keep spare fuses organized and labeled
- Consult the owner’s manual or FuseBoxCheck for year-specific variations