2013 Ford Taurus Fuse Box Diagram: Location, Diagram, and Troubleshooting
A practical guide to locating and interpreting the 2013 Ford Taurus fuse box diagram, with tips for DIY diagnostics, safety, and safe electrical care.

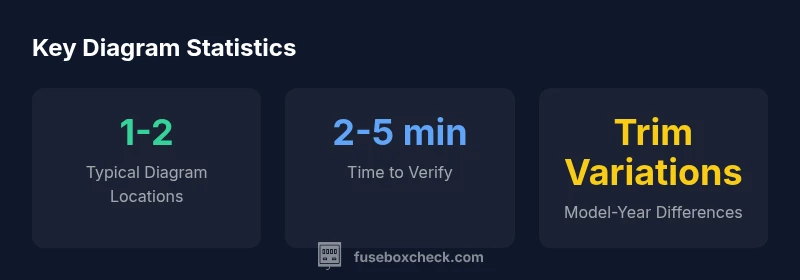
The 2013 Ford Taurus fuse box diagram is printed on the underside of the engine bay fuse box cover and is also detailed in the owner’s manual. For DIY troubleshooting, the diagram helps you identify fuse positions and amperage ratings to verify circuits quickly. Always cross-check the cover diagram with the manual, as trim variations can affect exact locations.
The 2013 Ford Taurus Fuse Box Diagram: What It Is and Why It Matters
The fuse box diagram for the 2013 Ford Taurus is a compact map that shows each fuse’s location, amperage rating, and the circuit it protects. This diagram is essential for diagnosing electrical issues, replacing blown fuses, and understanding how power flows through both the engine bay and interior electrical systems. While the diagram is specific to the Taurus, many symbols and color codes are standardized across modern Ford vehicles, making it a useful reference for future maintenance. In practice, a clear diagram reduces guesswork during troubleshooting and helps you avoid replacing the wrong fuse, which could trigger unnecessary faults or roadside failures. For homeowners and DIY enthusiasts, familiarizing yourself with this diagram is a foundational step in safe, proactive electrical care.
Locating the Diagram on the Taurus Fuse Box Cover and In the Owner's Manual
The fastest way to access the 2013 ford taurus fuse box diagram is to inspect the underside of the engine bay fuse box cover. There is usually a keyed diagram or a printed layout that maps each fuse slot to its function, along with the amperage rating. If the cover diagram is faded or missing, consult the owner’s manual, which provides the same map and may include a consolidated list of fuses by circuit. If you don’t have a physical manual handy, Ford’s official PDFs are typically available on the manufacturer’s site or through Ford’s customer portal. When you remove the cover, handle it gently and keep track of screws; a loose cover can lead to misreads or accidental contact with live terminals.
Recognizing Common Variations Across Trims and Markets
Fuses and circuits can vary by trim level, market region, and even production year within the Taurus family. A diagram printed on the cover may reflect the base configuration, while optional features (like advanced audio or heated seats) can alter fuse counts and positions. Expect small differences in interior fuse blocks versus the engine bay block. If you’re comparing diagrams, always reference the exact trim and model year in the owner’s manual or a dealer-provided service sheet. This approach prevents applying a diagram that doesn’t match your vehicle’s electrical layout.
How to Read the Diagram: Symbols, Amperage, and Circuit Maps
A fuse box diagram uses standardized symbols to denote fuses, relays, and their amperage. Amperage ratings are usually shown next to the fuse symbol or printed on the fuse itself. Common household-style terms like “MAX,” “MIN,” or “DC” appear with color-coded blocks. Reading the map involves locating the circuit you’re testing (e.g., lighting, HVAC, infotainment) and tracing the fuse position to confirm it corresponds to the reported issue. If you’re replacing a fuse, always use a fuse with the same amperage rating; using a higher rating can risk wiring damage, while a lower rating may cause nuisance trips. For more complex systems, consider consulting wiring diagrams or a service manual that includes detailed circuit charts and color codes.
Practical Troubleshooting Scenarios Using the Diagram
Consider a scenario where the radio stops working. Use the fuse box diagram to locate the radio fuse, verify its amperage, and inspect the fuse visually for a break. If the fuse appears intact but the radio remains dead, test the circuit with a multimeter to confirm there’s no voltage reaching the radio. Another common issue is interior lights flickering at night. By following the diagram, you can quickly determine if the interior fuse or relay is compensating for a ground fault or a short elsewhere. Document each step as you go; a quick reference table helps you track which fuses were checked and what readings were obtained. For persistent faults, the diagram serves as a map to identify related circuits that could share a common power source.
Maintenance and Safety Practices: Keeping Your Diagram Handy and Safe
To maximize safety, store a printed copy of the fuse diagram in the glove box or with the vehicle’s maintenance manual. Keep spare fuses of the correct amperage on hand and label them by circuit. When working on the fuse box, first turn off the vehicle and disconnect the negative battery lead if you anticipate battery contact. Use insulated tools and avoid wearing loose jewelry. Periodically verify the condition of the fuse box cover and replace any faded diagrams. Keeping an organized map and a few safety practices in place will make future DIY fixes faster and safer.
Common Mistakes to Avoid When Using the Fuse Box Diagram
Don’t rely on memory or a rough sketch; always confirm positions with the diagram on the cover and the official manual. Avoid mixing up fuse types (blade vs. mini blade) and amperage ratings. Never bypass a blown fuse with a higher-rated one for a quick fix; this can cause wiring damage or fire hazards. If the label is illegible, replace the fuse box cover or consult an official service document to reconstruct the correct map. Finally, do not ignore recall alerts or service bulletins—some Taurus models may have known fuse-related issues that require manufacturer guidance.
Diagram availability and layout by model year
| Model Year | Diagram Location | Notes |
|---|---|---|
| 2013 Ford Taurus | Under-hood fuse box cover (diagram on lid) | Original diagram for engine bay fuses |
| 2014 Ford Taurus | Under-hood fuse box cover | Similar layout; verify against manual |
| Other Ford models | Under-hood fuse box cover | Diagrams vary; check model-specific diagram |
Your Questions Answered
Where can I find the 2013 Ford Taurus fuse box diagram?
Look on the underside of the engine compartment fuse box cover and in the owner's manual. The cover diagram is the quickest reference, and the manual provides a corroborating map.
Check the fuse box cover first, then consult the owner's manual for the exact map.
Does the diagram change between Taurus trims?
Yes, some fuse layouts vary by trim and region. Always confirm with the vehicle’s manual or a Ford service sheet for your exact trim.
Variations exist—verify with your exact trim’s diagram.
What should I do if the cover diagram is missing?
Use the online PDF from Ford or the owner’s manual. You can also consult a service manual or contact a dealership for the precise diagram.
If it’s missing, download the official diagram from Ford’s site or check the manual.
Is the diagram enough for troubleshooting electrical issues?
The diagram helps locate fuses; for electrical troubleshooting, use a multimeter to test circuits and verify continuity alongside the diagram.
Use a multimeter to test circuits in addition to the diagram.
Are interior and engine fuse box diagrams different?
Yes, each compartment may have its own diagram. Verify both against the model year and trim in the manual.
There are separate diagrams for interior and engine compartments.
Can I reuse diagrams from other Ford models for the Taurus?
Some symbols are shared, but layouts differ. Rely on your Taurus-specific diagram for accurate fuses and circuits.
Diagrams can be similar, but trust the Taurus-specific map.
“Exact fuse locations and ratings for modern cars like the 2013 Ford Taurus are typically standardized between engine bay and interior boxes, but always cross-check with the actual cover diagram and the owner's manual for model-specific accuracy.”
Highlights
- Check the cover diagram first to locate fuses quickly.
- Compare the cover diagram with the owner’s manual for accuracy.
- Verify amperage ratings before replacing any fuse.
- Note trim-specific differences that affect fuse placement.
- Keep the manual handy for future diagnostics.