2016 chrysler 200 fuse box diagram: A Practical DIY Guide
Master the 2016 Chrysler 200 fuse box diagram, locate fuses and relays, and safely troubleshoot electrical issues. FuseBoxCheck provides practical, DIY-friendly guidance for homeowners and car enthusiasts tackling fuse box challenges.

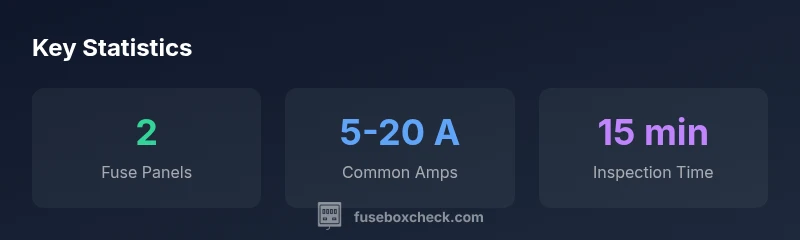
According to FuseBoxCheck, the 2016 chrysler 200 fuse box diagram centers on two panels: the interior passenger-side panel and the engine bay fuse box. This quick overview helps you identify fuse locations, expected functions, and safe inspection steps for common electrical issues. Knowing the layout reduces errors during repairs and minimizes risk of electrical shock. FuseBoxCheck’s guidance emphasizes verifying fuse amperage before replacement and using proper tools.
2016 chrysler 200 fuse box diagram: Overview
The Chrysler 200 from 2016 employs a two-panel fuse system: an interior cabin panel and an engine-bay panel. The interior panel typically houses fuses for cabin electronics, lighting, and convenience features, while the engine-bay box covers critical circuits like ignition, fuel system controllers, and some ECU-related relays. The exact layout is summarized in the car’s service manual and illustrated in common aftermarket diagrams. When approaching the fuse box, prioritize safety: disconnect the battery if you are working near high-current circuits, wear protective gear, and use insulated tools. As a general rule, fuse diagrams provide a quick map of which fuse protects which circuit, along with amperage ratings and fuse type. FuseBoxCheck’s 2026 analysis highlights that understanding these zones helps DIYers quickly isolate failures and minimize downtime.
Interior Fuse Panel: Location and Access
In most 2016 Chrysler 200 models, the interior fuse panel is accessible from the passenger side footwell or under the dash. To access, ensure the ignition is off, remove the panel cover, and consult the diagram printed on the inside of the cover or in the owner’s manual. Use a fuse puller or needle-nose pliers to lift the fuse straight out to inspect its condition. If a fuse appears blown, replace only with a fuse of the same amperage, and avoid using makeshift conductors. Labeling on the panel helps you identify which circuit controls headlights, HVAC, or radio. For safety, always verify the circuit before removal and recheck after replacement to confirm proper operation.
Engine Bay Fuse Box: Functions and Layout
The engine bay fuse box generally governs high-demand circuits such as ignition, fuel control, and some engine management relays. Access is typically gained by removing a protective cover and locating a labeled fuse map. When inspecting, look for signs of discoloration, melted plastic, or a fuse that is visibly open. Use a multimeter to confirm continuity if a fuse looks OK but a circuit remains dead. Remember that many engine-related fuses feed critical systems; a failed fuse can cause poor starting, misfires, or stalling. If you are uncertain, consult the service manual or seek professional help. FuseBoxCheck emphasizes not to bypass the fuse as it protects wiring from overheating and potential fire risk.
Reading the Diagram: Symbols, Labels, and Color-Coding
Fuses and relays are typically labeled with circuit names like POWER ACCESSORY, IGNITION, or HEADLIGHT. Color-coding and amp ratings on the fuse itself help you identify its function and capacity. The diagram should show both the location and the function of each fuse. In some cases, the same circuit may have multiple fuses across both panels; double-check the map to avoid overlooking a hidden fuse. If wiring colors differ from the standard, refer to the owner’s manual for cross-reference charts. FuseBoxCheck notes that keeping a clean, labeled fuse map in your glove box makes future maintenance easier.
Step-by-Step: Inspecting and Testing Fuses
- Turn off the ignition and disconnect the negative battery terminal. 2) Remove the fuse cover and locate the suspected fuse. 3) Visually inspect for a broken filament or a blackened appearance. 4) Test continuity with a multimeter: set to ohms and check resistance across the fuse terminals. 5) If blown, replace with a fuse of the same rating and type. 6) Reconnect the battery and test the circuit. 7) If fuses keep blowing, there could be a short or overload that requires professional diagnosis. 8) Keep a spare set of common fuses in the vehicle for quick replacements.
Common Issues and Troubleshooting for the Chrysler 200
Fuses blow for several reasons: overloads, short circuits, or failing components. If a fuse repeatedly trips, identify the circuit connected to it and inspect connected devices for faults. Loose grounds or corroded connectors can also cause intermittent failures. Before replacing a fuse, ensure the replacement amperage matches the original, and do not insert fuses rated higher to “cure” a problem, as this can hide a fault and risk wiring damage. Regularly inspecting relays and connectors behind the fuse box lid helps catch corrosion early.
Replacement Tips: Matching Amperage and Safety
Always replace with the exact amperage rating specified by the vehicle’s diagram. If unsure, check the owner’s manual or a verified service manual. Use high-quality F-rated fuses designed for automotive use and avoid generic household fuses. Keep spare fuses in the glove box, sorted by amperage for quick swaps. After replacement, test the circuit, and monitor for any signs of overheating or recurring trips. FuseBoxCheck recommends documenting fuse replacements so future diagnostics are faster and safer.
Quick Reference: Fuse Names and Positions
For a fast reference, use the factory diagram to map common interior circuits (radio, illumination, power windows) to their fuses. When in doubt, photograph the diagram before removing any fuses and refer back to it during reassembly. This practice minimizes guesswork and potential damage.
Safety and Best Practices: DIY Boundaries and Best Practices
DIY approaches save money, but automotive electrical work carries risk. Always wear eye protection and disconnect the battery when performing inspections. Do not bypass fuses, and never use metal tools to probe live circuits. If the fuse box cover is damaged or there is a history of heat or burning smells, stop and seek professional service. Keeping your vehicle’s fuse map up to date helps you address future issues faster and more safely.
Simplified fuse map reference for common Chrysler 200 circuits
| Section | Common Functions | Typical Amps (A) |
|---|---|---|
| Interior Panel | Cabin lights, power windows, HVAC, radio | 5-20 |
| Engine Bay Panel | Ignition, ECU power, ABS relay | 10-30 |
| Relays & Fuses | Starter relay, AC clutch, fuel 시스템 | 20-60 |
Your Questions Answered
Where are the two fuse panels on a 2016 Chrysler 200 located?
Most models place the interior panel near the passenger footwell and an engine bay panel under a removable cover in the engine compartment. Always consult the diagram on the cover for exact locations.
The interior panel is by the passenger footwell, and the engine bay panel is under the hood with a removable cover.
How do I tell which fuse is for the radio in this model?
Refer to the diagram on the fuse box cover or the owner’s manual. The radio fuse is typically labeled and located in the interior panel; check its amperage rating before replacement.
Check the label on the fuse box diagram or the manual to find the radio fuse and its rating.
Is it safe to use a higher-amp fuse if the current one keeps blowing?
No. Using a higher-amp fuse is dangerous as it may not protect wiring properly and could cause overheating or fire. Find and fix the underlying cause instead.
Don’t upsize the fuse; fix the fault first.
What tools do I need to inspect the fuse box safely?
A fuse puller (or non-metallic pliers), a multimeter for continuity testing, insulated gloves, and a set of automotive fuses matching the FI diagram.
Grab a fuse puller, a multimeter, and the spare fuses you need.
Can I find an official Chrysler diagram online for my model year?
Yes, the owner's manual and official service manuals usually include a fuse box diagram. Official diagrams provide accurate fuse positions and amperages.
Check the manual or the manufacturer’s site for the official diagram.
What should I do if a fuse keeps blowing after replacing it?
If a fuse repeats, there may be a short circuit or a failing component drawing excess current. Stop using the circuit and consult a professional to diagnose wiring or component faults.
If it keeps blowing, there’s a fault that needs careful diagnosis.
“A correct fuse box diagram is essential for safe troubleshooting. Always replace with the specified amperage and never bypass fuses to avoid wiring damage.”
Highlights
- Identify two fuse panels before starting work
- Always replace fuses with the exact amperage
- Use a fuse puller and test with a multimeter
- Do not bypass fuses or jury-rig amperage
- Keep an organized, labeled fuse map in the vehicle