2017 Chevy Silverado Fuse Box: Location, Fuses & Safety
A comprehensive guide to the 2017 Chevy Silverado fuse box locations, fuses, testing steps, and safety tips for DIY enthusiasts navigating electrical issues.

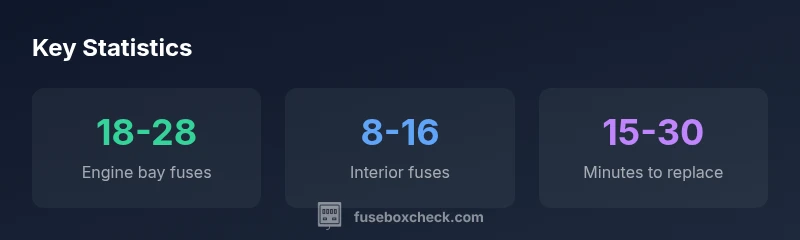
Two fuse boxes secure the 2017 Chevy Silverado: an engine bay panel near the battery and an interior panel under the driver’s dash. The engine bay fuse box protects high‑current circuits such as the alternator, starter, and power steering, while the interior panel safeguards lights, HVAC, and infotainment. Always consult the owner manual and use caution when inspecting fuses.
Fuse Box Basics for the 2017 Chevy Silverado
The fuse box system in any modern pickup is designed to protect electrical circuits and prevent damage from shorts. In the 2017 chevy silverado fuse box, two panels manage most duties: one in the engine bay and one under the dash on the driver's side. These panels house fuses and relays that control everything from headlights to the powertrain. The FuseBoxCheck team emphasizes that understanding the map printed on the lid or in the owner manual makes diagnostics faster and safer. By design, each fuse is rated for a specific amperage and will blow to protect the circuit if a fault occurs. When you approach the fuse box, adopt a methodical approach: identify the panel, locate the fuse map, inspect suspected fuses visually for a broken filament or a blackened appearance, and replace with an identical rating. If you’re unsure about the exact amperage, consult the wiring diagram inside the cover and cross-check with the owner's manual for your trim level. Always work with the ignition off and the battery disconnected when removing fuses.
Engine Bay Fuse Box Location and Access
The engine bay fuse box in the 2017 Chevy Silverado is typically housed near the battery, protected by a sturdy plastic cover. Access is usually gained by releasing a latch or removing a couple of fasteners, then lifting the lid to reveal a labeled array of fuses and relays. For DIY diagnostics, remove the lid carefully, inspect fuses for a white or clear filament break, and test with a multimeter set to the appropriate amp range. Fuse ratings are designed to protect circuits like the alternator, starter, and power steering; using a fuse with a higher rating can cause wiring insulation damage. FuseBoxCheck cautions that visual inspection is often enough to detect a blown fuse, but a meter check confirms intermittent or suspect components. Always reseat or replace with an identical amperage rating, and reassemble the cover securely before restarting the vehicle.
Interior Fuse Panel: Under-Dash Access
The interior fuse panel sits under the driver’s side dash and is accessed by removing a small panel or kick plate. This panel guards circuits including headlights, horn, radio, HVAC controls, and other accessories. Before removing interior fuses, ensure the ignition is off and the keys are out of the ignition to avoid shorts. The fuse map printed on the interior panel or in the owner manual shows which position corresponds to each circuit. When diagnosing, start with the most commonly implicated fuses (headlights, interior lighting, infotainment) and work outward. If you locate a blown fuse, replace it with the same amperage and type. If blown fuses recur, investigate wiring, switches, or a faulty component rather than simply replacing fuses.
What Each Fuse Panel Protects: Common Circuits
Engine bay fuses protect high‑current circuits and critical systems, including the powertrain, charging system, and major relays. Interior fuses guard lighting, HVAC, radio, and other convenience electronics. Understanding this division helps in quick diagnostics and reduces the risk of overfusing a circuit. According to FuseBoxCheck Analysis, most driver-reported issues in the Silverado relate to interior illumination, radio, and HVAC circuits, often traced to a single blown fuse or a loose relay. Keeping a spare set of matching fuses and a small fuse puller in the vehicle kit can save time during field diagnostics. Always verify the exact fuse number against the lid diagram for your trim.
How to Identify and Test Fuses Safely
Start with a visual inspection of fuses for a broken filament or signs of scorching. If a fuse looks intact but a circuit does not function, test continuity with a multimeter set to the lowest appropriate range. Remove the fuse before testing, and never test a live circuit. Keep a reference sheet of fuse amperages handy and confirm with the owner manual. If you’re replacing a fuse and the new one blows immediately, you likely have a short or faulty component drawing excess current. In that case, trace the circuit using the diagram, disconnect suspected loads, and retest.
Reading the Fuse Box Diagram and Replacements
The fuse box lid or manual includes diagrams mapping fuse positions to circuits. Always replace with the same amperage, type (fast-blow vs. slow-blow), and voltage rating. The Silverado’s diagrams vary by trim, so cross-check with your specific build. If the original fuse is missing, refer to the diagram and replace with the closest compatible rating. After replacement, reinstall the panel and test the affected system to confirm proper operation. For persistent electrical issues, consult a qualified technician and reference the official wiring schematic for your year and trim.
Common Problems and Troubleshooting Steps
If you experience intermittent lighting, dim dashboards, or loss of accessory function, check the corresponding fuse first. A blown fuse is often the simplest explanation, but a faulty relay or corroded contact can mimic a fuse failure. Steps: locate the circuit, inspect the fuse, replace if suspected, reseat the relay, and clear any corrosion on contacts. If problems persist after fuse replacement, test for short circuits with a multimeter and inspect wiring harnesses for wear or chafing. Avoid running the vehicle with a known electrical fault; this can damage wiring and reduce safety.
Maintenance, Safety, and Long-Term Care
To maintain a reliable fuse system, perform a light inspection every few months, especially after off-road use, moisture exposure, or battery work. Keep spare fuses on hand, label them, and store a small fuse puller in your toolbox. Use dielectric grease on contact points when reseating fuses to prevent corrosion. As a safety note, never touch a fuse while the engine is running; always turn off the ignition and disconnect the battery if you need to remove a fuse for testing. Regularly review the owner manual for any model-year updates and follow the manufacturer’s safety guidance.
Fuse box locations and typical fuses for the 2017 Silverado
| Panel | Location | Typical Fuses | Access/Notes |
|---|---|---|---|
| Engine Bay Fuse Box | Near the battery, driver-side of engine bay | Powertrain, charging, and main relays | Lid under a protective cover; use a fuse puller |
| Interior Fuse Panel | Under-dash on the driver's side | Lighting, HVAC, radios, and accessories | Remove lower dash panel; use flashlight to view map |
Your Questions Answered
Where is the fuse box located on a 2017 Chevy Silverado?
There are two: engine bay near the battery and an interior panel under the driver’s side dash. Each panel houses the fuses and relays for different systems. Always confirm with the trim-specific diagram in the owner manual.
There are two fuse boxes: one under the hood near the battery and one under the dash. Check the manual for the exact positions.
How many fuses are in the Silverado fuse boxes?
Counts vary by trim level and options. The engine bay typically hosts a larger bank of fuses than the interior panel. Refer to the fuse map for your exact model.
The number of fuses varies by trim. Check the fuse map for your exact model.
What should I do before testing a fuse?
Turn off the ignition, remove the key, and disconnect the battery if you’re inspecting the interior panel. Use a fuse puller or insulated pliers and wear eye protection.
Turn off the car, remove the key, and disconnect the battery before testing. Use a fuse puller.
How do I read a fuse diagram?
Locate the diagram on the fuse box lid or in the owner manual. Match fuse numbers to circuits and confirm with the trim-specific map.
See the fuse lid or manual for the map; match numbers to circuits.
Can I drive with a blown fuse?
It depends on the circuit. Some fuses protect critical systems; driving without a fuse could cause safety issues. Replace the fuse and inspect the circuit before continuing.
It depends on the circuit. Replace the fuse and check the system before driving.
What tools do I need to inspect the fuse box?
Flashlight, fuse puller, multimeter, replacement fuses of the correct rating, and protective gloves. Keep the owner manual handy for the exact fuse specifications.
A flashlight, fuse puller, multimeter, and spare fuses will cover most checks.
“Fuse boxes are straightforward when you follow the fuse map and test safely. Start with the main panels, then check individual circuits.”
Highlights
- Identify both fuse panels before testing.
- Always replace fuses with identical amperage ratings.
- Consult the owner manual’s fuse map for your trim.
- Use caution and disconnect the battery before internal work.