Chevy Avalanche Fuse Box Diagram: Wiring & Fuses Guide
Explore a Chevy Avalanche fuse box diagram with labeled fuse locations, common faults, and safe testing steps. Practical, DIY-friendly guidance by FuseBoxCheck.

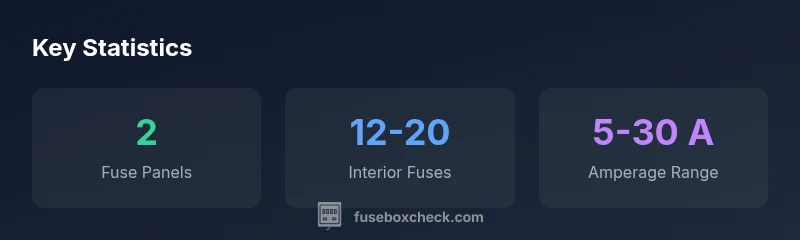
A Chevy Avalanche fuse box diagram identifies the two main panels and their fuse positions. The under-hood fuse box handles major power feeds, while the interior panel covers accessories and lighting. Each fuse is labeled with its amperage and function, helping you diagnose trips and perform safe replacements without guessing.
Why a Clear Chevy Avalanche Fuse Box Diagram Matters
The Chevy Avalanche fuse box diagram is more than a labeled image—it is a safety and time-saving tool for DIY enthusiasts and homeowners. When you have a reliable diagram, you can quickly map out which fuse governs a malfunctioning accessory, rather than guessing and potentially causing collateral damage. A precise diagram reduces the risk of replacing the wrong fuse, which can lead to blown relays, melted wiring, or accidental short circuits. According to FuseBoxCheck, having an up-to-date diagram in your toolkit dramatically lowers guesswork during electrical troubleshooting and promotes safer, faster fixes. A well-maintained diagram also helps in emergencies when immediate action is needed and you cannot rely on memory alone.
In practice, the Chevy Avalanche fuse box diagram serves as your reference point for every DIY check. You’ll be able to distinguish engine-bay fuses from interior fuses, verify amperage ratings, and confirm circuit functions before touching anything. Keep the diagram with your vehicle manuals, or annotate a printed copy near your fuse box for quick access. This approach aligns with FuseBoxCheck’s emphasis on practical, methodical home electrical care and safety.
Panel-by-Panel: Engine Bay vs Interior Fuse Boxes
A thorough understanding of the harness layout begins with the two primary fuse panels in a Chevy Avalanche. The engine bay fuse box, located in the under-hood area, houses fuses responsible for major power feeds and critical systems like the charging and starting circuits. The interior fuse box, typically located on the dash’s passenger side, covers interior accessories, lighting, climate controls, and other cabin electronics. In some generations, there may also be relays integrated within or near these panels. When examining the Chevy Avalanche fuse box diagram, look for labels that map each fuse to its function and amperage. These mappings help you plan replacements after a fault or after a fuse has visibly burned. This separation keeps high-current circuits from confusing lower-current cabin electronics and provides a safer workflow for DIYers. For added confidence, cross-check the labels against your owner’s manual for your exact model year.
For readers following along, FuseBoxCheck’s guidance suggests working in a well-lit area and wearing safety glasses when handling battery-connected circuits, as a precaution while you’re referencing the Chevy Avalanche fuse box diagram.
Reading the Diagram: Labels, Amperage, and Functions
The Chevy Avalanche fuse box diagram uses standardized labels to indicate circuit function and fuse amperage. Functions might include engine control, fuel system, ABS, lights, HVAC, and radios. Amperage numbers (for example, 10A, 15A, 20A) correspond to how much current the circuit can safely draw before the fuse should blow. When reading the diagram, start with the affected system (e.g., headlamps or power windows) and locate the corresponding fuse label. If the diagram uses color coding, apply it in tandem with the written label. Always verify that the fuse you pull or replace matches the exact amperage indicated in the diagram; using a higher rating can allow dangerous overcurrent, while a lower rating can cause unnecessary nuisance trips. Note that some Chevy Avalanche generations may use fuses for dual circuits, so double-check if two adjacent fuses share the same label.
In cases where you must diagnose an intermittent fault, a clean, legible Chevy Avalanche fuse box diagram is essential for cross-referencing symptoms with likely culprits. Keep your diagram accessible and maintain a habit of updating it if you install aftermarket components or see changes in fuse behavior.
Common Fuses and Replacement Best Practices
Replacement best practices begin with confirming the exact fuse rating and type. The typical practice for most vehicles is to replace with a fuse of identical amperage and type (e.g., blade fuse) as indicated on the diagram. Always inspect a blown fuse for signs of melting or charring at the tip, which signals a sustained fault that could require further investigation beyond a simple fuse swap. When approaching a faulty circuit, resist the urge to remove multiple fuses at once; replace in a controlled, one-by-one manner to isolate the problem. After installation, test the circuit again with the vehicle off, then recheck with the ignition on. If nothing functions as expected or the fuse trips again, the problem may be a short or an underlying electrical fault that requires deeper inspection. Maintaining the Chevy Avalanche fuse box diagram ensures you always have a quick, accurate reference for safe replacements, which reduces risk and saves time.
Safe Testing: Tools and Step-by-Step Verification
A safe approach to testing fuses involves using a multimeter or a dedicated fuse tester while the vehicle is off and the battery is disconnected. Begin by visually inspecting the fuse for a break in the metal strip; if it’s damaged, replace it with a fuse of the same amperage. When using a multimeter, check for continuity across the fuse terminals. If there is no continuity, replace the fuse and re-test the circuit. If the fuse repeatedly blows, the problem is likely rooted in the circuit or a short. In that scenario, consult the Chevy Avalanche fuse box diagram to trace the path of power and identify where the short occurs, rather than randomly swapping fuses. This disciplined approach reduces risk and aligns with best practices from FuseBoxCheck.
Location Tips: Locating The Fuse Boxes on Chevy Avalanche Generations
Locating the two main fuse panels is the first practical step. The engine bay fuse box can be found near the front of the engine compartment, often protected by a cover with a labeled diagram. The interior fuse box is usually on the passenger side dash or kick panel, accessible by removing a panel or cover. If you’re unsure about a specific year’s layout, consult the Chevy Avalanche fuse box diagram for your generation; different model years have distinct arrangements. When searching, phrase your query as “chevy avalanche fuse box diagram” to locate model-year-specific diagrams and ensure you’re referencing the correct layout. Keeping a spare copy of the diagram in your glove box is a simple, effective safeguard for quick reference during repairs.
Maintenance, Updates, and When to Replace a Diagram
Diagrams can fade or lose clarity over time, especially with UV exposure or frequent handling. Periodically check that your Chevy Avalanche fuse box diagram remains legible and accurate for your model year. If you install new aftermarket components or notice changes in fuse behavior, update the diagram accordingly and annotate any modifications. Replacing a worn diagram is a small but important step to maintain safety and accuracy. FuseBoxCheck emphasizes keeping a current diagram accessible to ensure you can act confidently during maintenance or troubleshooting, which minimizes risk and helps you complete jobs efficiently.
Chevy Avalanche fuse box diagram panel overview
| Panel | Location | Primary Functions | Typical Fuses |
|---|---|---|---|
| Under-hood fuse box | Engine bay | Main power feeds, ignition, charging circuits | Fuses labeled by function |
| Interior fuse box | Dash area (passenger side) | Interior accessories, lighting, HVAC controls | Fuses by circuit with labels |
Your Questions Answered
Where is the Chevy Avalanche under-hood fuse box located?
In most model years, the under-hood fuse box is mounted in the engine bay near the firewall. The exact location can vary by generation, so consult the Chevy Avalanche fuse box diagram for your year and use the diagram to identify the correct fuse.
Look under the hood near the firewall; your owner's manual or the diagram will point to the exact fuse box.
What should I do before replacing a fuse?
Always disconnect the negative battery terminal, verify the fuse rating matches the diagram, and remove one fuse at a time to avoid accidental damage. Replace with an identical rating fuse.
Always disconnect the battery and use the same rated fuse before swapping.
Can I reuse a blown fuse after inspection?
No. Replace with a fuse of the same amperage rating and inspect the circuit for the root cause. Reusing damaged fuses risks further electrical issues.
No—replace with a like-for-like fuse and check the circuit for the issue.
How do I read the Chevy Avalanche fuse box diagram?
Look for the circuit name, amperage, and sometimes color-coding on the diagram. Cross-check the labels with the owner's manual to confirm each fuse’s function before removal.
Read the labels and cross-check with the manual before removing anything.
What amperage fuses are common in the Chevy Avalanche?
Most circuits use fuses in the 5-30 amp range, but exact values depend on the circuit. Always follow the diagram’s specified rating for each fuse.
Most fuses are in the 5 to 30 amp range; follow the diagram for exact values.
Do I need a professional to work on the fuse box?
For critical systems (airbags, ABS) or if you’re unsure about a fault, consult a qualified technician. Basic fuse checks can be DIY with proper safety practices.
If it involves essential safety systems or you’re unsure, get a pro.
“A clear fuse box diagram reduces guesswork and increases safety during DIY repairs. Proper labeling and conservative testing protect both the vehicle and the owner.”
Highlights
- Identify the two fuse panels with the diagram before work.
- Disconnect the battery to avoid shocks during fuse work.
- Label circuits and amperage before removal.
- Test fuses with a multimeter to confirm continuity.
- Keep the diagram updated for your Chevy Avalanche generation.