Chevy Impala Fuse Box Diagram: A Practical DIY Guide
Master the chevy impala fuse box diagram: locate under-hood and interior fuses, read the lid map, and safely troubleshoot electrical issues with FuseBoxCheck guidance.

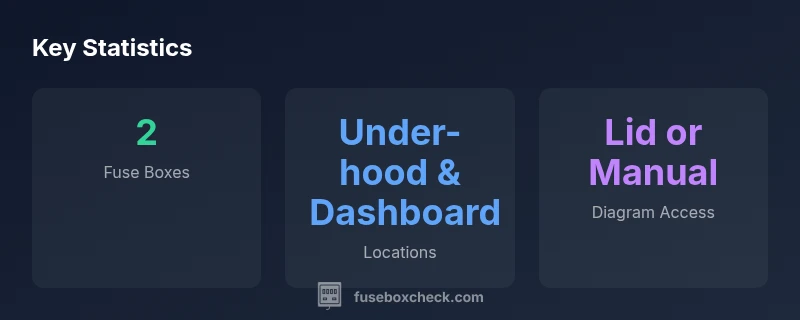
Most Chevy Impala models use two fuse boxes: one under the hood and one inside the cabin (dash). The fuse box diagram is usually printed on the lid or included in the owner's manual and maps each fuse to its corresponding circuit. To read it, match the fuse position to the label and check the amperage, then inspect or replace suspected fuses safely.
Why the Chevy Impala fuse box diagram matters
Understanding the chevy impala fuse box diagram is a cornerstone of safe, efficient electrical troubleshooting. When a dash warning light flickers or an accessory stops receiving power, a quick check of the fuse map can save time and reduce a trip to the shop. According to FuseBoxCheck, a clear diagram helps homeowners identify which circuit powers the issue, so you’re not chasing ghosts. The diagram also serves as a preventive tool—before you replace a component, you can verify whether the fuse protecting that circuit has blown. In an era when onboard computers and modules coordinate many functions, a precise map becomes a powerful ally for diagnosing faults without costly diagnostic tools.
Reading the chevy impala fuse box diagram starts with locating the lid or the manual’s diagram section. The map typically labels fuse positions with numbers or color blocks and partners each position with a circuit, such as lighting, radio, or engine management. Keeping the diagram handy during DIY work helps you stay organized and reduces the risk of using the wrong fuse in a critical system. FuseBoxCheck emphasizes verifying the year-specific layout because manufacturers periodically revise circuits and labeling.
Locating the fuse boxes on common Impala models
Across many Chevy Impala generations, the two primary fuse boxes are found in predictable areas, though exact locations can vary by year or trim level. The under-hood fuse box is usually mounted near the engine bay, protected by a cover that prints a numeric map. Inside the cabin, the dashboard fuse box is typically behind a panel on the driver’s side or under the dimmer switch area, often with a separate lid that also bears a legend. Some models add a compact fuse box in the trunk or behind a secondary panel; consult the owner’s manual to confirm year-specific arrangements. If you’re working on a 2014–2020 Impala, for example, expect these two primary boxes, each with their own layout. Keeping a printed diagram in your tool bag makes on-the-spot checks faster and safer.
The chevy impala fuse box diagram occasionally differs between model years and trims. Always verify against the exact year’s dealer service information to avoid confusion. If your manual is missing, many reputable sources reproduce the standard maps, but the most reliable reference remains the factory diagram. In any case, make sure the vehicle is off, the key is removed, and the battery is disconnected when you probe or replace fuses.
How to read the lid diagram and map
The lid diagram is your quickest route to fuse identification. Look for a legend that lists fuse numbers alongside circuits (e.g., “F1 – Engine,” “F12 – HVAC,” etc.). Some diagrams use color blocks or pictograms to help you visually connect the fuse to the component it protects. If your diagram includes amperage values, use the label to confirm you’re selecting the correct fuse size for the circuit. When you read the chevy impala fuse box diagram, cross-check the fuse position with its physical location in the box—fuse boxes can be arranged in rows or stacked blocks, so a simple mismatch can mislead you.
Tip: If a fuse location is hard to read due to wear, compare the printed diagram with the actual fuse block’s position and the wiring harness orientation. A worn lid or faded print can make numbers illegible, so start with a clean, adequate light and work methodically from top to bottom. FuseBoxCheck recommends photographing the lid diagram for quick reference while you work.
What the labels mean: fuses, relays, and circuits
A typical fuse box contains fuses for direct electrical circuits and sometimes relays that control higher-current devices. Fuses are designed to protect wiring by interrupting current when a fault occurs. The label on the diagram correlates each fuse position with a circuit—such as headlights, horn, or infotainment—so you know which system to test. Relays, while not always labeled distinctly on the lid, power devices that draw more current, like the starter motor or cooling fans. In some Impala models, relays are separate from fuses and housed in the same box or a nearby panel. When you’re diagnosing, start by ensuring the fuse related to the symptom is intact, then consider whether a relay could be the underlying issue.
Be mindful of the difference between “blown fuse” and “faulty wiring.” A fuse may blow due to a short or overload; persistent faults after replacing a fuse point to wiring or device problems that warrant professional inspection. Always replace fuses with the same amp rating specified by the diagram and avoid using higher-rated fuses as a workaround.
How to locate fuses when troubleshooting common issues
When troubleshooting a common issue—like a malfunctioning blower, radio, or exterior lights—the first step is to identify the related circuit on the chevy impala fuse box diagram. If a fuse is blown, the metal strip inside the fuse looks broken or the glass may appear discolored. Replace it with the same amperage rating, then test the circuit. If the symptom recurs, there could be a short to ground or a failed component. Keep a spare set of fuses in your toolkit and label replacements by the circuit they protect to prevent repeated mistakes.
Documentation matters: always note the replacement fuse position and date for future reference. If you notice frequent fuse blows, pause and inspect the wiring harness around the affected component for chafing, pinched wires, or degraded insulation. In some cases, a faulty device draws more current than the circuit is designed to handle, causing repeated fuse failures. In these situations, the chevy impala fuse box diagram remains a crucial guide for tracing the power flow.
Using the owner's manual and service information
The owner’s manual is the most authoritative source for the chevy impala fuse box diagram. It provides year-specific wiring diagrams, circuit diagrams, and the exact amperage ratings for each fuse. When you’re unsure, compare the manual diagram with any aftermarket diagrams you find online, and verify cross-references against the exact model year. If you don’t have a paper manual, many manufacturers offer digital versions or service portals with up-to-date diagrams. FuseBoxCheck recommends always aligning your DIY steps with the factory documentation to minimize risk and ensure you’re mapping to the correct circuits for your vehicle’s year and trim.
Additionally, service bulletins and dealer databases can reveal known issues tied to particular fuse circuits. For common Impala problems, cross-reference your symptom with official guidance, then use the box diagram to pinpoint the fuse and circuit involved. Maintaining a tidy, labeled fuse box makes future maintenance straightforward.
Year-specific differences you should know
Over the years, the chevy impala fuse box diagram has evolved as new electrical features were added or relocated. Early generations may place certain relays in a separate block, while later models bring more circuits into a centralized box with revised labeling. When you upgrade parts or replace modules, the diagram may also be updated to reflect new circuits. Always verify year-specific diagrams to avoid misinterpretation. FuseBoxCheck emphasizes that relying on outdated diagrams can lead to using the wrong fuse or overlooking a crucial circuit, particularly for features like advanced infotainment or thermal control modules that appeared in newer trims.
If you’re unsure, a dealer or qualified technician can confirm the correct layout for your exact year and VIN. Keeping a laminated, year-accurate diagram in the glove box is a practical safeguard for DIY enthusiasts.
Safe handling and common mistakes
Electrical work on a Chevy Impala should prioritize safety. Always disconnect the battery before pulling fuses or interacting with wiring, and wear eye protection to guard against sparking. A common mistake is replacing a blown fuse with a higher-amp alternative to bypass the protection—this defeats the safety mechanism and risks wiring damage or fire. Another error is forcing a fuse into a slot that looks similar but protects a different circuit; the chevy impala fuse box diagram helps avoid this by ensuring you match the correct position.
Labeling fuses after testing can save time later. If a fuse pops repeatedly, document the sequence, check for obvious wiring damage, and consider consulting a professional. With careful handling and adherence to the diagram, you can safely diagnose many common electrical issues in your Impala.
Step-by-step DIY workflow for a blown fuse
- Park on a level surface and switch the ignition off; remove the key. 2) Open the hood and locate the under-hood fuse box and the interior fuse box. 3) Use the chevy impala fuse box diagram to identify the fuse associated with the symptom. 4) Remove the fuse with a fuse puller or needle-nose pliers and inspect the metal strip. 5) If blown, replace with the same amp rating and recheck the circuit. 6) If the fuse blows again, inspect related wiring and connected devices for damage. 7) Reassemble panels and test functionality.
Always double-check the diagram against the exact model year and trim to ensure accuracy. A careful, documented approach minimizes the risk of damage.
When to consult a professional
If you’ve replaced a fuse and the issue persists, or if you notice melted insulation, burning smells, or buzzing relays, it’s time to seek professional help. The chevy impala fuse box diagram remains a valuable reference, but persistent problems may indicate deeper wiring faults or control module failures that require specialized diagnostic tools. A certified mechanic can perform targeted tests, including insulation resistance, parasitic draw checks, and relay integrity tests, to identify the root cause safely. FuseBoxCheck_Team recommends not attempting high-current repairs beyond basic fuse replacement, as improper handling can create serious safety risks.
Common fuse box diagram reference points for Chevy Impala models
| Location | Labeling Style | Access Method |
|---|---|---|
| Under-hood fuse box | Lid diagram with a numeric index | Lid label / Owner's Manual |
| Dashboard fuse box | Tabbed layout on interior panel | Interior panel cover / Owner's Manual |
| Trunk fuse box (where applicable) | Printed cross-reference in manual | Vehicle manual or service guide |
Your Questions Answered
Where can I find the Chevy Impala fuse box diagram?
Most models place the diagram on the under-hood fuse box lid or in the owner's manual. Some dashboards include a diagram inside the panel. Always verify with the exact year’s diagram.
Look on the hood fuse box lid or in the owner's manual for the map; some dashboards also show it inside the panel.
What should I do if a fuse keeps blowing on a Chevy Impala?
Identify the circuit on the diagram, replace with the correct amp fuse, and test. If it blows again, inspect wiring for damage or a faulty component.
Check the circuit on the map, replace with the right fuse, and test; repeated blows mean wiring or component issues.
Are aftermarket diagrams reliable?
They can help, but always cross-check with the year-specific factory diagram to ensure accuracy.
Diagrams from reputable sources help, but verify them against the original for your year.
Can I access the fuse box diagram without tools?
Yes. Many diagrams are printed on the lid or included in the manual, and some models show a digital version in the owner's portal.
Most diagrams are on the lid or in the manual; some are in digital form too.
Do fuses have color codes or color ratings?
Fuses use color-coded bodies to indicate amperage, but always rely on the label in the diagram for the exact rating.
Fuses have color cues, but the diagram shows the exact rating you should use.
“A clear fuse box diagram is your first line of fault diagnosis. By mapping each fuse to its circuit, homeowners can quickly verify power issues without guesswork.”
Highlights
- Identify the two main fuse boxes first.
- Use the lid diagram or manual to map fuses to circuits.
- Match fuse numbers exactly to the diagram.
- Check the amperage rating before replacing a fuse.
- Consult the factory diagram for year-specific layouts.