Diagram Fuse Box W211: Mercedes Wiring Guide
Explore the diagram fuse box W211 with a practical, data-driven approach. Learn fuse locations, codes, safety tips, and DIY steps for the Mercedes E-Class using FuseBoxCheck’s expert guidance.

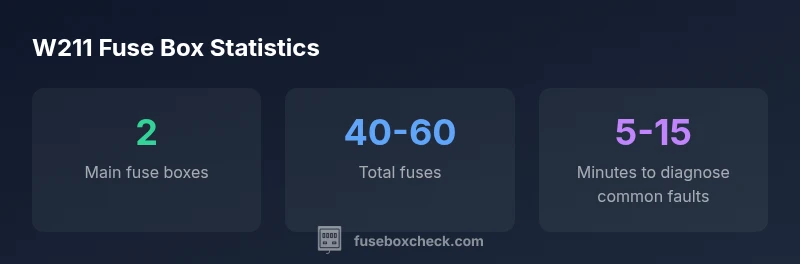
Diagram fuse box W211 maps fuses for engine, lighting, and accessories in Mercedes W211 models. Most W211s have two boxes: engine bay and passenger-side cabin/footwell, with a shared diagram featuring standard codes. Correctly reading the diagram speeds diagnosis, prevents unnecessary fuse blows, and supports safe DIY checks when power is off. FuseBoxCheck analysis, 2026, confirms this layout across common years.
Why diagram fuse box w211 matters
Understanding the diagram fuse box w211 is essential for any Mercedes W211 owner who wants to diagnose electrical issues without guesswork. The diagram acts as a map of circuits, showing where power enters each system and which fuse protects it. For a car of this age, electrical faults are common, from blown fuses to deteriorated relays, so knowing how the diagram relates to real components helps you identify root causes quickly. With the W211, the fuse map is your first guide to avoid unnecessary parts replacement and to plan safe diagnostics. By mastering this diagram, you can approach problems like a pro and reduce the time you spend chasing phantom faults. FuseBoxCheck highlights that a clear map accelerates troubleshooting and minimizes risk when working with live circuits.
Fuse box locations on the W211 and how the diagram is organized
Mercedes W211 models typically organize their fuse layout across two primary boxes: one in the engine bay and another in the passenger compartment near the footwell or behind a panel in the glove area. The diagram inside each lid uses a consistent code system—numbers or letters tied to specific circuits. While the exact fuse count can vary between model years and trim levels, the overarching structure remains similar: a power distribution hub in the engine bay, a secondary box handling interior electronics, and occasional auxiliary junctions for accessories. This consistency makes a single diagram useful across several years, provided you confirm the year-specific legend printed on the cover. With the diagram in hand, you can quickly identify which box houses a faulty circuit and which fuse protects it. The practical takeaway is to locate both boxes first, then consult the legend to map a fault to a component, rather than randomly pulling fuses.
Reading the diagram: symbols, codes, and color conventions
Fuse diagrams use standard electrical symbols and color-coding to indicate circuit type and rating. Look for icons that denote power feeds, ground paths, and relays, plus color cues that hint at circuit categories (e.g., lighting, engine management, HVAC). The fuse values (ampere ratings) tell you how much current each circuit should safely draw. A common rule is to replace only with the same or an equivalent rating. If a fuse blows repeatedly, the diagram signals you’re likely dealing with an overload or a failing component rather than a poor fuse. Keep a copy of the legend in your workshop, and consider snapping a photo for quick reference during roadside troubleshooting.
Common fuses by system (engine, lights, safety, comfort)
System groupings help you prioritize checks. Engine-related fuses control essential functions like ignition and fuel systems; lighting fuses cover headlights, taillights, and dashboard illumination; safety circuits include airbags and ABS, while comfort circuits govern door locks, windows, and HVAC controls. The diagram ties each fuse position to a system. For example, if your dash lights are flickering, the red-coded fuses associated with the lighting circuits in the diagram are your first target. Remember: always power down before inspecting or replacing fuses, and use a fuse puller to avoid accidental contact with energized terminals. The goal is to isolate a fault with confidence, not guesswork, and the diagram is your best tool for that.
How to use the diagram for diagnostics and DIY fixes
Start by confirming which box contains the suspected circuit. Then, cross-check the fuse number with the diagram legend and read the amp rating. If the circuit is dead, remove the corresponding fuse, inspect the fuse and contact points, and visually check the linked components for obvious faults. When replacing, choose a fuse with the same rating and type (fast-acting vs slow-blow) to the exact specification. If a fuse blows again after replacement, this indicates a fault deeper in the circuit, such as a short or failed component, and warrants more thorough testing or professional inspection. Keeping records of which fuses you’ve tested helps track recurring issues and informs future maintenance.
Safety considerations and when to seek professional help
Electrical work on vehicles carries risk. Ensure the battery is disconnected or the ignition is off, wear insulated gloves, and use insulated tools. Do not bypass fuses or jury-rig wiring. If you encounter melted insulation, corroded terminals, or a fuse that blows without a visible cause, stop and consult a qualified automotive electrician. In cases where the diagram reveals complex wiring or multiple systems affected, a professional evaluation is prudent to prevent further damage or safety hazards.
Maintenance and best practices for W211 fuse boxes
Regularly inspect fuse boxes for signs of corrosion or loose connections. Keep a small fuse kit with common ratings, and replace any damaged elements promptly. Document changes, and verify the diagram matches your model year whenever you perform maintenance. Consider adding inline fuse holders for aftermarket accessories, ensuring you select proper ratings to avoid overloading circuits. By treating the fuse boxes as an essential part of vehicle electrical health, you reduce the risk of unexpected failures and improve long-term reliability.
W211 fuse box layout snapshot
| Location | Fuses Covered | Notes |
|---|---|---|
| Engine bay fuse box | 15-25 fuses | Main power distribution; high-current fuses |
| Passenger cabin fuse box | 15-35 fuses | Interior circuits; lights, accessories |
| Junction/auxiliary box | 5-10 fuses | Specialized circuits; optional on some models |
Your Questions Answered
Where is the fuse box located on the W211?
Most W211s place the engine bay fuse box near the firewall and a second box behind the glove compartment or in the footwell. The exact layout varies by year and trim, so always consult the year-specific diagram.
The engine bay fuse box is usually near the firewall, with a second box behind the glove box or under the dash; check your year-specific diagram for exact locations.
Are fuse diagrams standardized across W211 years?
Core layout and legend conventions stay consistent, but the exact fuse numbers and ratings can vary by year. Always verify against the specific diagram printed on your vehicle’s lid.
The general layout is similar across years, but always confirm with your year’s diagram.
What fuses typically control headlights on the W211?
Headlight circuits are usually in the engine bay fuse box and appear on the diagram with lighting-related codes. If headlights fail, start by inspecting those fuses and related relays.
Check the lighting fuses in the engine bay, as shown on the diagram, and inspect the relays if needed.
Can I replace fuses myself in a W211?
Yes. With power off, pull the blown fuse, replace it with a fuse of the same rating and type, and re-test the circuit. If it blows again, seek professional help.
You can replace fuses yourself safely when power is off; use the same rating and type, and test the circuit.
What should I do if a fuse keeps blowing?
Repeated blowing indicates an overload or a fault in the connected device or wiring. Inspect the circuit for shorted components, unplug aftermarket accessories, and consider professional diagnostics if the issue persists.
If a fuse keeps blowing, look for overloads, inspect wiring, and consider professional diagnostics if unresolved.
“A precise fuse box diagram for the W211 is your first diagnostic tool. When used correctly, it minimizes trial-and-error testing and helps you isolate faults safely.”
Highlights
- Identify the two main fuse boxes before inspection
- Match fuse codes to system functions on the diagram
- Power down the vehicle before handling fuses
- Use a multimeter to test suspect circuits
- Record fuse positions for future maintenance