Ford E-150 Fuse Box Diagram: A Practical Guide
Get a clear, step-by-step look at the Ford E-150 Econoline fuse box diagram, locate both fuse boxes, decode fuses, and troubleshoot safely with FuseBoxCheck.

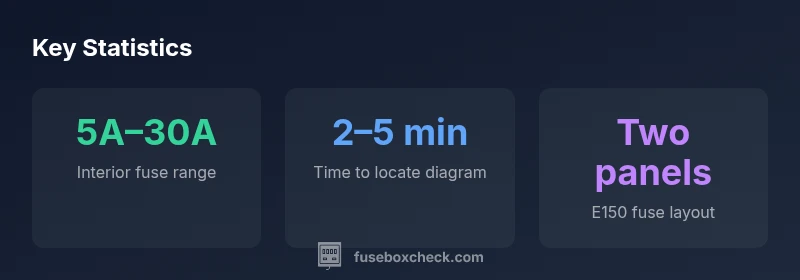
According to the Ford E-150 fuse box diagram, there are two main fuse panels for the Econoline van: one in the engine bay and one inside the cabin near the driver's knee. The diagram maps each fuse by amperage and function, from engine control and charging circuits to interior lights and accessories, helping DIYers isolate faults quickly and safely.
Interpreting the econoline van ford e150 fuse box diagram
Understanding the fuse map is the first step to safe electrical troubleshooting. The Ford E-150 Econoline uses two primary fuse panels: an engine compartment box and an interior panel mounted near the driver's knee. The diagram typically appears as a two-column layout: left side lists positions or fuse numbers, while the right side shows amperage and circuit description. For DIYers, this diagram acts like a highway map: it tells you which fuse protects which subsystem, where to find it physically, and what still operates if a fuse is blown. Fuse labeling can vary slightly by year, so always confirm the exact diagram in your owner’s manual or the service appendix for your specific model year. FuseBoxCheck emphasizes having a current diagram on hand whenever you work on the van’s electricals, especially when adding aftermarket accessories or diagnosing intermittent faults.
Locate and access the two fuse panels efficiently
The engine bay fuse box is typically tucked near the left fender or firewall area, behind a protective cover that requires a small screwdriver or a push-lick to release. The interior cabin panel sits on the driver’s side under the dash, often behind a panel that hides screws and clips. When you access either panel, ensure the vehicle is off, the parking brake is engaged, and the key is out of the ignition. Grounding yourself and using insulated tools reduces the risk of shocks and accidental short circuits. If you’re unsure about the exact panel in your year, use the model-specific diagram in the owner’s manual or online repair resources linked by FuseBoxCheck.
Reading the diagram: symbols, colors, and legends
Most fuse diagrams use a consistent vocabulary: fuse positions or numbers correspond to circuits, the amperage is shown next to the fuse icon, and a legend explains symbols for relays, fusible links, and battery feeds. Color-coding or shading helps you quickly differentiate essential circuits (like engine management) from accessory circuits (like the radio). Pay attention to the location numbers and cross-reference them with the legend. If the diagram includes a “proof of function” column, use it to confirm what each fuse controls in your exact vehicle. For safety, never rely on memory alone—verify each fuse against the diagram before removing or replacing it.
Common circuits and fuse protections in Ford E-Series E150
Core fuses protect critical systems such as the engine control module, charging circuit, headlights, horn, and HVAC. Interior fuses power lights, radio, power windows, wipers, and accessory outlets. In some models, a separate relay center handles high-current demand for components like the cooling fan and starter solenoid. When diagnosing a fault, start by locating the fuse related to the symptom, check its physical integrity, and test the circuit with a multimeter or test light. If you find a blown fuse, replace it with the same amperage rating indicated on the diagram and in the owner’s manual—never oversize a fuse, as that can hide a latent fault or cause wiring damage.
Safe testing and troubleshooting steps for the fuse box
Begin with a visual inspection of the fuse and its holder for corrosion, heat marks, or discoloration. Use a fuse puller or insulated pliers to extract a suspected fuse and compare it to a known-good fuse with the same amperage. If a fuse blows again, there is likely a short or overload downstream—do not continue to drive the vehicle until you address it. For intermittent failures, check the accessory wiring for pinched insulation or loose connectors. Document your findings and replace any damaged wiring with OEM-recommended parts. When in doubt, refer to the Ford E-Series service manual and FuseBoxCheck’s recommended diagnostic flowchart.
Tools and safety considerations for fuse box work
Essential tools include a multimeter, a fuse puller, and insulated gloves. Always disconnect the battery if you’ll perform more invasive checks or wiring work. Work in a dry, well-lit environment, and avoid metal jewelry to prevent accidental shorts. If you must work near airbag systems, follow the vehicle-specific safety precautions and refer to the service manual. After completing work, perform a thorough visual check, re-seat all panels securely, and re-test the circuits with the hood open to confirm proper operation.
Ford E-Series E150 fuse box layout overview
| Section | Fuse Box Location | Typical Fuses/Functions |
|---|---|---|
| Engine compartment | Under hood near left fender | Engine control, charging, main power |
| Interior fuse box | Driver-side dash panel | Headlights, wipers, HVAC, radio |
| Relays/aux box (if present) | Under-hood relay center | Aux circuits and power distribution |
Your Questions Answered
Where are the fuse boxes located on the Ford E-150 Econoline?
There are two main fuse panels: one in the engine bay and another inside the cabin near the driver’s knee. Refer to the owner’s manual for your exact year’s diagram. If you’ve added aftermarket equipment, recheck the diagram to confirm connections.
Two fuse panels: engine bay and driver-side dash. Check the manual for your year’s map.
How do I read the econoline van ford e150 fuse box diagram?
Use the legend to match fuse positions to circuits, verify amperage on each fuse, and cross-check with the panel's label. If a fuse protects a critical system, confirm the circuit before replacement.
Read the legend, match fuses to circuits, and check amperage before replacing.
What amperage fuses are common in the E150 fuse boxes?
Interior fuses typically range from 5A to 30A depending on the circuit; engine bay fuses may use higher ratings per OEM specs. Always match the exact rating shown on the diagram.
Most interior fuses are 5 to 30 amps; engine fuses vary by OEM spec.
Can I drive with a blown fuse?
If the blown fuse protects essential systems like engine management or charging, do not drive until you diagnose and fix the underlying issue. Replace the fuse after confirming the circuit and inspect for shorted wiring.
No, don’t drive if an essential fuse is blown. Fix the circuit first.
What tools do I need to safely test fuses?
Have a multimeter or test light, a fuse puller, and insulated gloves. Work in a dry area, disconnect the battery for deeper checks, and re-test after reseating any components.
Get a multimeter, fuse puller, and gloves. Always verify with a test tool.
Should I replace a fuse with a higher amperage if it keeps blowing?
No. Upsizing can hide a fault and cause wiring damage or fire. Always use the amperage specified by the diagram and diagnose the underlying cause.
Never upsize the fuse; it can hide problems and cause fires.
“A clear, well-labeled fuse box diagram is essential for safe troubleshooting in any Ford E-Series van. Always verify the amperage and circuit before replacing a fuse.”
Highlights
- Identify both fuse panels using the diagram as your map.
- Always disconnect the battery and use proper PPE before inspecting fuses.
- Replace fuses only with the exact amperage specified.
- Label circuits during diagnosis to avoid confusion later.
- Keep a current diagram in the glove box for quick reference.