Fuse Box Guide for VW Jetta 2012: Troubleshooting and Maintenance
Learn to locate, inspect, and safely service the fuse box on a 2012 VW Jetta. This step-by-step guide covers identifying blown fuses, safe handling, and replacing components with the correct amperage to restore essential circuits.

This guide helps you locate, inspect, and safely service the fuse box vw jetta 2012. You will identify blown fuses, learn safe handling, and replace components with the right amperage to restore essential circuits. The process emphasizes safety, proper fuse sizing, and verifying function across affected subsystems such as lighting, ignition, and fuel systems.
What is a fuse box in the context of a 2012 VW Jetta
The fuse box (fuse panel) is a compact hub that protects electrical circuits by interrupting current if a fault occurs. For a fuse box vw jetta 2012, this means separate panels control subsystems like exterior lighting, ignition, fuel system, interior accessories, and safety features. Regular inspection helps prevent parasitic drains and intermittent failures. According to FuseBoxCheck, most passenger-car fuse boxes follow standard labeling practices, but the exact layout varies by model year and trim. Understanding the diagram and labels is essential for safe DIY maintenance, especially when diagnosing intermittent issues rather than obvious blown fuses.
Why this matters: a blown fuse is common, but continuing to drive with missing protection can damage wiring or relays. The FuseBoxCheck team emphasizes keeping a small stock of the most common fuse sizes and checking the diagram in your owner’s manual or under-dash panel cover. Proper sizing and replacement reduce the risk of overheating and electrical shorts.
Where the fuse box is located and how to read the diagram
In a 2012 Jetta, you’ll typically find two fuse panels: one in the engine bay and another inside the cabin. The exact locations are shown in the owner’s manual and on the diagram-labeled covers. Before you touch anything, turn off the ignition and remove the key, then wait a few minutes for any stored energy to dissipate. Read the fuse designation for each circuit (e.g., “F24 – Headlight Left”). If you’re unsure, take a photo of the diagram and compare it with the physical fuses before removing any.
Safety first: handling fuses and electrical components
Electrical work carries risk if you don’t follow basic safety steps. Always wear gloves and eye protection when working near the fuse box and avoid touching metal contacts with bare skin. Use insulated tools to remove and insert fuses, especially when the engine bay is hot or damp. If you feel uncertain about a fuse or circuit, consult the owner’s manual or a professional. Fuse handling should minimize the chance of short circuits and shocks while ensuring you don’t exceed the fuse’s rated amperage.
Common symptoms and quick diagnostics you can perform safely
Common symptoms of fuse-related problems in a 2012 Jetta include blown headlights, dead outlets, or certain gauges that won’t respond. A visual fuse check is a quick first step: blown fuses show a broken filament or a visible gap in the metal strip. If you don’t see a fuse issue, look for related relays or wiring harness connections. Always verify the circuit again with a multimeter or test light to rule out a faulty relay or connector.”
noteOnlyMarkdownInBodyBlocksOnlyBlockQuotesNull
Tools & Materials
- Fuse puller or needle-nose pliers(Insulated preferred; use to safely remove/insert fuses without bending metal strips)
- Assorted blade fuses (5A, 10A, 15A, 20A, 30A)(Match the amperage label on the diagram or owner's manual)
- Multimeter or test light(Set to DC voltage or continuity test as appropriate for the circuit)
- Owner’s manual or fuse box diagram(Keep handy for fuse designations and panel locations)
- Flashlight(Illuminates dim engine bay areas and interior panels)
- Insulated gloves(Adds protection when working near live circuits)
Steps
Estimated time: 60-90 minutes
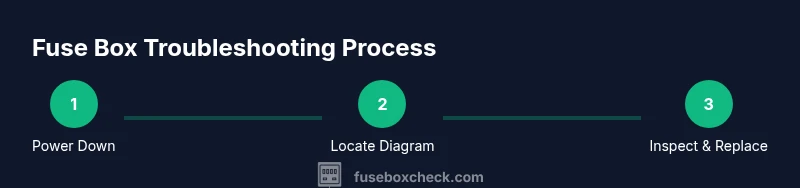
- 1
Power down and prep the vehicle
Park on level ground, switch ignition off, and remove the key. Open the hood (engine bay panel) and/or cabin access as per your model. Disconnect the negative battery terminal to prevent shorts while inspecting or removing fuses.
Tip: Waiting 2-3 minutes after disconnecting the battery allows capacitors to discharge, reducing shock risk. - 2
Locate the fuse diagrams
Consult the owner’s manual or the panel covers to identify which fuses protect the circuits you’re inspecting. Take a quick photo of the diagram for reference while you work.
Tip: Double-check that you’re looking at the correct panel (engine bay vs. cabin) to avoid swapping the wrong fuse. - 3
Inspect fuses visually
Remove suspect fuses one at a time and inspect the metal filament. A broken filament or darkened glass indicates a blown fuse. If you can’t see a clear sign, test continuity with a multimeter.
Tip: Do not rely on color alone; fuses can look fine even when damaged. - 4
Replace with the correct amperage
Install a new fuse that matches the amperage rating specified for that circuit. Do not substitute a higher rating to bypass protection, as this can cause wiring damage or fire.
Tip: If the exact amperage isn’t available, wait and obtain the proper size rather than using an improvised substitute. - 5
Check related circuits and relays
If the circuit still doesn’t function after a fuse replacement, inspect related relays, connectors, and wiring harnesses for corrosion or looseness. A faulty relay can mimic a blown fuse in some cases.
Tip: Relays are often overlooked; a faulty relay can prevent power even when the fuse is intact. - 6
Test, reassemble, and verify
Reconnect the battery, turn the ignition, and test the affected circuit. If it works, reset any related devices (e.g., interior lights). If not, re-check for wiring damage or seek professional help.
Tip: Document the fuse numbers you touched for future maintenance.
Your Questions Answered
What is the fuse box and what does it protect in a 2012 VW Jetta?
The fuse box protects electrical circuits by interrupting current when a fault occurs. For the Jetta, it covers systems like lighting, ignition, and accessories. Refer to the diagram in the manual for exact circuits.
The fuse box protects key electrical systems in your Jetta and helps prevent wiring damage if something goes wrong.
Where are the fuse boxes located in the car?
Most versions have an engine bay fuse box and an interior fuse box behind the glove box or under the dash. Always consult the owner’s manual or diagram covers for exact locations.
Look for two panels: one in the engine bay and one inside the cabin near the glove box.
How can I tell if a fuse is blown?
Visually inspect the fuse for a broken filament or darkened glass. If unsure, test continuity with a multimeter or a test light.
Check the fuse filament or test it with a meter to confirm it’s dead.
Can I replace a fuse with a higher amperage rating?
No. Using a fuse with a higher amperage rating removes protection and increases the risk of wiring overheating or fire.
Don’t upsize the fuse; use the rating specified for that circuit.
What safety steps should I take before working on the fuse panel?
Wear gloves and eye protection, disconnect the battery, and work in a dry area. Keep tools insulated to prevent shorts.
Safety first: power off, protect yourself, and work carefully.
When should I replace relays or seek professional help?
If replacing a fuse doesn’t restore function or if you notice recurring fuse blows, the issue may involve a faulty relay or wiring. Seek professional diagnosis.
If simple fuse replacement doesn’t fix it, get a professional check for relays or wiring.
Watch Video
Highlights
- Identify the correct fuse amperage before replacement
- Always disconnect power before inspection
- Test circuits after replacement to confirm function
- Document changes for future maintenance
- When in doubt, consult a professional