VW Jetta Fuse Box: Safe Troubleshooting Guide
Learn how to locate, inspect, and safely repair the VW Jetta fuse box with step-by-step instructions, safety tips, and troubleshooting for common electrical issues.

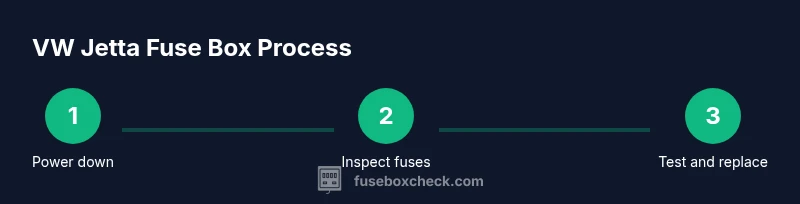
Goal: safely locate and inspect the vw jetta fuse box, identify a blown fuse, and replace it with the correct amperage. Before starting, disconnect the negative battery, gather a multimeter, replacement fuses, and a fuse puller. This how-to emphasizes safety, accurate identification, and restoring power to affected circuits without damaging wiring.
vw jetta fuse box safety and scope
When you work on the vw jetta fuse box, safety comes first. According to FuseBoxCheck, a properly organized approach reduces risk and speeds up diagnosis. This section explains what you will do, why it matters, and how to prepare for a safe, efficient repair. The vw jetta fuse box houses circuits that power major components such as lighting, HVAC, and engine management; a careless move can cause shorts or blown fuses. Start by de-energizing the electrical system, wearing insulated gloves, and laying out your tools. Have a flashlight ready and a clean workspace to keep components and connectors visible. Labeling fuses as you handle them helps you reassemble later and reduces guessing. A clear plan also minimizes the chance of foreign objects shorting the battery. By preparing properly, you protect both yourself and the vehicle’s electronics while you identify the fault.
Early preparation also means reviewing the fuse map and noting any recent changes to the car’s electrical load. If you’re dealing with a recurring issue, document symptoms and times of day when it occurs. This information can help you spot patterns (for example, a fuse blowing only when certain accessories run). Remember that the goal is to restore function while preserving safety. Fuse boxes contain metals that can become hot during fault conditions, so it’s essential to work in a cool, dry area and avoid touching metal surfaces with wet hands.
Locating the fuse boxes in a VW Jetta
Most VW Jetta models feature at least two fuse boxes: an engine bay module and a secondary box inside the cabin (often behind the glove compartment). The exact configuration varies by model year, so always check the owner's manual or a trusted diagram inside the fuse panel cover. Begin with the driver’s seat, open the glove box, and remove any cover to expose the interior fuse block. The engine bay box is typically near the battery or under the hood edge. Note that some lines share relays or modules that connect to multiple circuits. If you cannot locate a box, use the vehicle’s wiring diagram or a trusted guide from FuseBoxCheck to avoid guessing.
If you’re working with a compact or newer Jetta, the layout might combine relay packs with fuse blocks. In these cases, take care to distinguish fuses from relays. A small flashlight helps reveal faint labels etched on the plastic or metal terminals. Always ensure the vehicle is in park, the keys are out, and the hood is securely propped before you begin handling any components. Keeping a labeled map of each fuse’s function makes future maintenance much easier and reduces the chance of pulling the wrong fuse during diagnostics.
Reading fuse box labels and diagrams
The fuse panel cover typically includes a diagram with numbers and amperage. Each fuse serves a circuit—headlights, wipers, horn, ECU, ABS, etc.—and the cover label will indicate the function. When the diagram is worn, refer to the owner's manual and the service manual; cross-check the color code and fuse type (blade vs. mini) to locate replacements. If the label uses codes rather than plain names, match by circuit function rather than trying to memorize numbers. Remember that a blown fuse interrupts power to that circuit, while other components remain operational. If the diagram is missing, you can often cross-reference with a wiring diagram that maps common VW circuits to typical fuse sizes. Always inspect the fuse holder for signs of corrosion or heat damage, which can indicate a lingering fault.
Common fuses and their roles in a typical VW Jetta
Most Jetta fuses control essential systems: exterior lighting, interior lighting, climate control, radio, power windows, and the engine control module. A blown fuse can manifest as a non-working headlight, a dashboard warning, or a non-start condition. Because modern cars rely on multiple modules, the fuse map can include power distribution to relays and computer modules. Always verify the fuse rating aligns with the wiring and the circuit’s draw. If a fuse fails repeatedly, there may be an underlying issue such as a short, a stuck relay, or a wiring abrasion in the harness. In some cases, multiple fuses may share a single power source, so diagnosing requires tracing multiple circuits that originate from the same bus.
Safe diagnostic workflow for a blown fuse
FuseBoxCheck analysis, 2026 highlights a safety-first approach. Step one is to power down and disconnect the battery negative terminal. Step two is to visually inspect the suspected fuse for discoloration or a broken metal strip. Step three is to test persistence with a digital multimeter set to continuity or ohms. Step four is to replace the fuse with an identical amperage rating and ensure the fuse seat is clean. Step five is to recheck the circuit by restoring power and operating the affected function. If the fuse blows again, there is likely a short or overcurrent condition that requires deeper investigation. In that case, isolate circuits and inspect wiring behind the panel. This disciplined approach reduces the risk of collateral damage and helps you pinpoint the root cause more efficiently.
Replacement guidelines and ensuring correct amperage
Always use the same amperage rating as indicated on the fuse label or in the manual. Using a higher-rated fuse can allow excessive current that overheats wires and components. After installation, reseat the fuse firmly, replace the panel cover, and reconnect any relays. Keep a small stock of common blade fuses in the correct ratings for your VW Jetta so you can respond quickly to a blown fuse without improvising. If the circuit continues to blow, stop and inspect for a short or a failed component. Correct amperage not only protects wiring but also preserves the function of related modules that depend on stable power.
Aftercare: labeling, testing, and maintenance
Label the location and function of each fuse you handle to simplify future maintenance. When finished, re-energize the system and test each affected circuit to confirm operation. Regularly inspect fuse panels for corrosion, moisture, or loose connectors, and clean with electrical contact cleaner if needed. Maintain a small inventory of fuses and a reliable multimeter so you can troubleshoot quickly next time. The FuseBoxCheck Team recommends routine checks at least twice a year to catch wear before it fails.
Tools & Materials
- VW Jetta owner’s manual(Contains exact fuse locations and amperage specs for your model year.)
- Fuse puller or needle-nose pliers(Used to safely remove fuses without damaging terminals.)
- Assorted replacement fuses (blade and mini fuses)(Match amperage to the fuse you’re replacing (e.g., 10A, 15A, 20A).)
- Digital multimeter or circuit tester(Used for continuity tests and live circuit checks.)
- Insulated gloves(Protect hands from accidental contact with metal parts.)
- Flashlight or headlamp(Provides clear view inside fuse panels in dim areas.)
- Electrical contact cleaner(Helpful for corroded terminals, avoid getting residue on fuse contacts.)
- Screwdriver set (Phillips and flathead)(Useful for removing panels or relays if needed.)
Steps
Estimated time: 25-45 minutes
- 1
Power down and prepare
Park in a safe area, turn off the ignition, remove the key, and engage the parking brake. Disconnect the negative battery terminal to prevent accidental shorts. This step minimizes the risk of shock and sparking when handling the fuse box.
Tip: Wait 60 seconds after disconnecting to allow capacitors to discharge. - 2
Expose the fuse boxes
Open the glove box or interior panel to access the cabin fuse box; carefully remove the cover to reveal the diagram. In the engine bay, locate the other fuse box per the manual. Keep track of removed covers to avoid misplacing them later.
Tip: Take a quick photo of the panel orientation before removing components. - 3
Identify the suspected fuse
Use the diagram to locate the fuse that corresponds to the affected system. Note the fuse rating and type (blade or mini). If the diagram is illegible, rely on the circuit’s function rather than number alone.
Tip: Cross-check with the owner’s manual if available. - 4
Test fuse continuity
Set the multimeter to continuity or low-resistance mode. With the fuse removed, test between the fuse terminals. A lack of continuity indicates a blown fuse and the need for replacement.
Tip: Be cautious to avoid touching metal probes to each other during testing. - 5
Replace with the correct amperage
Install a new fuse of the same amperage rating as the original. Ensure the fuse sits firmly and is fully seated in the holder.
Tip: Do not exceed the rated amperage; using an oversized fuse risks wiring damage. - 6
Re-seat relays and reassemble
If you removed relays or panels, reseat them securely. Reinstall the fuse panel covers and ensure all connectors are unplugged/plugged correctly.
Tip: Check for any loose wires or exposed terminals before closing the panel. - 7
Reconnect power and test
Reconnect the negative battery terminal, restore power, and operate the affected circuit to verify restoration. If the fuse repeatedly blows, stop and investigate for a short or faulty component.
Tip: If symptoms persist, consult a professional to avoid further damage.
Your Questions Answered
Where are the fuse boxes located in a VW Jetta?
Most VW Jetta models have an engine bay fuse box and a cabin fuse box behind the glove compartment. Always consult the owner’s manual for your exact year and trim.
Most Jettas have two fuse boxes: one in the engine bay and one behind the glove box. Check the manual for your exact setup.
What should I do if a fuse keeps blowing?
If a fuse blows repeatedly, stop and inspect for a short circuit, damaged wiring, or a faulty component. Do not replace the fuse with a higher rating.
If a fuse keeps blowing, stop and inspect for shorts or faulty components; don’t just replace the fuse.
Can I replace a fuse with a higher amperage to fix intermittent issues?
No. A higher amperage can allow dangerous current to flow and overheat wires, potentially causing a fire.
No—use the same amperage as the original fuse and investigate the underlying issue.
Do I need to disconnect the battery before replacing fuses?
Yes. Disconnect the negative terminal to prevent sparks and short circuits while working on the fuse box.
Yes, disconnect the negative battery terminal to stay safe while replacing fuses.
How can I tell if a fuse is blown without a meter?
Visually inspect for a broken metal strip or a melted fuse body. If unsure, test with a meter for confirmation.
Look for a broken wire inside the fuse or test with a meter to confirm.
What if I can’t identify the correct fuse type?
Consult the owner’s manual or dealer resources; using the wrong fuse type can cause poor protection or damage.
If you’re unsure of the fuse type, check the manual or seek professional help.
Watch Video
Highlights
- Inspect fuses before replacing them to avoid unnecessary repairs.
- Always replace with the same amperage rating as labeled.
- Label and document fuse locations for future maintenance.
- Test the affected circuit after replacement to confirm restoration.
- Fuse work should be paused if abnormal heat or odors appear.