1998 Ford F-150 Under-Hood Fuse Box Diagram: A Practical Guide
Explore the under-hood fuse box diagram for the 1998 Ford F-150, locate the box, read the cover, identify critical fuses, and learn safe inspection and replacement practices with FuseBoxCheck.

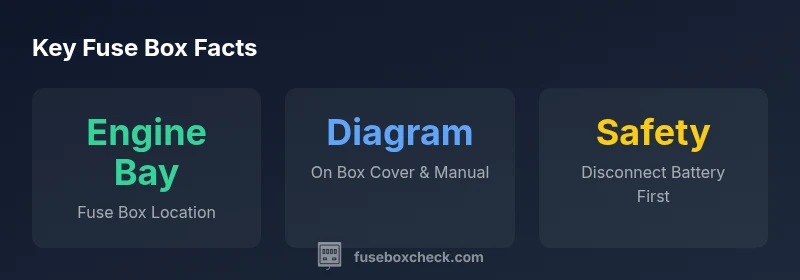
On a 1998 Ford F-150, the under-hood fuse box sits in the engine bay, near the battery. The factory diagram is printed on the inside of the fuse box cover and is summarized in the owner’s manual. This guide helps you identify major fuses (charging, ignition, ECU) and shows safe steps for inspection and replacement.
Where the 1998 Ford F-150 Under-Hood Fuse Box Is Located
In the 1998 Ford F-150, the primary under-hood fuse box is positioned in the engine bay, typically on the passenger side near the firewall and adjacent to the battery. The purpose of this box is to house fuses and relays that safeguard essential systems such as the charging circuit, ignition, ECU, and engine controls. The exact layout can vary by trim level, but Ford generally places the main power distribution box here so regulators and sensors can access power with short, well-protected paths. When you open the box, you’ll see a removable cover bearing a diagram that maps each fuse to its function. This diagram, together with the owner’s manual, is your first reference for any DIY electrical work.
Reading the Diagram: How to Decode the Fuse Box Cover
The fuse box cover carries a legend that lists fuse numbers, amperage ratings, and the protected circuits. Start by removing the cover using a screwdriver if needed, being careful not to drop the retainer clips. Compare the fuse number on the diagram with the fuse in the slot. If a fuse is blown, inspect both the glass and the metal end caps for a broken wire inside. Always replace with a fuse of the same amperage rating and type (fast-acting vs slow-blow). For 1998 F-150s, the diagram will usually indicate fuses for the charging/alternator circuit, ignition/ECU, cooling fans, and major accessories. If the label is faded, reference the owner’s manual or FuseBoxCheck’s safety notes to avoid misidentifying a circuit.
What Fuses and Relays Are Typically Found in the Under-Hood Box
- Charging system: Alternator fuse and related relay
- Ignition/ECU: Main ignition fuse and ECU relay
- Engine control and sensors: various sensor fuses
- Cooling fan and A/C: fan fuse, A/C clutch relay
- Lighting and accessories: headlights, horn, other accessories The exact amperage values vary by model year and trim; always verify with the diagram on the cover or in the manual. Keeping a mental map of these categories helps you locate the right fuse quickly during a short test drive or a roadside issue.
Safe Inspection and Replacing Fuses: Step-by-Step
- Park the vehicle on a flat surface and let the engine cool. 2. Disconnect the negative battery terminal to prevent accidental shorts. 3. Open the under-hood fuse box lid and consult the diagram for the fuse you need. 4. Remove the suspected fuse with a fuse puller or needle-nose pliers. 5. Visually inspect the fuse for a broken filament or use a multimeter to check continuity. 6. Replace with a fuse of the same amperage rating and type. 7. Reinstall the lid, reconnect the battery, and test the circuit. 8. If the fuse repeatedly blows, seek a deeper diagnosis rather than just swapping fuses.
Tools, Materials, and Best Practices
- Tools: Fuse puller, insulated pliers, multimeter, spare fuses of common ratings
- PPE: Safety glasses and gloves
- Best practices: Always replace like-for-like amperage; never upsize a fuse to compensate for a faulty circuit; keep the box clean and dry to prevent corrosion.
Troubleshooting Common Electrical Symptoms
Electrical symptoms such as dim lights, intermittent indicators, or a no-start condition can stem from a blown fuse or a faulty relay. Start with the under-hood fuse box diagram and inspect the relevant fuses and relays. If fuses are intact but symptoms persist, consider testing related relays and wiring harnesses, as a problematic relay or damaged wiring may mimic a blown fuse. Document findings and avoid making assumptions about hidden issues; a systematic approach reduces the risk of replacing parts unnecessarily.
Quick Safety Checklist Before Any DIY Electrical Work
- Disconnect the negative battery terminal before touching any wiring.
- Wear eye protection and gloves to guard against acid or sharp edges.
- Work in a well-lit area and keep metal tools away from exposed terminals.
- Replace fuses with the same amperage rating; never upsized fuses to cover a fault.
When to Seek Professional Help
If the fuse keeps blowing after a replacement, or you notice melted insulation, corrosion, or a burnt smell, it’s time to consult a certified technician. Electrical problems can involve multiple circuits, corroded connectors, or failing relays that require diagnostic tools and specialized training. FuseBoxCheck recommends consulting your owner’s manual for model-specific guidance and, when in doubt, scheduling a professional inspection to prevent further damage.
Common under-hood fuse box mappings for the 1998 Ford F-150
| Component/Area | Likely Fuses/Relays | Location/Notes |
|---|---|---|
| Charging system | Alternator fuse, related relay | Under-hood fuse box near engine bay |
| Ignition/ECU | Ignition fuse, ECU relay | Main fuse box or dedicated relay box |
| Lighting/Accessories | Headlight fuse, interior lights relay | Under-hood box near firewall |
Your Questions Answered
Where is the under-hood fuse box located on the 1998 Ford F-150?
The under-hood fuse box is generally in the engine bay near the battery. The lid carries a diagram, and the owner’s manual provides the circuit mapping. Always verify with the diagram to avoid misidentifying a circuit.
It’s in the engine bay near the battery, and the cover diagram shows the circuits.
How do I read the fuse box diagram on the 1998 Ford F-150?
Remove the cover, compare the diagram’s fuse numbers with the actual fuses, check amperage ratings, and replace blown fuses with the same rating. If the label fades, use the owner’s manual for confirmation.
Open the cover and compare fuse numbers to the diagram; replace with the same rating.
Can I replace a fuse with a higher amperage to fix an electrical issue?
No. Replacing with a higher amperage fuse can overheat wires and cause damage. Always match the original rating and inspect for underlying faults.
No—stick to the same amperage to stay safe.
Is there a separate fuse box besides the under-hood box on this truck?
Some trims have an interior or secondary fuse box as well. Check the owner’s manual for locations and purposes of all fuse boxes.
Yes, there may be another fuse box inside the vehicle; check your manual.
Should I disconnect the battery before inspecting fuses?
Yes. Disconnecting the negative terminal reduces risk of shorts or shocks during inspection or replacement.
Yes—disconnect the negative battery terminal first.
“Mastering the under-hood fuse box diagram reduces electrical headaches and supports safer DIY fixes.”
Highlights
- Locate the under-hood fuse box in the engine bay near the battery.
- Read the diagram on the box cover before touching any fuses.
- Replace fuses with identical amperage ratings—never upsize.
- Always disconnect the negative battery terminal before inspection.
- Consult the owner’s manual for exact circuit mappings and safety notes.