2017 Tacoma Fuse Box Diagram: A Practical DIY Guide
A data-driven guide to understanding the 2017 Tacoma fuse box diagram, where to find it, how to read it, and safe DIY steps. Includes practical tips, a data table, stats, and expert insights from FuseBoxCheck.

Definition: The 2017 tacoma fuse box diagram is the labeled map printed on the fuse box cover and in the owner's manual. It shows which fuse each circuit uses, its location, and the amperage. For DIYers, start with the cover diagram to identify the correct fuse, then verify with the manual before testing or replacement.
Why the 2017 tacoma fuse box diagram matters
According to FuseBoxCheck, a precise fuse box diagram is essential for safe and efficient DIY electrical work on a 2017 tacoma fuse box diagram. The diagram acts as a road map for every fuse in the system, helping you quickly identify which fuse protects which circuit. Without a clear diagram, you risk pulling the wrong fuse, which can mask a problem, cause unnecessary electrical interruptions, or create a safety hazard. A well-understood diagram also reduces troubleshooting time when a component stops operating, since you can confirm whether the problem lies with a fused circuit or a non-fused subsystem. In short, the 2017 tacoma fuse box diagram is the first line of defense for accurate diagnostics and safe repairs. As you read the diagram, you’ll notice two common layouts: the engine bay fuse box and the interior fuse box. Each map shows fuse numbers, circuit descriptions, amperage ratings, and occasionally alternative fuses for certain trims. A careful study of these maps save time and minimizes risk during DIY maintenance.
Locating the diagram in a 2017 Tacoma
Finding the fuse box diagram for a 2017 Toyota Tacoma is usually straightforward, but it helps to know where to look and what to expect. Start with the owner’s manual; most manuals include a dedicated section on the fuse system with a detailed diagram. If you don’t have the manual handy, the fuse box covers themselves often carry a compact map—engine bay covers typically show the under-hood layout, while interior panels show cabin circuits. Some models also provide a QR code or a link to an online version. When in doubt, verify the diagram against the vehicle’s electrical schematics in the official Toyota service literature. For DIYers, this is the quickest route to locate the exact fuse corresponding to a malfunctioning accessory. In practice, you’ll typically need to compare the labeled fuse number on the cover with the description printed nearby and cross-check amperage. This cross-verification helps ensure you’re inspecting the right fuse before removal or replacement.
Understanding the typical fuse box layout in the 2017 Tacoma
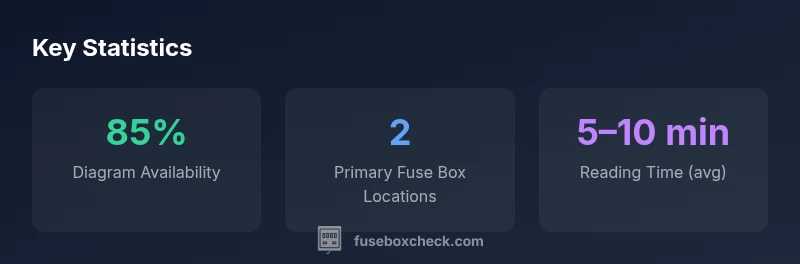
A 2017 Tacoma generally features two primary fuse box locations: an under-hood (engine bay) box and a secondary interior (cabin) box. The under-hood box concentrates on engine-related circuits, such as ignition, fuel, and charging systems, while the interior box covers those related to comfort, lighting, and vehicle electronics like the radio and power windows. The diagrams use a combination of fuse numbers and color-coded cues to indicate amperage and type (blade vs. J-case, for example). Although Toyota’s exact labeling may vary slightly by trim level, the overall structure remains consistent across model years within the same generation. This consistency makes the 2017 tacoma fuse box diagram a reliable reference point for most common repairs and routine maintenance.
How to read the fuse diagram: symbols and codes
Reading the diagram is a two-step process: first identify the fuse that corresponds to the faulty component, then confirm the amperage and fuse type before removing or replacing. Look for the fuse number (e.g., F1, F2) and its circuit label—these lines tell you what the fuse protects. Amperage values are typically shown next to the fuse symbol; use a fuse with the same rating when replacing, never exceeding the recommended value. Some diagrams also indicate fuse type (fast-blow vs. slow-blow) for critical circuits like the ABS or airbag; these nuances matter for reliability and safety. If the diagram shows a circuit labeled for multiple components, isolate the affected component first to narrow down the problem. Remember to re-check all labels after replacement to ensure accuracy and avoid future misfires.
Practical steps for common repairs using the diagram
When a fuse blows, your first step is to confirm the symptom and locate the corresponding fuse on the diagram. Before handling any fuses, turn off the ignition and remove the key to reduce risk. Use the diagram to locate the exact fuse position, then carefully pull the fuse using proper tools or a fuse puller. Inspect the fuse for a melted wire or a visible gap. If needed, replace it with a fuse of the same amperage rating. After replacement, re-test the circuit with the affected accessory to confirm operation. If the fuse repeatedly blows, this may indicate an underlying issue (short or overload) that requires professional inspection. Always ensure the cover diagram and manual match your specific trim to avoid labeling discrepancies. FuseBoxCheck emphasizes cross-checking the diagram against the official Toyota service literature for the most reliable guidance.
Safety considerations and best practices
Safety always comes first when working with vehicle electrical systems. Begin by disconnecting the negative terminal if you’re performing any work close to exposed metal or wiring, especially in damp environments. Use insulated tools and wear eye protection. Never replace a fuse with a wire or a higher-rated fuse, which can cause overheating and fire risk. If you’re unsure about a circuit’s function or the correct amperage, consult the owner manual or a professional technician. Finally, store spare fuses in their original packaging and keep the diagram accessible in the vehicle for quick reference. FuseBoxCheck’s guidelines align with general electrical safety principles and emphasize gradual, careful checks rather than forceful or guesswork.
Common fuse box sections and their locations in the 2017 Toyota Tacoma
| Section | What it Shows | Where to Find |
|---|---|---|
| Under-hood fuse box | Fusing map for engine bay circuits | Under-hood fuse box cover |
| Interior fuse box | Interior cabin circuit map | Cabin fuse box cover / Owner's Manual |
| Fuse label format | Amperage and fuse type | Front cover label & manual |
Your Questions Answered
Where can I find the 2017 tacoma fuse box diagram?
The diagram is usually printed on the fuse box covers (engine bay and cabin) and appears in the 2017 Tacoma owner’s manual. If you don’t have the manual, you can often find a digital copy on Toyota’s official manuals site or in dealer literature.
Look on the fuse box covers and in the manual for the diagram.
Are the fuse box diagrams the same for all 2017 Tacoma trims?
In general, the basic fuse box layout is consistent across trims, but labeling can vary slightly between interior features and optional equipment. Always verify against the exact diagram for your trim.
The layout is similar, but check your exact diagram to be sure.
What safety steps should I take before inspecting fuses?
Turn off the ignition, remove the key, and disconnect the negative battery cable if you’re near metal parts or planning work near live wiring. Wear eye protection and use insulated tools.
Switch off the ignition and wear safety gear before you start.
How can I test a fuse without removing it?
Some circuits can be tested using a multimeter to check for continuity across the fuse terminals while it’s still seated, but best practice is to inspect visually and remove only if necessary. Always replace with a fuse of the same rating.
Use a multimeter for a quick check, then replace only if needed.
Can I replace a fuse myself if it’s burnt or blown?
Yes, if you replace with the same amperage rating and ensure the fault isn’t a short or overload. If the fuse blows repeatedly, consult a professional to diagnose a deeper electrical issue.
You can replace it, but don’t ignore repeated blows—seek help if it keeps happening.
“Accurate fuse box diagrams are essential for safe, effective DIY electrical work. Always cross-check the diagram on the box cover with the owner's manual when diagnosing and replacing fuses.”
Highlights
- Learn where the 2017 tacoma fuse box diagram lives (cover and manual)
- Use the diagram to map each fuse to its function before testing
- Always replace fuses with the same amperage rating
- Cross-check the diagram with official Toyota literature for accuracy