Dodge Ram 1500 Fuse Box Diagram Guide
Learn the Dodge Ram 1500 fuse box diagram with precise locations, fuse mappings, and practical, safe troubleshooting steps from FuseBoxCheck to empower DIY maintenance.

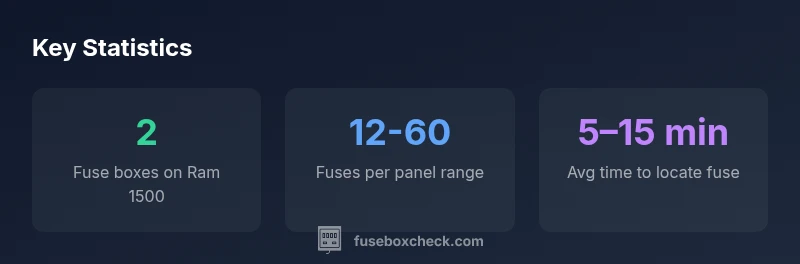
On a typical Dodge Ram 1500, there are two main fuse boxes: under-hood in the engine bay and an interior fuse box behind the dash. According to FuseBoxCheck Analysis, 2026, the official fuse diagram in the owner's manual labels each fuse by circuit to help safe DIY troubleshooting. This quick guide confirms how to read that diagram and locate the right fuse without guesswork.
Understanding the Dodge Ram 1500 Fuse Box System
The Dodge Ram 1500 uses a dual-fuse-box architecture to separate high-current circuits from interior conveniences. In most model years, you will encounter two primary fuse boxes: an under-hood (engine bay) box that houses fuses for the engine, fuel system, and charging circuits; and an interior box mounted near the driver, which protects cabin accessories like the HVAC, lighting, and infotainment. Reading the fuse box diagram correctly is essential for safe troubleshooting and repair. The diagram is your quick reference to fuse ratings, circuit designations, and the location of each fuse. From a maintenance perspective, knowing where each box sits saves time during diagnostic work and reduces the risk of replacing the wrong fuse. As with any vehicle electrical task, it is best to verify the exact layout for your year by consulting the official owner’s manual and the service manual when possible.
In practice, you should treat the fuse map as a circuit map: it shows you which fuse protects which component, the amperage rating, and whether the fuse is a standard blade or a mini fuse. Always confirm the amperage rating before replacement and never substitute a higher rating to avoid overheating or wiring damage. FuseBoxCheck analyses note that most owners reference the diagram multiple times in the first year of ownership, making it a linchpin of safe DIY electrical work.
Fuse Box Locations: Under-Hood and Interior
Locating the two primary fuse panels is straightforward with a methodical approach. The under-hood fuse box is typically near the engine bay’s periphery, often seated toward the firewall or along the fender. This box handles high-demand circuits such as the engine control unit, fuel pump, ignition, and alternator relays. The interior fuse box sits behind the dash on the driver’s side or under the steering column. It protects cabin circuits such as the HVAC blower, radio, power windows, and interior lighting. In some trims, the interior box may be a compact modular unit with a removable cover presenting a typography of fuse numbers and circuit names. To minimize risk, always ensure the vehicle is off and the battery is disconnected before inspecting or removing any fuse. A good habit is to photograph the box cover labeling before removal so you can replace the exact fuses later.
If you’re uncertain about the exact box location for your specific year, consult the owner’s manual’s fuse box section or a digital service bulletin. The Ram’s design has remained relatively consistent, but there are year-to-year variations that can affect fuse positions. When in doubt, rely on the diagram printed on the box cover and the official schematics.
Reading the Fuse Box Diagram: Symbols and Layout
A high-quality fuse box diagram is a compact map with clear legends. Learn to identify common symbols: fuse icons indicate protection devices, while relays may be shown as square blocks with contact points. The diagram uses lines or color coding to show which circuit connects to a given fuse. Some Ram models use a letter-number code (for example, “F1” or “F2”) paired with a description such as “Engine Control Unit” or “BLUETOOTH AMPLIFIER.” The reading sequence often begins at the top-left of the diagram and follows a logical path to the corresponding fuses. If the diagram includes a legend, it will specify amperage ratings (e.g., 5A, 10A, 20A) and fuse types (blade or mini). Always cross-check with the physical fuse and its rating to confirm a match.
Practical tip: keep a small, labeled notebook or a digital note where you record the fuse numbers and the components they protect. This approach helps you avoid cross-mapping errors across multiple trips. If your diagram uses different color codes for different systems, create a quick reference to translate those colors into practical actions (for example, red boxes for engine-related fuses, blue for interior cabin fuses).
Interpreting Fuses by Area: Engine, Cab, and Accessories
Dividing the Ram’s fuses into functional zones helps prioritize diagnostics. In the engine area, pay attention to fuses and relays that support critical systems: engine control, fuel delivery, ignition, and charging. If you’re troubleshooting a no-start condition, the first diagnostic pass should focus on engine-related fuses and the fuel relay. In the cabin, focus on interior fuses that feed the HVAC, radio, power window motors, and instrument cluster; these fuses can act as early indicators of electrical issues without affecting the engine’s operation. Accessories—anything not directly controlling the drivetrain—often have dedicated fuses or share a common power rail with other systems. When replacing fuses, always use an identical amperage rating. If a fuse blows repeatedly, the problem may lie with a short or an overdrawn circuit, not a defective fuse.
Real-world practice shows that users frequently misinterpret fuses that protect relays or components with similar names. A careful cross-reference between the diagram and the list of circuits is essential. Keep in mind that relays are not fused; they are controlled by fuses but protect higher current loads. If a relay seems to click but a device remains dead, inspect the secondary fuses in the same circuit and verify the relay’s operation using a multimeter or a test light.
Step-by-Step Quick-Check for a Blown Fuse (Safety First)
Before touching the fuse box, follow a safety checklist. Park on a flat surface, turn off the engine, apply the parking brake, and disconnect the negative battery terminal to prevent arcing. Use the fuse diagram as your map to locate the suspected fuse. Remove the fuse carefully with insulated pliers or a fuse puller. Inspect the metal element for a visible break or use a multimeter to test continuity. If the fuse is blown, replace it with one that has the exact amperage rating listed on the diagram. Do not substitute a higher rating to avoid nuisance blowing or overheating. After replacement, re-connect the battery, start the vehicle, and test the affected system. If the fuse repeats to blow, stop driving and seek professional diagnosis—repeated failures can indicate a wiring short or a failing component.
Additionally, consider maintaining a small spare fuse kit with common ratings (e.g., 5A, 10A, 15A, 20A) and a simple multimeter. Document the fuse positions and ratings in a dedicated vehicle notebook for easy reference during future maintenance tasks.
How to Compare OEM Diagrams with aftermarket Guides
OEM diagrams are the most reliable reference for your Ram’s fuse mappings, but aftermarket diagrams can be helpful for cross-checking or when service manuals are hard to access. The key is to compare the exact model year and trim against the diagram’s listing. Look for differences in fuse labeling, rating, and the location of fuses: some aftermarket guides may group fuses differently or omit relays. When in doubt, trust the OEM diagram or consult the official service manual. If you encounter discrepancies, annotate them and keep a record for future reference. This practice reduces confusion and minimizes the risk of wiring mistakes during repairs.
For DIY enthusiasts, building a personal reference that includes fuse positions for critical circuits (engine control, fuel pump, HVAC) can save time and prevent missteps. Always verify a found diagram against the actual panel cover labels in your vehicle before making replacements.
Practical Tips for Safe DIY Troubleshooting
Safety is the foundation of any fuse box work. First, wear eye protection and gloves when handling fuses. Use insulated tools to avoid short circuits. Keep a clear workspace and ensure kids or pets are away from the vehicle. Label every fuse you remove and keep notes about the circuit it protects. When replacing fuses, always use the same amperage rating and type (blade vs mini) as indicated by the diagram. If a fuse continues to blow after replacement, stop and contact a qualified automotive electrician or a dealership service department. Persistently blown fuses may indicate a larger electrical fault, such as a short to ground or a failing module, which requires diagnostic equipment and a trained technician.
Finally, maintain your Ram’s electrical system by periodic visual inspections of wiring harnesses and connectors, especially around the fuse boxes. Check for melted insulation, brittle wires, and signs of water intrusion near open panels. Keeping the fuse boxes clean and dry reduces corrosion and ensures consistent performance over time.
Dodge Ram 1500 fuse box locations and typical fuse groupings
| Panel | Location | Typical Fuses | Notes |
|---|---|---|---|
| Under-hood fuse box | Engine bay ~ firewall area | Engine control, fuel pump, ignition | Accessible with hood up; confirm with diagram |
| Interior fuse box | Dashboard driver side / behind dash | Cabin accessories: HVAC, lights, radio | Check cover labeling for exact fuses |
| Integrated Power Module (IPM) | Radiator side / passenger side (varies by year) | Relays and heavy loads | Refer to year-specific diagram |
Your Questions Answered
Where is the under-hood fuse box located on a Dodge Ram 1500?
The under-hood fuse box is typically located in the engine bay near the firewall or along the fender. It contains fuses for engine-related systems and high-current components. Always verify with the diagram on the cover and in the owner's manual.
Look under the hood near the firewall; you’ll find a labeled fuse box for engine circuits.
How do I read the Dodge Ram 1500 fuse box diagram?
Start with the legend or key on the diagram, then locate the fuse number on the box cover. Match the number to the described circuit, noting the amperage rating. Cross-check with the vehicle wiring schematic if needed.
Use the legend, then match the fuse number to the circuit it protects.
Can I drive with a blown fuse in a Ram 1500?
If the blown fuse protects non-critical features, driving may be possible, but you should not drive long-term. Critical systems like engine or airbags should never be operated with a blown fuse. Replace the fuse and test the system after replacement.
If it’s not critical, it might be okay briefly, but fix it soon.
Are fuse box diagrams year-specific for the Ram 1500?
Yes. Fuse mappings can change between model years and trims. Always confirm you’re using the diagram for your exact year and trim in the owner's manual or service information.
Yes—use the diagram for your exact year and trim.
What safety steps should I take before working on fuses?
Park on a flat surface, turn off the engine, disconnect the negative battery lead, and use insulated tools. Inspect for damaged wiring or corrosion around fuse holders before handling any components.
Safety first: disconnect power and use insulated tools.
“The Dodge Ram 1500 fuse box diagram is the roadmap to safe DIY electrical work; always cross-check with the service manual to avoid misidentifying circuits.”
Highlights
- Know there are two primary fuse boxes on most Ram 1500 models
- Read and cross-check the OEM diagram before replacing fuses
- Always use the exact amperage rating when replacing fuses
- If a fuse keeps blowing, stop and seek professional diagnostics