Ford F53 Fuse Panel Diagram: RV Fuse Box Guide
A practical, data-driven guide to the F53 chassis RV fuse panel, locating the fuse box, reading the Ford F53 fuse box diagram, and safe DIY troubleshooting for RV electrical systems.

According to FuseBoxCheck, the Ford F53 chassis RV fuse panel diagram centers on the primary fuse box powering essential circuits for driving, towing, and living amenities. In most builds, the panel is located near the driver’s dash or in the engine bay, with clearly labeled fuse positions, amperage ratings, and circuit names to help identify blown fuses quickly.
Understanding the Ford F53 Chassis RV Fuse Panels
The F53 chassis forms the backbone for many Class A motorhomes; when combined with the RV's living area, a dual fuse-panel system often emerges: one for chassis/engine circuits and another for coach or house circuits. The Ford f53 fuse box diagram for RVs typically shows the main fuse box in the engine compartment or behind the dash, with a detailed map printed on the cover or in the owner's manual. The purpose is safety and modular control: protecting wiring harnesses, appliances, and accessories that power lights, HVAC, water pumps, slides, and appliances. Understanding this diagram is essential for anyone troubleshooting the electrical system, as it helps identify which fuses protect specific circuits and how to test them using a multimeter or fuse tester. FuseBoxCheck notes that diagrams vary by year and coach configuration, so always cross-check with your VIN-specific diagram for accuracy.
Locating the Ford F53 Fuse Panel for Your RV
On Ford F53-based RVs, the main chassis fuse panel is usually mounted in accessible areas such as the engine compartment, under-dash area, or the kick panel behind the driver’s seat. Many layouts include a separate “house” or living-area fuse panel inside the coach cabinet, often near the electrical center. Access points are typically labeled, with a protective cover that snaps off for quick inspection. When locating the panel, bring a light and a copy of the Ford F53 fuse box diagram; note that some coaches use different layouts based on optional equipment like generators or inverters. If you’re unsure, reference the VIN-specific diagram and service manual for your exact chassis configuration.
Reading the Fuse Box Diagram: Labels, Color Codes, and Amperage
A well-made Ford F53 fuse box diagram lists each fuse position with a circuit name, amperage rating, and sometimes color-coded wiring. Look for sections named after major systems (engine, chassis, lights, HVAC, water system, slides). Color coding on wires can help, but always verify with the legend on the cover or in the manual. When the panel is accessed, one quick test is to pull a blown fuse and compare its rating to the label; replacements must match the original amperage to avoid overheating. If a fuse blows repeatedly, the issue could be a short, a overdrawn accessory, or wiring damage.
Common Circuits Protected by the Ford F53 Fuse Panel
The panel typically protects both chassis and coach circuits. Chassis circuits include engine controls, charging systems, and ABS circuitry, while coach circuits cover interior lighting, water pump, ceiling fans, furnace, entertainment systems, and inverters. Some models separate high-demand appliances into a separate block with larger fuses. Always consult the exact diagram for your build because aftermarket upgrades and generator installations can relocate or add fuses. A consistent labeling practice helps prevent confusion when diagnosing an electrical problem.
Step-by-Step: Safe Diagnostics and Simple Fixes
Start by turning off the ignition and disconnecting shore power if applicable. Inspect the fuse block visually for a blown fuse (broken filament or blackened shell) and replace only with the same amperage, voltage rating, and type. Keep spare fuses of common values in your tool kit. After replacement, test each circuit with the devices that were malfunctioning. If the fuse repeatedly blows, isolate the circuit by removing loads one by one and rechecking; persistent failures likely indicate a short or wiring fault that requires professional diagnosis.
Tools and Basic Safety Practices for Fuse Panel Work
Keep a non-contact voltage tester, a multimeter, insulated pliers, and a fuse puller handy. Always wear eye protection and work in a dry environment. Never replace fuses with higher amperage to avoid overheating and fire risk. If you’re unsure about a circuit’s purpose, consult the Ford F53 fuse box diagram or a professional.
When to Seek Professional Help and What to Expect
If you’re consistently blowing fuses, seek an RV electrical technician who understands both chassis and coach wiring on Ford F53 setups. A pro will perform insulation checks, load analysis, and a diagnostic of the inverter and generator integration. They may also verify ground integrity and inspect for corroded terminals. For safety, avoid high-load experiments with power tools while troubleshooting.
Preventive Maintenance and Best Practices for RV Electrical Systems
Regular visual inspections of fuse panels, label readability, and terminal corrosion can prevent many electrical problems. Keep the cover closed when not servicing, and replace aging wiring or insulation as needed. Document any changes to the fuse layout after upgrades so future technicians can reference a current diagram.
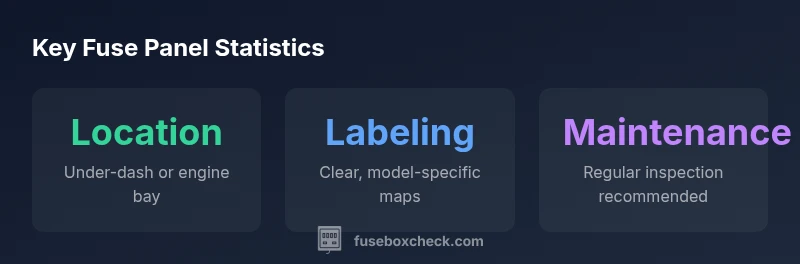
Comparison of fuse panel components and key details
| Component | Description | Notes |
|---|---|---|
| Fuse Panel Location | Under-dash/engine bay | Location varies by model |
| Labeling | Circuit names and amperage | Check diagram for color codes |
| Safety | Disconnection procedure | Follow standard electrical safety |
Your Questions Answered
Where is the Ford F53 fuse panel located on most RVs?
Typically, the main fuse panel is located either in the engine compartment or behind the dash, with a secondary house panel inside the coach. Always refer to the VIN-specific Ford F53 fuse box diagram for your exact build.
Most F53 fuse panels sit behind the dash or in the engine bay; check the VIN-specific diagram for your exact layout.
How can I tell if a fuse is blown?
A blown fuse typically shows a broken filament or a darkened shell. Remove the fuse and inspect; if needed, replace with a fuse of the same amperage and type. If it continues to blow, there may be a short or overloaded circuit.
Look for a broken filament or darkened shell. Replace with the same rating and test the circuit; persistent blowing needs a professional check.
What is the difference between fuses and circuit breakers in this setup?
Fuses provide overcurrent protection by melting when overheated, while breakers trip to interrupt power and can be reset. RVs may mix both; consult the diagram to understand which protects each circuit.
Fuses melt to stop power; breakers trip and can be reset. The diagram shows which protects which circuit.
Can I replace a fuse with a higher amperage fuse?
No. Using a higher amperage fuse can allow wiring to overheat, posing a fire hazard. Always match the original amperage rating unless a qualified technician advises otherwise.
Don’t upsize the fuse. It risks overheating wiring; consult a tech before any change.
What tools do I need to read the fuse box diagram effectively?
Keep a flashlight, a multimeter, a fuse puller, and spare fuses of common ratings. A copy of the Ford F53 fuse box diagram or VIN-specific manual is essential.
Flashlight, multimeter, fuse puller, spare fuses, and the VIN-specific diagram.
“Understanding the fuse box diagram is the first step toward safe, effective RV electrical maintenance. A solid diagram reduces guesswork and lowers the risk of wiring damage.”
Highlights
- Know where to locate the F53 fuse panel in your RV
- Read the label, amperage, and circuit names on the diagram
- Replace fuses with identical amperage ratings
- Use proper safety tools and PPE when working on wiring
- Consult a professional for repeated fuse failures