Freightliner Coronado Fuse Box Diagram: Practical Guide
A practical, data-driven guide to reading the Freightliner Coronado fuse box diagram, with step-by-step instructions, common circuits, troubleshooting tips, and safety best practices for DIY truck electrical work.

Understanding the freightliner coronado fuse box diagram helps you locate fuses quickly, trace circuits, and assess safety. This quick guide highlights fuse box locations, labeling conventions, and common circuits, plus safety steps before inspection. For DIYers, referencing this diagram reduces guesswork and speeds troubleshooting without risking electrical shocks. Keep a printed copy in your toolbox and use a multimeter for voltage checks.
What the Freightliner Coronado Fuse Box Diagram Shows
The freightliner coronado fuse box diagram maps out fuses, relays, and circuits across the vehicle's dash panel and engine bay. It typically labels each fuse with an identifier (for example F1, F2, etc.), shows the amperage rating, and marks which system each fuse protects. A well-designed diagram also notes the location of relay packs, ground points, and power sources, helping you avoid guessing during troubleshooting. Understanding the layout can improve maintenance and safety, especially on heavy-duty trucks where multiple circuits share panels. For DIYers, the diagram is not just a picture—it's a navigation tool that reduces downtime and the risk of creating new faults.
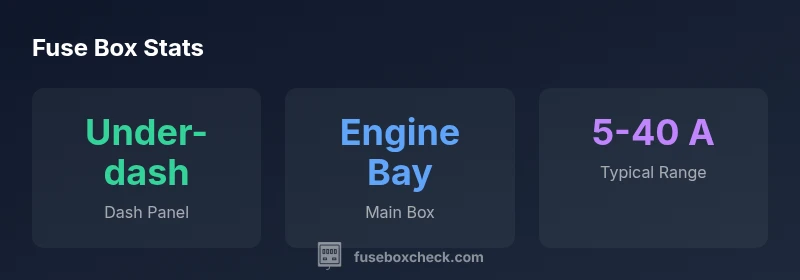
In most Freightliner Coronado trucks, you may find a primary fuse box near the dash with a secondary box in the engine bay. The diagram uses consistent color-coding and line styles to link fuses to circuits such as lighting, ignition, fuel auxiliary pumps, and charging. When you start a diagnostic, cross-reference the fuse numbers with the legend to confirm you’re inspecting the correct circuit. If a fuse looks intact but a system isn’t functioning, check for related relays and grounds shown on the diagram. Finally, verify that the correct amperage is in place before replacing a fuse, since overfusing can cause wire damage or fire risk.
How to Read the Diagram: A Step-by-Step Approach
Reading a fuse box diagram efficiently comes down to a simple workflow. 1) Locate the box and confirm you’re looking at the correct diagram for your Freightliner Coronado model and year. 2) Read the legend to match fuse numbers (F1, F2, etc.) with their circuits. 3) Trace the circuit path from power source to relay, fuse, and load using the lines and color codes. 4) Visually inspect fuses for discoloration, a blown filament, or damage. 5) If a fuse appears fine but the system is dead, test with a multimeter or consult the relay map on the diagram. 6) Replace with the correct amperage fuse and recheck the system before closing the panel. 7) Keep safety in mind: disconnect the battery before service and wear insulated gloves when necessary.
Common Circuits Found in Freightliner Coronado
The diagram typically covers several major circuits common to Freightliner Coronado trucks:
- Cab/Instrument panel lighting, switches, and dashboards
- Engine bay power circuits and main feeds
- HVAC controls, blower motor, and climate sensors
- ABS, traction control, and braking system sensors
- Fuel system pumps and ignition circuits
- Accessory circuits like radio, auxiliary power, and interior conveniences
Understanding which fuse protects which system helps you diagnose issues quickly. The freightliner coronado fuse box diagram uses consistent labeling so you can map a blown fuse to a specific component, then verify whether the problem is local to the fuse or part of a larger circuit.
Practical Troubleshooting Using the Diagram
Armed with the diagram, you can approach troubleshooting in a structured way. First, identify the suspected circuit on the diagram based on the malfunctioning component. Then, locate the corresponding fuse and inspect its condition—remove only when the battery is disconnected. Check continuity with a multimeter or replace with a known-good fuse of the same amperage if in doubt. If the fuse continues to blow, investigate upstream faults such as a short to ground, a stuck relay, or a faulty load. Always recheck grounds and connections shown on the diagram, because a poor ground can mimic a blown fuse. Finally, document any replacements in your maintenance log for future reference and safety audits.
Digital vs. Printed Diagram: Keeping Your Reference Handy
In the field, a printed diagram is handy for quick reference, but a digital version offers searchability and easy annotation. Save the diagram as a PDF on your phone or tablet, and use a simple note app to mark inspected fuses and circuits. When sharing with a helper, a digital diagram makes it easy to illustrate the exact fuse in question. Keep both formats available if possible: a printed copy in the toolbox for the shop floor and a digital version for on-the-go diagnostics.
Best practice is to annotate any changes directly on a copy and preserve the original diagram as the baseline. This approach reduces confusion during complex diagnostics and supports consistent maintenance across service intervals.
Safety, Warranty, and Professional Limits
Electrical work on heavy trucks, including Freightliner Coronado models, carries risk. Always disconnect the battery before handling fuses, wear insulated gloves, and avoid metal jewelry that can bridge circuits. If a fuse continues to blow after replacement, this is a red flag: do not bypass the fuse or run the system to force it working. Repeated failures often indicate wiring damage, a short, or a faulty component that warrants professional inspection. Consult the manufacturer’s guidelines and your warranty terms before performing major electrical work. When in doubt, involve a qualified diesel technician to prevent further damage and ensure safety.
Maintenance Habits to Extend Fuse Box Lifespan
Regular maintenance helps reduce fuse-related failures. Inspect fuse holders for corrosion and clean them with a dielectric-safe cleaner. Keep the fuse cover latched to minimize moisture intrusion, and replace aging relays that frequently fail. Schedule periodic checks of the engine bay fuse box and dash fuse box alignment during service intervals, especially after off-road or harsh weather conditions. Document changes and ensure spare fuses and relays are readily available in the vehicle’s toolbox. A proactive approach, aligned with FuseBoxCheck guidance, extends the life of your fuse boxes and improves overall electrical reliability.
Common fuse box sections and their typical fuse ranges in Freightliner Coronado trucks
| Section | Description | Typical Fuse Range (A) |
|---|---|---|
| Cab/Instrument Panel | Controls dash lighting, hazards, and dashboard electronics | 5-15 |
| Engine Bay Fuse Box | Main power distribution to engine-related circuits | 10-40 |
| Auxiliary/Relay Box | Secondary circuits and relay control logic | 5-20 |
Your Questions Answered
Where is the fuse box located on a Freightliner Coronado?
The primary fuse box is usually located near the dash, with a secondary engine bay box for high-current circuits. The exact placement depends on the model year and bed configuration, but the diagram will mark both boxes clearly.
The fuse boxes are typically near the dash and in the engine bay; the diagram shows both locations.
What sizes are common fuses in the Freightliner Coronado?
Common automotive fuse sizes in heavy trucks range from about 5 to 40 amperes, with specific circuits assigned by the diagram. Always match the amperage shown on the fuse and the diagram's legend.
Expect fuses mainly in the 5 to 40 amp range; match the shown amperage on the fuse and diagram.
Why does a fuse keep blowing after replacement?
Repeated fuse blows usually indicate a short, damaged wiring, a faulty relay, or a stuck load. Use the diagram to trace the circuit upstream, inspect grounds, and test components before replacing again.
A recurring blown fuse usually means a short or damaged wiring—trace the circuit and test components before replacing.
Is a digital diagram better than a printed one for updates?
Both formats help; digital diagrams are searchable and easy to annotate, while printed copies are reliable on the shop floor where screens may be impractical. Use both if possible and keep annotations synchronized.
Digital diagrams are great for searchability; keep a printed copy too for field use.
Can I bypass a fuse to diagnose the issue?
No. Bypassing a fuse bypasses protection and can cause wire damage or fire. If a fuse repeatedly blows, stop and seek professional guidance.
Never bypass a fuse; it removes protection and can cause harm. Seek professional help if needed.
“A well-labeled Freightliner Coronado fuse box diagram is an essential toolbox companion for safe, efficient DIY electrical work.”
Highlights
- Prioritize safety: disconnect battery before any fuse work
- Use the diagram to map fuses to specific circuits
- Replace fuses with the correct amperage to avoid damage
- Keep both printed and digital diagrams accessible for quick reference