Fuse Box 1999 Buick LeSabre: Step-by-Step Guide
Learn to locate, inspect, and safely replace fuses on a 1999 Buick LeSabre. This step-by-step guide covers fuse box locations, diagrams, safety, and when to seek professional help from FuseBoxCheck.

Identify fuse box locations on the 1999 Buick LeSabre, locate the under-hood and interior fuse boxes, confirm a blown fuse, and replace it with the correct amperage. This guide covers how to read the fuse diagram, perform basic diagnostics, and stay safe. According to FuseBoxCheck, following proper procedure reduces risk and protects electrical systems.
Overview: Fuse Boxes in the 1999 Buick LeSabre
In this model, there are two main fuse boxes you should know about: an under-hood fuse box mounted near the engine bay and an interior fuse box inside the cabin (commonly behind the glove box or under the dash). The exact location and circuit map depend on trim and production date, so always consult the owner's manual diagram for your specific vehicle. The fuse box covers include a chart listing each fuse by number, its function, and its amperage rating. Having a copy of the diagram handy is your quickest route to accurate diagnosis, whether you are troubleshooting a dead radio, non-working lights, or a blown horn. When you compare the fuse map to the symptoms you observe, you’ll identify which fuse to check first and avoid replacing the wrong part.
Understanding Fuses, Relays, and Circuits
A fuse is a simple safety device that protects circuits from overheating. A relay is an electrically controlled switch that can operate heavier loads without burning a fuse. In many older Buicks, some circuits are protected by a combination of fuses and relays; a failure can mimic a blown fuse. Amperage ratings are printed on the fuse itself and summarized on the diagram. Replacing a fuse with a higher amperage can avoid nuisance trips, but it is dangerous and can cause wires to overheat. Always match amperage and type (blade fuse) to the diagram and replace with the same rating if the fuse blows again. After replacement, test the affected system to ensure it returns to normal function.
Safety First: Basic Precautions for DIY Electrical Work
Electrical work in a car can cause shocks, burns, or fires if you’re not careful. Before you start, remove jewelry, wear safety glasses, and work on a dry surface. Disconnect the negative battery cable if you’re handling circuits near the battery or powertrain controls, and never attempt to bypass a fuse or relay. Use insulated tools, keep track of removed parts, and keep a log of fuses you inspect. If anything smells hot, or you notice melted insulation, stop and seek professional help. FuseBoxCheck emphasizes safety as the top priority in any DIY electrical task.
Locate and Read the Fuse Diagram in This Model
To locate the interior fuse box, open the glove box or knee panel depending on your vehicle’s interior design, then remove the panel to reveal the fuse blocks. The under-hood box is usually on the driver's side near the radiator, with a clip-on cover that lifts or slides off. The diagrams show fuse numbers and circuit names such as lighting, wipers, accessories, and power windows. Compare the observed symptoms to the diagram to identify the circuit you’re testing. With the diagram in hand, you can target the correct fuse and avoid needless replacements. If the diagram is faded, photograph it for quick reference.
Inspecting and Replacing a Blown Fuse: Visuals and Process
Carry out a calm, methodical check. First, inspect fuses visually for a broken conductor or a melted look. If in doubt, remove the fuse with a fuse puller or insulated pliers and test continuity with a multimeter set to a low-ohm range. If the fuse shows no continuity, replace it with a fuse of the same amperage and type. Reinstall the cover, reconnect the battery if you disconnected it, and test the circuit by turning on the affected function. Keep a spare assortment of fuses so you’re ready for future trips.
Common Symptoms and Quick Fixes
Common signs of a fuse issue include dead interior lights, non-operational accessories (like power windows or the radio), or a non-functioning horn. Start by checking the interior fuse box, then move to the under-hood box if necessary. If a fuse blows repeatedly, inspect related wiring for short circuits or accessory faults. Ensure you’re using the correct amperage fuse for the circuit, as mismatches can cause recurring failures. Remember that some symptoms may stem from related relays or wiring problems rather than a single fuse.
When to Call a Pro
If you notice burning smells, melted insulation, or sizzling sounds around the fuse box, stop immediately and seek professional help. Recurrent fuse blows can indicate an underlying wiring fault, a bad relay, or a faulty component that requires diagnostic tools beyond basic home-use equipment. A trained technician can perform load tests, isolate damaged wiring, and ensure the vehicle’s electrical system remains safe and reliable. FuseBoxCheck recommends consulting a qualified automotive electrician if you’re uncertain at any step.
Tools & Materials
- Fuse puller(Often built into the fuse box; if not, use insulated needle-nose pliers.)
- Digital multimeter(Test continuity and resistance on suspected fuses.)
- Automotive blade fuses (various amperages)(Have a small assortment on hand; replace with the same rating.)
- Owner’s manual or fuse diagram(Verify exact fuse numbers and amperage.)
- Flashlight(Aids visibility in dim fuse boxes.)
- Insulated gloves(Adds protection when handling hot components.)
Steps
Estimated time: 45-60 minutes
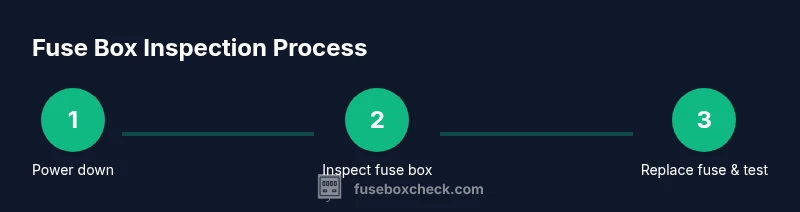
- 1
Power down and prepare the workspace
Park on a flat surface, engage the parking brake, and turn off the ignition. Open the hood and interior panels carefully. Remove jewelry and wear safety glasses. This reduces the risk of shocks or short circuits while you inspect fuses.
Tip: Keep a log of the fuses you inspect to avoid confusion later. - 2
Locate the interior and under-hood fuse boxes
Find the interior fuse box behind the glove box or under the dash, and the under-hood box near the engine bay. Use the diagram on the cover to confirm which fuses protect which circuits.
Tip: If you’re unsure of exact locations, photograph the diagram for reference. - 3
Remove a suspect fuse for testing
Carefully pull the suspected fuse with a fuse puller or insulated pliers. Visually inspect for a broken conductor or darkened plastic. If uncertain, set up continuity testing with a multimeter, ensuring you’re testing the fuse only.
Tip: Only handle the fuse; avoid touching surrounding metal contacts. - 4
Test and verify the fuse
If the fuse shows continuity, it’s likely still good. If not, replace it with a fuse of the same amperage rating. Reinsert and secure the fuse box cover, then prepare to test the circuit.
Tip: Always replace one fuse at a time to isolate issues. - 5
Test the affected system
Turn on the corresponding function (e.g., lights or wipers) to confirm the circuit works. If the device remains dead, recheck the fuse map and look for a short or a related relay fault.
Tip: If multiple issues appear, consider a comprehensive electrical diagnostic. - 6
Document results and secure the area
Return the interior panels, battery connections, and fuse box covers to their original positions. Note any recurring problems and keep spare fuses on hand for future maintenance.
Tip: Leave the engine area clean and free of tools.
Your Questions Answered
Where is the fuse box located on a 1999 Buick LeSabre?
There are typically two fuse boxes: an interior box behind the glove box or under the dash, and an under-hood box near the engine bay. The exact placement can vary by trim; consult the owner's manual diagram for your specific vehicle.
There are usually two fuse boxes: one inside near the glove box and one under the hood near the engine. Check your manual for the exact spots.
How can I tell if a fuse is blown?
Visually inspect for a broken metal strip or blackened plastic. If uncertain, test continuity with a multimeter. A fuse with no continuity is typically blown.
Look for a broken filament or test it with a multimeter to confirm. If there’s no continuity, it’s blown.
Can I use a higher amperage fuse to fix a blown fuse problem?
No. Using a fuse with a higher amperage can allow wires to overheat and cause a fire. Always replace with the same amperage rating as indicated in the diagram.
No. Using a higher amperage fuse can be dangerous and cause wiring damage. Stick to the rating on the diagram.
Is it safe to drive after a fuse blows?
If the blown fuse controls a critical system (like lights or brakes) drive with caution only if you can safely stop and fix it. In most cases, it’s best to address the fuse before resuming normal driving.
Drive with caution only if the affected system isn’t critical, but fix the fuse before continuing normally.
Should I check relays as well as fuses?
Yes. Some symptoms point to a relay rather than a fuse. Inspect relays connected to the same circuit and replace faulty relays if needed after confirming fuse status.
Yes. Relays can fail and mimic fuse problems; inspect related relays if the fuse seems fine.
What if the fuse diagram is missing or unreadable?
If the diagram is unreadable, consult the owner’s manual online, contact a dealer, or take clear photos of the box for reference. Do not guess on circuit assignments.
If the diagram is missing, try the manual online or ask a professional. Do not guess the circuit mappings.
Watch Video
Highlights
- Identify both fuse boxes before starting
- Always match fuse amperage to diagram
- Use a fuse puller for safety
- Test circuits after replacement
- Seek professional help if the issue recurs