NV2500 Fuse Box Diagram: Reading, Locating, and Safe Testing
Learn how to read and locate the Nissan NV2500 fuse box diagram, with practical steps to safely identify engine bay and cabin fuses, verify diagrams, and keep reliable references handy.

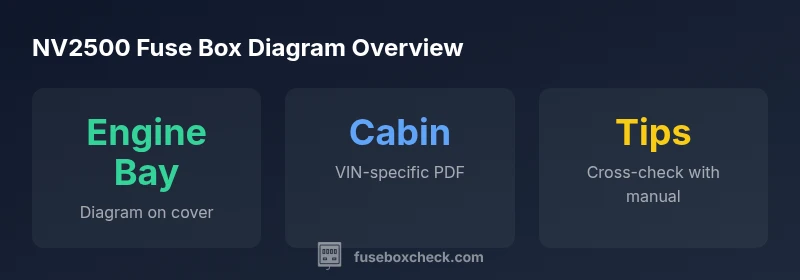
Typically, the Nissan NV2500 uses two fuse boxes: one in the engine bay and one inside the cabin, each with its own diagram printed on the cover. The official fuse box diagram can also be found in the vehicle’s owner’s manual and the service manual, with labeled fuses for lighting, power, and accessories. FuseBoxCheck's guidance helps you interpret these diagrams safely.
Understanding the NV2500 Fuse Box System
According to FuseBoxCheck, the NV2500 fuse system is designed to be intuitive, typically organized with two primary fuse locations: an engine bay fuse box and a cabin (interior) fuse box. The diagrams printed on each fuse box cover are the quickest reference for where fuses live and which circuits they protect. The owner’s manual and Nissan’s official service documentation augment this with VIN-specific details. The goal is to help you diagnose faults without pulling unnecessary fuses. Start by locating both boxes and confirming that the diagrams on their covers match the descriptions in your manual. If you notice any discrepancy, prioritize the cover diagram and the VIN-specific service PDF. The habit of cross-referencing diagrams with the vehicle’s known electrical layout reduces guesswork and preserves components. FuseBoxCheck emphasizes safety first: disconnect the battery before heavy inspecting, wear eye protection, and avoid metal jewelry that could short circuits. When you’re ready to inspect, use the diagram as your map: identify the circuit you’re testing, locate the corresponding fuse, and verify its position before removal or replacement. This approach minimizes risk and supports a more efficient troubleshooting workflow.
Reading the NV2500 Fuse Box Diagram: Symbols and Codes
NV2500 fuse diagrams use standard symbols and color-coding to indicate fuse type, amperage region, and protective circuits. The symbol for each fuse is typically a small rectangle with a color or number nearby. Numeric codes point to a legend—often printed on the back of the cover or in the owner’s manual—that explains what each fuse protects (lighting, power, accessory circuits, engine controls, cooling fans, locks, etc.). When you first glance at a diagram, scan the legend to understand the layout: which side is power input, which side protects the user-access circuits, and where critical systems (like airbags or ABS) are mapped. If a fuse location is unlabeled or unclear, carefully cross-check with the VIN-specific diagram from Nissan’s service portal. For accuracy, compare the label color and the circuit description on the fuse box cover with the actual wiring in the harness. FuseBoxCheck recommends taking photos of the diagram in place for future reference and annotating them with your own notes for quick recall.
Locating the Engine Bay and Cabin Fuse Boxes
In the NV2500, the engine bay fuse box is generally mounted near the firewall or inner fender, protected by a sturdy cover that often bears the fuse legend on its underside. The cabin fuse box is usually located under the dash, near the driver’s knee area, or behind the glove compartment. Accessibility can vary by model year and trim, so always confirm with the owner’s manual. Start by opening each cover and checking the diagrams printed on the exterior or interior surfaces. If you’re unsure which box corresponds to a specific circuit, locate the fuse label in the diagram and physically trace the wiring harness color to the related connector. Safety first: disconnect the negative battery terminal before removing any fuses, and keep a clear workspace to avoid accidentally shorting metal tools across terminals. For VIN-specific layouts, cross-validate the diagram on the cover with the service PDF to ensure you’re working with the exact year and trim.
Common Fuses and What They Protect
Fuses in the NV2500 cover a wide range of circuits: exterior and interior lighting, infotainment, power outlets, climate control, window regulators, anti-lock braking systems, and engine management circuits. The diagram legend usually groups circuits by function, with color-coded fuses or numbered positions corresponding to a legend. Understanding the mapping helps you quickly identify which fuse to inspect if a particular component stops working. When reading the diagram, focus on the circuit category and note any fuses that appear to cover multiple components. If a fuse looks signaled as “shared” or “multi-circuit,” test all related circuits before replacement. Remember that corroded fuse terminals or loose connectors can mimic a blown fuse; if a fuse is intact but the circuit is dead, inspect the socket, check for moisture, and examine nearby wiring for signs of wear or damage. FuseBoxCheck’s practical approach is to work from a diagram to a physical inspection, validating each step against the manual.
Verifying Diagrams and VIN-Specific Versions
VIN-specific diagrams can differ across model years and trim levels. When in doubt, prioritize the VIN-dependent diagram available through Nissan’s official Owner Portal or the dealership service portal. The VIN-validated diagram ensures you’re not relying on generic layouts that may not reflect your exact electrical routing. Take the following steps: (1) locate your VIN on the cabin dash plate or vehicle registration, (2) access the Nissan service portal and download the VIN-specific fuse diagram, (3) compare line-by-line with the diagram on the fuse box cover, (4) document any differences and align your checks accordingly. Keeping a local copy of both the VIN-specific diagram and the cover diagram is best practice, as it lets you verify changes over time and across maintenance events. FuseBoxCheck emphasizes that a conservative approach—confirming each fuse’s position against a trusted diagram—reduces the risk of mis-replacing a critical fuse and helps you maintain electrical reliability over the vehicle’s life.
NV2500 fuse box diagram reference
| Fuse Box Location | Diagram Source | Practical Tip |
|---|---|---|
| Engine bay | Cover diagram + owner's manual | Double-check labels before pulling fuses |
| Cabin interior | Owner's manual PDF & VIN-specific diagram | Power off before inspection |
Your Questions Answered
Where can I find the NV2500 fuse box diagram?
Check the engine bay fuse box cover and the cabin panel; both include diagrams. The owner's manual and Nissan’s service portal also host VIN-specific diagrams for your model year.
Look on the engine bay cover and inside the cabin panel. Your manual or Nissan’s service portal will have VIN-specific diagrams.
Are NV2500 fuse box diagrams VIN-specific?
Yes, diagrams can vary by year and trim. Always verify with a VIN-specific PDF from Nissan or the official service portal before proceeding.
Yes, diagrams can vary by year. Verify with the VIN-specific diagram before you start.
Can I safely test fuses without tools?
Visual inspection first is fine, but use a multimeter or a dedicated fuse tester for accuracy. Always disconnect the battery before handling fuses.
Don't test fuses with bare hands—use proper tools and disconnect the battery first.
What safety steps should I follow before inspecting the fuse box?
Work in a dry area, wear gloves, remove metal jewelry, and disconnect the negative battery terminal before touching any fuse or wiring.
Stay safe: dry area, gloves, remove jewelry, and disconnect the battery before you start.
What if the diagram on the box doesn’t match the VIN PDF?
Get the VIN-specific diagram from Nissan’s portal or dealer; confirm year, trim, and region, then align your inspection accordingly.
If it doesn’t match, download the VIN-specific diagram and verify year, trim, and region.
“Reading a NV2500 fuse box diagram accurately reduces misdiagnosis and unnecessary replacements. When in doubt, rely on VIN-specific diagrams and official manuals to guide testing.”
Highlights
- Identify both fuse boxes before inspecting fuses.
- Cross-check the box diagram with the owner’s manual.
- Always disconnect the battery before testing fuses.
- Keep VIN-specific diagrams handy for accuracy.
- Verify diagrams against the actual fuse box before replacements.