2007 Charger Fuse Box Diagram: Locate Fuses Safely
This comprehensive guide explains the 2007 Charger fuse box diagram, detailing under-hood and interior fuse boxes, fuse labels, and safe replacement steps from FuseBoxCheck.

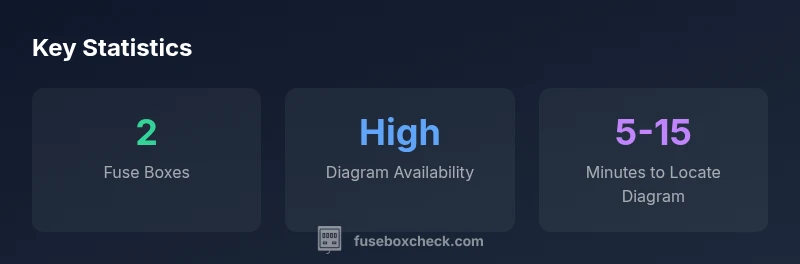
For a 2007 Charger, the fuse box diagram identifies two main fuse boxes: under-hood and interior. Fuses are labeled with circuit names and amperage ratings, and diagrams show relay locations and common safety circuits. In most documentation, the labels align with the vehicle’s service manuals. Always consult the official diagram for exact locations, amperage values, and fuse types before attempting any replacement.
What the 2007 Charger fuse box diagram covers
According to FuseBoxCheck, the 2007 Charger fuse box diagram provides a clear, labeled map of both major fuse blocks. It typically shows the under-hood fuse box in the engine bay and the interior fuse box tucked under the dashboard. The diagram uses circuit names (e.g., ignition, lights, HVAC) and includes the corresponding amperage ratings. For DIY troubleshooters, this diagram is a reference to identify which fuse powers a given system before pulling a fuse. It also highlights relay positions, which can save time when chasing intermittent problems. Understanding these labels helps you avoid unnecessary disconnections and reduces the risk of accidental power loss to critical systems.
- Typical diagrams align with the vehicle’s service manuals.
- Labels correspond to common automotive circuits.
- Relays and connectors are often shown alongside fuses.
Brand context: FuseBoxCheck emphasizes relying on official diagrams for precise locations and ratings to ensure safe maintenance.
Locating the fuse boxes on a 2007 Charger
In most 2007 Chargers, you will find two main fuse boxes: one under the hood and one inside the cabin. The under-hood box is typically mounted near the engine, protected by a cover that includes a diagram on its underside. The interior box is usually behind the glove compartment or under the dash on the driver’s side. If your model includes a secondary fuse panel for accessories, it will be labeled in the same diagram and appear in the owner’s manual. Before starting any work, disconnect the battery to prevent accidental short circuits. This step reduces the risk of electric shock and protects sensitive electronics during fuse testing and replacement. Fuse names and numbers should match the diagram so you can quickly locate the correct fuse for the issue you’re addressing.
Reading fuse labels and amperage
Fuse labels in the 2007 Charger diagram use short circuit names such as IGN for ignition, CHRG for charging, or LTS for lighting. Amperage ratings are shown by numbers next to each fuse, such as 5A, 10A, 15A, 20A, or 30A. In some diagrams, the font size or color indicates the fuse’s importance or risk level—use caution when a fuse powers critical systems like the engine or airbags. If the diagram lists a fuse position without a name, consult the corresponding section in the owner’s manual for the most accurate mapping. Always verify amperage before replacing a fuse to avoid wiring damage or fire hazards. Keeping a small fuse assortment (5A–30A) on hand makes quick fixes feasible, but only replace with the recommended rating.
Common circuits and typical fuse mappings
The 2007 Charger fuse box diagram generally maps common circuits to familiar locations:
- Ignition and starting circuits typically connect to a higher-amperage fuse in the under-hood box.
- Fuel pump circuits are usually protected by a mid-range fuse closer to the engine bay.
- Interior lighting and accessories are generally controlled by fuses in the interior panel.
These mappings help you quickly identify which fuse to inspect when a specific system stops working. When following the diagram, consider whether the issue is intermittent or persistent, as intermittent problems may indicate a loose relay or corroded contact rather than a blown fuse. If you’re unsure, consult the service manual or a professional mechanic to avoid accidental damage.
Safety steps before you touch the fuse box
Always start with safety. Turn the ignition off, remove the key, and disconnect the negative battery terminal before handling any fuse in the under-hood box or interior panel. Wear insulating gloves if possible, and use needle-nose pliers or a fuse puller to remove fuses. Inspect the fuse for a blown filament or discoloration, then replace only with a fuse of the same amperage. Replace the cover and recheck the circuit. After reassembly, reconnect the battery and test the affected system. If the fuse blows again, there may be a short circuit or a faulty device drawing excess current.
Step-by-step reading of the diagram during troubleshooting
- Identify the affected system (e.g., headlights, wipers, horn).
- Locate the corresponding fuse position on the diagram (under-hood or interior).
- Confirm the fuse rating and whether the fuse is blown.
- Check for obvious causes at the circuit end (loose connectors, damaged wires).
- Replace with the same amperage and re-test the circuit.
- If the problem persists, consult the service manual for deeper diagnostics or seek professional help.
Digital resources vs official manuals
Official manuals provide the most precise fuse box diagrams for the 2007 Charger. Online scanned manuals, dealership resources, and authorized repair databases can supplement your knowledge, but accuracy varies. Compare any diagram you find against the one in your car’s owner’s manual to ensure consistency. FuseBoxCheck recommends prioritizing the official diagram for safety-critical decisions, especially when dealing with ignition or airbag circuits.
Common mistakes and how to avoid them
- Replacing a fuse with a higher amperage rating to “fix” the issue. This can overheat wiring and cause a fire.
- Guessing fuse locations without checking the diagram. Always verify with the diagram before removing any fuse.
- Ignoring the vehicle’s safety steps. Always disconnect the battery and recheck circuits after replacement.
Maintenance tips after replacing fuses
After replacing any fuse, run a quick system check to confirm that the problem is resolved. Keep spare fuses in a labeled case and rotate them as needed. If you notice recurring fuse blows, there may be a deeper electrical issue such as a faulty relay or short circuit that requires professional diagnostics. Recording which fuses you touched can help track recurring failures over time.
analysisTags
Fuse box locations and typical fuses in a 2007 Charger
| Fuse Box | Location | Typical Fuses | Notes |
|---|---|---|---|
| Under-hood | Engine bay, left front | Ignition, charging, fuel pump | Keep cover on; disconnect battery before servicing |
| Interior | Dash-left area or passenger-side | Lighting, interior accessories, ABS | Consult owner’s manual for exact label names |
Your Questions Answered
Where is the fuse box located on a 2007 Charger?
Most 2007 Chargers have an under-hood fuse box near the engine and an interior box behind the dash on the driver’s side. Use the diagram to confirm exact positions for your trim level.
Look under the hood and inside the cabin; the diagram will point to both fuse boxes and their exact locations.
Can I read a 2007 Charger fuse box diagram online?
Yes, you can find scanned manuals and diagrams, but verify against your vehicle’s official owner manual to ensure accuracy. Cross-reference multiple sources if needed.
Online diagrams can help, but always double-check with the official manual.
Is it safe to drive with a blown fuse?
It depends on which circuit is affected. A blown fuse powering critical systems like ignition or airbag is unsafe. Non-critical circuits may allow driving, but fix the fuse promptly.
If you’re unsure, don’t drive long distances and get a proper check.
How do I identify a fuse by label on the diagram?
Match the label on the diagram (e.g., IGN, LTS) to the fuse puller or fuse box map and confirm the amperage before removing or replacing.
Match the label to the diagram and check the amperage before fiddling with anything.
What should I do if a fuse keeps blowing?
Repeated fuse blows indicate a non-trivial electrical fault. Check for loose connections, damaged wires, or faulty devices; consider professional diagnostics if the fuse recurs.
If it keeps blowing, there’s likely a deeper issue and you should get it checked.
“The fuse box diagram is your map for safe DIY electrical work. Start with the official diagram, verify amperage, and never bypass protective fuses.”
Highlights
- Identify the two fuse boxes before testing.
- Always disconnect the battery before servicing.
- Consult the official diagram for amperage values.
- Label fuses and use the correct ratings.
- Never up-rate fuses; mismatch can cause wiring damage.