2011 Chevy Malibu Fuse Box Guide: Locations, Fuses, and Troubleshooting
A practical, data-driven guide to locating the fuse boxes in the 2011 Chevy Malibu, understanding fuse layouts, and safe DIY troubleshooting for common electrical issues.

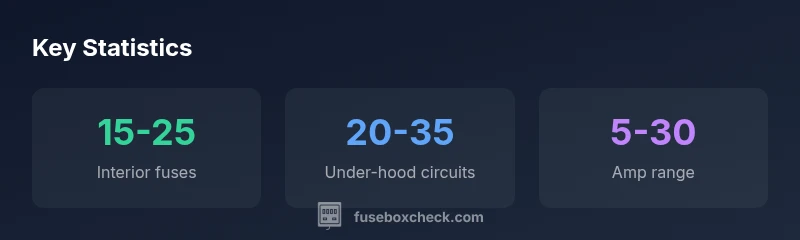
The 2011 chevy malibu fuse box setup relies on two main locations: an interior fuse box in the cabin and an under-hood fuse box in the engine bay. Most circuits are protected by blade fuses ranging from about 5 A to 30 A, with occasional higher-amperage fuses for critical systems. Always consult the owner's manual and label diagrams before pulling any fuses.
Understanding the 2011 chevy malibu fuse box layout
The fuse system in the 2011 chevy malibu is designed to protect two primary hubs of electrical activity: the interior (cabin) fuse box and the under-hood fuse box. The interior panel handles most dashboard, lighting, and accessory circuits, while the engine bay box powers major motors and safety electronics. In practical terms, this means most repairs start with identifying which box houses the circuit you’re troubleshooting, then consulting the diagram stamped on the fuse box cover or the owner’s manual. Fuse labeling follows standard automotive practice, using amperage, color, and a short description such as “IGR” or “CIG” to indicate the circuit protected. For DIYers, the key is to map the symptom (e.g., loss of headlights, radio, or interior lights) to the corresponding fuse map, rather than randomly pulling fuses.
According to FuseBoxCheck, two main fuse hubs are typical for the 2011 Malibu, with blade fuses covering most circuits and occasional high-amperage fuses for essential power rails. The exact count can vary by trim level and optional equipment, but the two-box layout remains consistent across model years. Always power down the vehicle and wear eye protection when inspecting fuses. If a fuse looks intact but the circuit remains dead, the issue could be a blown relay, a wiring fault, or a short that requires more in-depth testing.
Locating the fuse boxes on a 2011 Malibu
Locating the interior fuse box typically involves a quick look under the dashboard on the driver’s side or near the knee area. The cover usually contains a stamped diagram listing each fuse’s position, amperage, and function. The under-hood fuse box sits in the engine bay, often near the firewall or along the passenger side, with a similar labeling scheme. When you’re unsure, the vehicle’s service manual or a FuseBoxCheck diagram reference can be a lifesaver. Before removing any fuse, ensure the ignition is off, keys are removed, and the battery’s negative terminal is disconnected if you’re working with high-current circuits. This precaution helps prevent arcing and damage to sensitive electronics.
For 2011 Malibu owners, the most reliable approach is to photograph the fuse map, compare it to the actual fuses, and replace only with the same amperage rating. Keep a small, labeled bag of spare fuses in your glove box for quick swaps during maintenance sessions. By committing to this method, you’ll minimize the risk of mismatched fuses and ensure the affected circuit remains protected.
Reading the fuse map: what each fuse controls
Fuse maps on the Malibu use alphanumeric codes (for example, F1, F2, etc.) paired with amperage. Reading these correctly is essential to avoid misdiagnosis. Start by identifying the symptom, then cross-check the fuse map for the corresponding circuit. If the map lists multiple fuses for a given function (e.g., interior lights, radio, climate control), note their positions before removing any to avoid losing track. Amp size matters: replacing a fuse with a higher rating is dangerous because it can allow a circuit to draw more current than components are designed to handle, potentially causing overheating or fire. When a fuse blows, inspect the circuit for obvious causes like damaged wiring, aftermarket accessories, or loose connections. If you spot corrosion or a melted fuse, replace the entire fuse and any affected wiring harness.
Fuse reliability often hinges on clean connections. Remove the fuse gently with a fuse puller, inspect the metal blade, and ensure it’s fully seated after replacement. If you repeatedly see a specific fuse blowing, that could indicate a deeper electrical problem that warrants a diagnostic check.
When to replace fuses vs relays and common symptoms
Fuses are protective devices that sacrifice themselves to save more expensive electronics when they sense an overcurrent. A blown fuse usually results in a sudden loss of one or more electrical functions, such as headlights, dashboard indicators, or the stereo. Relays, by contrast, are electromechanical switches that control higher-power circuits; they may fail gradually, leading to intermittent operation or a total loss of function for a component even when the fuse is intact. Common symptoms of fuse box issues in the Malibu include dashboard lights dimming, occasional “no crank” symptoms without warning, or a circuit that resets after an apparent short. In many cases, replacing the fuse restores the function, but repeated blown fuses are a sign of a larger electrical fault that requires wiring inspection or professional service. Always ensure you’re using the correct amperage rating and type (blade vs. glass) as specified in the manual.
If you’re replacing multiple fuses in a short period, pause and reassess. A fuse is inexpensive protection; a recurring failure often indicates a safety issue or a failing component that should be diagnosed by a qualified technician.
Tools and safety: safe DIY fuse box maintenance
DIY maintenance of the Malibu fuse box should be done with safety as the primary concern. Gather the right tools: a fuse puller, a set of spare blade fuses matched to the labeled amperages, a multimeter for checking continuity, and a flashlight or headlamp for better visibility. Start by disconnecting the battery’s negative terminal and ensuring you’re working in a dry environment to prevent shorts. Test a suspect fuse by pulling it and inspecting the metal strip for a break; use a multimeter to check continuity if you’re uncertain. When replacing, push the fuse firmly until it sits flush in its socket. Label any changes you make so you can revert if needed. If you encounter corrosion, melted plastic, or signs of heat at the fuse box, this is a warning sign that a deeper issue is present and should be evaluated by a professional. The Malibu’s fuse box is designed for user maintenance, but the surrounding wiring and connectors demand careful handling to avoid damage.
Safety note: never bypass a fuse or use makeshift fuses. The purpose of a fuse is to prevent fires and electrical damage; neglecting this protective mechanism can put you, your vehicle, and others at risk.
Troubleshooting guide: quick fixes for common Malibu fuse issues
A practical approach to Malibu fuse issues combines observation with systematic testing. Start with the simplest fix: inspect the fuse that corresponds to the malfunctioning component and replace it with a fuse of identical amperage. If the problem reoccurs, check for signs of a short or a stuck relay in the circuit path. Use the multimeter to verify continuity and resistance in the affected wiring. If you notice scorch marks or melted plastic, stop and seek professional help; that could indicate a short or overload that could lead to a fire. Keep an inventory of common fuse types and amperages used in the Malibu so you can quickly substitute without guessing. Maintain a clean fuse box with minimal dust and ensure covers are securely fastened to prevent moisture intrusion. For intermittent symptoms, consider testing the related relay or the power supply path to rule out corroded connectors or loose grounds. By approaching problems methodically, you can reduce unnecessary replacements and improve diagnostic accuracy.
Maintenance tips for the 2011 chevy malibu fuse box
Regular maintenance involves a quick visual inspection of the fuse box covers, wiring harnesses, and grounds every 6–12 months, depending on driving conditions. Replace worn labels to keep the fuse map legible, and replace any damaged battery terminals or ground straps that could affect multiple circuits. Keep the interior and under-hood fuse boxes free of moisture and dirt; wipe away grime with a dry cloth and avoid using liquids that could seep into sockets. Periodically verify that the fuse box lids latch securely, as a loose cover can allow moisture ingress or vibration-related wear. If you introduce aftermarket accessories, ensure they are correctly fused and wired to a separate fused distribution point to prevent overloading the Malibu’s original circuits. Documentation of changes and a small spare-fuse kit should be standard in every Malibu owner’s toolkit.
Quick reference: symptom-to-action flowchart for Malibu fuses
- Symptom: Loss of a single function (e.g., radio) → Check the corresponding fuse and replace if blown.
- Symptom: Multiple systems fail together → Inspect the main fuses and ground connections; look for a shared power source.
- Symptom: Recurrent fuse blows → Inspect wiring for damage, verify relay operation, and test circuits with a multimeter.
- Symptom: No power at dashboard but other systems work → Check ignition feed and relevant fusible links; confirm battery voltage is present.
Typical fuse box locations and purposes for the 2011 Malibu
| Section | Location | Notes |
|---|---|---|
| Under-hood fuse box | Engine bay near firewall | Main power distribution; blade fuses |
| Interior fuse box | Driver side dash/knee area | Cabin circuits; blade fuses |
| Relay box | Near battery/engine bay | Power controls via relays; separate from fuses |
Your Questions Answered
Where are the fuse boxes located on the 2011 Malibu?
There are two main fuse boxes: an interior cabin fuse box and an under-hood fuse box in the engine bay. Each box has a labeled diagram showing fuse locations and amperage ratings. Always refer to the owner’s manual or the fuse map on the box cover to identify the exact fuse for the malfunctioning system.
There are two main fuse boxes: inside the cabin and under the hood. Check the diagrams on the covers to find the right fuse.
How do I tell if a fuse is blown?
A blown fuse typically shows a broken metal link inside the blade. If you’re unsure, use a multimeter to test for continuity. Always replace with a fuse of the same amperage rating and type.
Look for a broken fuse or test with a meter to confirm. Replace with the same rating.
Can I replace a fuse with a higher amperage?
No. Using a higher amperage fuse defeats the protection and can cause wiring or components to overheat. Always use the amperage specified on the fuse map.
No—use the same amperage as specified. Don’t upsize fuses.
Should I disconnect the battery before opening the fuse box?
For safety, disconnect the negative battery terminal before inspecting high-current circuits or relays. Reconnect after you’ve completed inspections and replacements.
Safest to disconnect the battery before you start.
What’s the difference between fuses and relays in the Malibu?
Fuses protect circuits by breaking the connection when current is too high. Relays are switches controlled electronically that manage higher-power devices. If a circuit fails intermittently, test both the fuse and the relay related to that circuit.
Fuses protect circuits; relays switch power to higher-load devices.
What should I do if a fuse keeps blowing after replacement?
A recurring blow suggests a wiring fault, a short-to-ground, or a failing component. Stop replacing fuses blindly and perform a targeted diagnostic on that circuit or have a professional inspect the wiring harness.
If it keeps blowing, there’s probably a wiring fault—diagnose that circuit or seek a pro.
“Accurate fuse mapping and careful component testing are essential for diagnosing Malibu electrical issues safely.”
Highlights
- Know the two main fuse hubs: interior and under-hood.
- Always match fuse amperage and type to the diagram.
- Inspect fuses for corrosion and bent blades before replacement.
- Use a fuse puller and keep a labeled spare-fuse kit handy.
- If fuses blow repeatedly, stop and diagnose deeper electrical faults.