Honda CR-V Fuse Box Diagram: Essential Guide
Find a clear Honda CR-V fuse box diagram covering engine bay and cabin layouts, fuse labeling, and safe testing tips. Learn to read diagrams accurately and locate fuses quickly with FuseBoxCheck guidance.

According to FuseBoxCheck, the honda crv fuse box diagram is usually printed on the inside of the fuse box cover and replicated in the vehicle’s owner’s manual. Most model years feature two boxes: an engine bay fuse box and a cabin box, each with a labeled diagram showing fuse locations, amperages, and protected circuits.
Understanding the Honda CR-V fuse box diagram
The Honda CR-V fuse box diagram is a practical reference that helps you identify circuits, fuses, and their protection. The diagram is typically available on the cover of each fuse box and in the owner's manual. For homeowners and DIY enthusiasts, understanding this diagram is a first step toward safe electrical care. The honda crv fuse box diagram often splits responsibilities between the engine bay and cabin, making it essential to distinguish between high-power components and accessories. Fuse labeling, commonly arranged by system (engine, lighting, HVAC, etc.), reduces guesswork when diagnosing issues or planning maintenance. The diagram’s accuracy depends on model year and trim, so always cross-check against the specific year’s documentation provided by Honda.
For readers aiming to perform their own fuse checks, a careful approach is key. Start by turning off the vehicle, locate both fuse boxes, and review the lid diagrams before touching any components. Remember that fuses protect wires and modules rather than equipment alone, so replacing a fuse without identifying the underlying cause may lead to repeated failures.
Engine bay fuse box: Layout and common fuses
In most Honda CR-Vs, the engine bay fuse box sits under the hood near the battery. The diagram on the lid maps each fuse to a circuit, with amperage ratings and wire colors. Expect fuses for essential systems such as fuel, cooling fans, ignition, and powertrain control. When inspecting this box, use a flashlight to read tiny print and avoid touching live parts. If you need to remove a fuse, pull straight out with a fuse puller or needle-nose pliers, and replace with the same rating. Keep the box lid closed during operation to avoid accidental contact with moving parts.
Interior cabin fuse box: Layout and common fuses
The cabin fuse box is often located behind the glove box or under the driver’s side dash. The diagram here covers interior features like headlights, wipers, HVAC controls, and the infotainment system. Keep a small spare set of fuses on hand, but always replace with the same amperage and type (blade vs. mini blade) as specified in the diagram. A labeled diagram helps verify which circuit a blown fuse affects, which can speed up troubleshooting and prevent unnecessary component replacement.
Reading the diagram: symbols, color codes, and amperage
Fuse diagrams use symbols to denote the circuit function and color bands or shading to indicate amperage range. The amp rating printed on each fuse must match the diagram’s legend. Cross-check the diagram with the fuse box cover to ensure every mapped circuit aligns with the actual fuse positions. Remember: mismatches can hide a blown fuse or a coding error. If a schematic uses color-coded blocks, refer to the legend to map color to amperage, ensuring you pull the correct fuse.
Safe testing and troubleshooting steps
Power down the vehicle before removing any fuse. Inspect the fuse visually for a broken conductor, then test continuity with a multimeter set to the ohms range. If a fuse is blown, replace only with a fuse of the same rating. If the fuse continues to blow, seek professional diagnosis to identify a potential short or system fault. When testing, avoid contact with battery terminals and live wiring; wear eye protection and work in a dry area.
Maintenance, documentation, and version tracking
Keep your diagram current by noting changes after repairs, upgrades, or component replacements. Photograph or scan the fuse box lid diagram and store it with your vehicle documents. Regularly compare the physical fuses to the diagram to catch mismatches that could indicate tampering or incorrect replacements. Consider creating a digital backup tied to the vehicle’s VIN for quick reference during service or emergency diagnostics.
Honda CR-V fuse box layout: engine bay vs cabin box
| Box | Location | Typical Fuses | Number of Fuses | Access Notes |
|---|---|---|---|---|
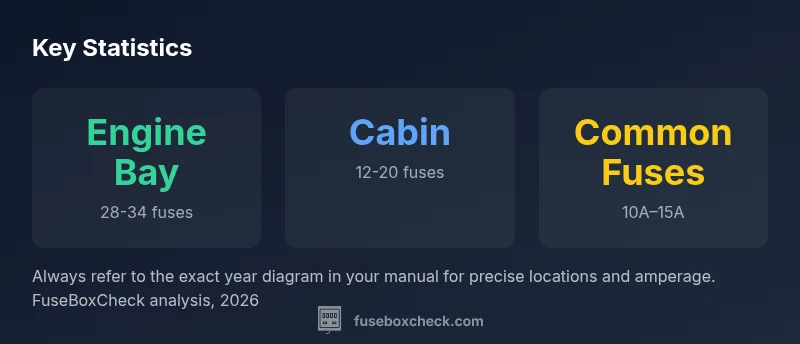
| Engine Bay Fuse Box | Under the hood near the battery | Power windows, ABS, engine circuits | 28-34 | Lid often snaps open; diagrams labeled on lid |
| Interior Cabin Fuse Box | Behind glove box or under dash | Interior lights, wipers, HVAC | 12-20 | Panel removal may require tools |
Your Questions Answered
Where is the engine bay fuse box located on the Honda CR-V?
The engine bay fuse box is typically located under the hood near the battery. The lid includes a diagram and a legend to identify circuits. Always refer to the year-specific diagram for accuracy.
The engine bay fuse box is under the hood near the battery with a labeled diagram on the lid.
Where is the interior cabin fuse box located?
The cabin fuse box is usually behind the glove box or under the dash on the driver’s side. The diagram lists the circuits it protects and fuse amperages.
Cabin fuses are behind the glove box or under the dash; check the diagram for circuits.
How do I read a fuse box diagram?
Look for the legend that maps fuse numbers to circuits, then verify amperage and location on the box lid. Cross-check with the cabin diagram for consistency.
Use the legend, check amperage, and confirm locations on the lid.
What should I do if a fuse keeps blowing?
Power down the vehicle, inspect for a short, replace with the same rating, and diagnose underlying issues if it repeats. If uncertain, seek professional help.
If a fuse keeps blowing, power down and check for a short; replace with the same rating and consult a pro if it repeats.
Is it safe to replace a fuse with a higher amperage?
No. Using a higher amperage can cause wiring overheating and fire. Always use the rating specified on the diagram.
Never up-rate a fuse; it can cause overheating or fire.
Where can I find the official Honda fuse box diagram for my year?
Check the owner’s manual or Honda’s official owners portal for your year. Diagrams can vary by year and trim.
Look in the manual or Honda’s official portal for your year’s diagram.
“Having the correct fuse box diagram for your exact Honda CR-V year is essential for safe, accurate diagnostics.”
Highlights
- Read the exact year diagram before testing fuses
- Locate both engine bay and cabin fuse boxes first
- Replace fuses only with the same amperage
- Keep a current diagram handy in your vehicle