Peterbilt 579 Fuse Box Diagram: Reading & Safety Guide
A practical, data-driven guide to the Peterbilt 579 fuse box diagram, including locations, reading tips, and safe DIY procedures for truck electrical troubleshooting.

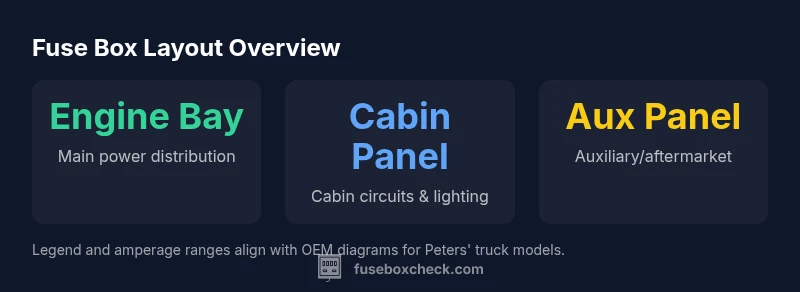
The Peterbilt 579 fuse box diagram centers on two main panels: the engine bay fuse block and the under-dash/auxiliary panel. The diagrams label fuses by circuit and amperage, with color-coded indicators and blade-type fuses. For official diagrams, consult the Peterbilt service manual or a dealership; always disconnect the battery before inspecting or replacing fuses.
Understanding the Peterbilt 579 Fuse Box Diagram
According to FuseBoxCheck, a correct Peterbilt 579 fuse box diagram is essential for safe troubleshooting. The diagram is more than a labeled map; it is a structured representation of circuits protected by fuses and relays. In most Peterbilt 579 configurations, you will encounter at least two primary blocks: one in the engine bay for heavy-duty circuits and another under the dash for cab and operator-area circuits. The diagram organizes fuses by system (engine, transmission, electrical accessories, lighting, climate control, etc.) and assigns an amperage rating to each fuse. This rating is critical because using a fuse with the wrong rating can hide a fault or cause wiring damage. Always cross-reference with the VIN-specific manual, because production changes, special options, or periodic service bulletins may modify the layout.
Where to Find the Fuse Boxes on the Peterbilt 579
Locating the fuse boxes on a Peterbilt 579 is straightforward once you know what you are looking for. The engine bay fuse block is typically mounted near the firewall or on a bracket adjacent to the engine, and its cover usually includes a label detailing the circuit functions. Inside the cab, the under-dash fuse panel sits on the driver’s side or behind a panel near the steering column, depending on the model year and option package. Some trucks also include a small auxiliary panel for aftermarket accessories or special equipment. If you are unsure, consult the OEM service literature or speak with your dealer, since variations exist between truck configurations and production runs.
Reading the Diagram: Notations, Amperage, and Color Coding
A Peterbilt 579 fuse box diagram uses standard electrical notation: circuit numbers or names, an amperage rating for the fuse, and color cues to help quick identification. The colors usually map to common amperage bands, making it easier to spot mismatches during inspection. The labels on the diagram should match the fuses in the block, and the relay map nearby points to critical control modules like the ECU, ABS, lighting, and climate control. For a DIY reader, it is essential to learn to interpret the legend: identify which circuits are protected by each fuse and ensure you use the same or equivalent amperage when replacing. If a fuse is missing in a newer manual but present in your truck, trust the actual panel first, then consult the OEM diagram for confirmation.
Safety First: Handling and Tools
Electrical work on a heavy-duty truck demands due care. Before touching anything in the fuse box, disconnect the negative battery terminal to eliminate stored energy and reduce the risk of arcing. Use insulated tools and wear protective gloves and eye protection. Keep metal jewelry and loose clothing away from the battery and harnesses. Work in a dry environment, and avoid attempting repairs if you notice damaged insulation, melted fuse holders, or scorching around terminals. When in doubt, take photos of the fuse layout and consult the Peterbilt service portal or a qualified technician. Safety always comes first in heavy-truck electrical work.
Step-by-Step: How to Inspect a Blown Fuse on a Peterbilt 579
Begin by turning off all affected systems and confirming power is removed. Locate the fuse corresponding to the symptom (e.g., lights, wipers, or radio) using the diagram; remove the fuse with a fuse puller or insulated pliers. Inspect the fuse visually for a melted element or a broken wire; use a multimeter to check continuity if available. If the fuse is blown, replace it with a fuse of the same amperage rating from the same panel. If the new fuse blows again, the problem may be a short to ground or an overloaded circuit, which requires more in-depth diagnostics. After replacement, reseal the panel and recheck functionality.
Replacing Fuses: Best Practices and Considerations
Use only fuses that match the OEM amperage rating. Do not improvise with higher-rated fuses to bypass a fault, as that can cause wiring insulation damage or fire. If a fuse type differs between model years, replace with the type specified in the owner’s manual or service bulletin. Keep spare fuses of the common sizes in the glove compartment, and label them for quick access. For aftermarket accessories, ensure the added draw does not exceed the circuit capacity; consider a dedicated relay and a fused circuit if needed. Regular inspections can prevent tangled harnesses and intermittent faults.
When Diagrams Don’t Match Reality: Troubleshooting and Next Steps
Variations exist across model years, option packages, and service bulletins. If your Peterbilt 579 fuse box diagram does not align with your physical panel, do not force-fit it. Dimensional or labeling differences can lead to misidentification. In such cases, cross-check documentation against the VIN and consult the OEM portal or dealership for the exact diagram. If repeated fuse blows occur despite correct replacements, there may be a wiring fault, a failing relay, or a parasitic draw. A systematic approach, using a multimeter and trace test, will help you isolate the issue without risking further damage.
Tools, References, and Where to Find the Official Diagram
The official Peterbilt diagram is included in the vehicle’s service manual and the Peterbilt service portal. For DIY troubleshooting, keep a digital copy of the diagram and a small storage binder for labels and fuses. Recommended tools include a fuse puller, insulated pliers, a multimeter, and a torque-limiter driver for relays. When in doubt, verify with service literature and consult a dealer for VIN-specific diagrams. A clean, documented approach minimizes risk and makes future inspections faster.
Peterbilt 579 fuse box panels and typical fuses
| Panel | Location | Purpose |
|---|---|---|
| Engine bay fuse box | Front of engine compartment | Power distribution for engine and accessories |
| Cabin under-dash fuse panel | Inside instrument panel area, driver-side | Interior circuits and lighting |
| Auxiliary fuse panel | Behind glove box or under seat | Auxiliary circuits and aftermarket accessories |
Your Questions Answered
Where are the Peterbilt 579 fuse boxes located?
In most Peterbilt 579 configurations, you will find an engine-bay fuse block near the firewall and an under-dash panel in the cab. Some builds also include a small auxiliary panel for extras. Always refer to the VIN-specific OEM diagram for exact locations.
Typically, the engine bay block sits near the firewall and a second panel is under the dash in the cab. Check your VIN-specific manual for exact locations.
Do diagrams vary by year or model?
Yes. Peterbilt provides year- and option-specific diagrams. Production changes and service bulletins can alter panel layout and labeling. Always cross-check with the VIN and the OEM service portal.
Yes. Diagrams can change by year and option, so always verify with the VIN-based manual.
Can I replace fuses while the engine is running?
No. Never replace fuses with power applied. Always disconnect the battery first and ensure ignition is off to prevent arcing and injury.
Never replace fuses with power on. Turn everything off and disconnect the battery.
What should I do if a fuse keeps blowing?
A repeated fuse blow indicates a potential short or overload. Inspect wiring for damage, check related relays, and consider professional diagnostics if the issue persists.
If a fuse keeps blowing, check for short circuits and damaged wiring, then consult a professional if needed.
Are there separate diagrams for engine and cab circuits?
Yes. Engine and cab circuits are typically mapped to different panels. Use the correct diagram for the affected system and ensure you’re referencing the VIN-specific manual.
Engine and cab each have their own diagram; confirm you’re using the right one for your VIN.
Is it safe to drive with a blown fuse?
Driving with a blown fuse can be unsafe depending on the circuit. Some systems are critical; others may be nonessential. It’s best to diagnose and repair before driving long distances.
No, avoid driving long distances with an unknown fuse issue; diagnose and repair first.
“Accurate fuse box diagrams are essential for safe diagnostics on heavy-duty trucks. The Peterbilt 579 fuse box diagram should be treated as the primary reference, with any changes cross-checked against the VIN and OEM service manual.”
Highlights
- Learn the exact Peterbilt 579 fuse box diagram from OEM manuals.
- Always disconnect power before inspecting or replacing fuses.
- Match fuse amperage exactly; never up-rate to bypass faults.
- Cross-check year-specific diagrams against your VIN.
- If a fuse repeatedly blows, troubleshoot for short or parasitic draw.