Engine Bay Fuse Box: DIY Inspection and Safe Maintenance
Learn how to locate, inspect, test, and safely replace fuses in your engine bay fuse box. This practical guide covers layout, tools, safety, and maintenance to keep your car’s electrical system reliable.

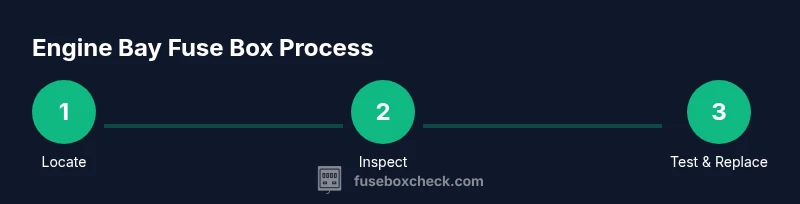
By the end, you’ll locate the engine bay fuse box, inspect fuses and relays, test for continuity, and safely replace blown fuses. This guide covers how to identify common causes of fuse failures, the right safety steps before working on a vehicle, and when to consult a professional. It uses plain terms and practical checks you can perform yourself.
What is the engine bay fuse box and why it matters
The engine bay fuse box is a centralized hub of fuses and relays that protect and control vital vehicle systems. In most cars, this box powers the engine management sensors, fuel system components, cooling fans, and engine bay lights. When a fuse blows or a relay fails, the corresponding circuit loses power, which can cause symptoms from a single dashboard warning light to a stalled engine. Understanding the engine bay fuse box helps you diagnose issues quickly, reduce guesswork, and prevent further damage. According to FuseBoxCheck, a well-maintained fuse box lowers the risk of unexpected electrical faults during daily driving. Familiarity with common fuse types and labeling will save you time and frustration when things don’t run as expected.
Common fuse box layouts in cars
Car designers use a mix of fuse box layouts inside the engine bay depending on make and model. You’ll typically encounter a compact block with blade fuses, a few larger maxi-fuses, and several relays. Some vehicles place the engine bay fuse box near the radiator support, others closer to the firewall. Diagrams inside the cover or the owner’s manual map each fuse to a system (e.g., headlights, cooling fan, or ignition). While the names vary, the underlying idea is consistent: protect circuits with the correct amperage and isolate faults so other systems stay powered.
Safety first: preparing to inspect the engine bay
Safety comes first when working around an engine bay. Disconnect the negative battery terminal to minimize the risk of short circuits while you inspect or replace fuses. Wear safety glasses and insulated gloves, and keep metal tools away from live circuits. Work in a dry, well-lit area, and avoid touching metal parts while the battery is connected. If you’re unsure about any step, consult the owner’s manual or a qualified technician. FuseBoxCheck emphasizes planning your work to avoid accidental shocks or damage to sensitive electronics.
Tools and fuses: reading circuit labels and choosing replacements
Before you begin, gather essential tools: a fuse puller or needle-nose pliers, a multimeter with a continuity setting, a flashlight, and a few replacement fuses that match the label amperage. Read the fuse box diagram on the cover or in the manual to identify the correct amperage for each circuit. Fuses are rated by amperage, and replacing a fuse with the wrong rating can create heat buildup or fail to protect the circuit properly. If a fuse label isn’t clear, check the owner’s manual or manufacturer’s website for exact specifications. Label any replaced fuses to track maintenance history.
Step-by-step: locate and access the engine bay fuse box
Begin by opening the hood and locating the engine bay fuse box using the diagram on the cover or the owner’s manual. Remove the cover carefully to expose the fuses and relays. Take a photo or make a quick sketch of the layout before removing any fuses, so you can reassemble correctly. Use the fuse puller or insulated pliers to pull a suspect fuse straight out. Recheck the next fuse in the same circuit before touching more components to avoid unnecessary disassembly. If the vehicle has multiple fuse blocks, verify you’re targeting the correct box for the engine bay.
Inspect fuses visually: signs of wear and corrosion
Visually inspect each fuse for a broken metal filament or darkened, burned areas. Some fuses may look normal but have internal micro-fissures that only show when tested. Look for signs of corrosion on fuse terminals or relay connectors, which can impede contact. If a fuse appears partially melted or discolored, replace it with a fuse of the same amperage rating. Keep a log of which fuses you inspect and their condition to spot patterns over time, such as repeated failures in the same circuit.
Test with a multimeter: confirming blown fuses and circuits
A multimeter helps confirm whether a fuse is truly blown or if there’s an upstream issue. Set the meter to continuity or resistance mode and test across the fuse terminals with the fuse removed. If the meter shows no continuity, the fuse is blown and should be replaced. If continuity is present, the fuse is sound, and the fault lies elsewhere in the circuit. Also test the relay coil and contacts if you suspect relay failure. Always disconnect the battery before testing to avoid shorting circuits.
Replacing fuses and relays correctly
When replacing fuses, always match the exact amperage rating printed on the fuse and the diagram. Using a fuse with a higher rating can overlook a legitimate fault and allow overheating; a lower rating may cause nuisance blowing. If a relay is faulty, replace it with the same part number or a compatible equivalent. After replacement, recheck the circuit with the key on or the engine running as appropriate. Reinstall the fuse box cover and verify nothing is loose or making contact with hot surfaces.
Post-replacement checks: test the circuit and functionality
With all fuses and relays replaced, perform a functional check on the affected systems before completing the job. Turn the ignition on, observe warning lights, and test the affected components (headlights, cooling fans, fuel pump, etc.). Listen for relay clicks and ensure there are no abnormal smells or heat near the fuse box. If issues persist, re-evaluate the circuit and consider a professional diagnostic, especially for critical systems like the ignition or fuel delivery. Routine checks now can prevent bigger problems later.
Preventive care: labeling, documentation, and routine checks
To avoid future guesswork, keep a labeled map of the engine bay fuse box with amperage ratings and circuit names. Update the diagram whenever you replace a component, and note the date of service. Regularly inspect for signs of corrosion and clean connectors with electrical contact cleaner. A concise maintenance log helps you track issues and plan preventive actions. FuseBoxCheck recommends implementing a simple quarterly inspection as part of your DIY routine.
Troubleshooting scenarios: common problems and quick fixes
If a fuse keeps blowing, there may be an underlying short in the circuit, a failing component, or a wiring fault. Start by verifying the fuse rating and inspecting the wiring harness for damage or loose connections. If a relay seems unresponsive, test its coil with a multimeter and swap with a known-good unit to confirm. In some cases, a damaged connector or ground fault will manifest as intermittent failures; cleaning and reseating connectors can restore reliability. Seek professional help if multiple circuits are affected or you find signs of melted insulation.
Tools & Materials
- Owner's manual / vehicle service information(Locate fuse box diagrams and amperage specs)
- Fuse puller or needle-nose pliers(Safely remove fuses without bending terminals)
- Replacement fuses (assorted amperages)(Match the labeled amperage exactly)
- Multimeter (continuity/resistance setting)(Test fuses and relays for proper function)
- Electrical contact cleaner(Clean corrosion from terminals)
- Insulated gloves(Protection when working around live circuits)
- Safety glasses(Eye protection during inspection)
- Flashlight / headlamp(Good visibility inside engine bay)
- Labeling tape & marker(Document circuit names and changes)
- Rags or lint-free cloth(Wipe away moisture or debris)
- Owner’s service record app or notebook(Maintain maintenance history)
Steps
Estimated time: 30-60 minutes
- 1
Prepare workspace and safety setup
Gather tools, ensure vehicle is cool, and remove jewelry. Put on safety glasses and gloves. This reduces the risk of heat burns and electrical shocks.
Tip: Double-check the battery is safe to work around before starting. - 2
Locate the engine bay fuse box
Use the owner's manual or diagram on the fuse box cover to identify the engine bay block. Open the hood, find the box, and note its orientation.
Tip: Take a photo of the labeling for reference during reassembly. - 3
Remove the fuse box cover
Carefully pry off the cover to expose fuses and relays. Avoid forcing tabs; if needed, wiggle slightly to release stubborn clips.
Tip: Keep track of removed pieces to avoid misplacing clips. - 4
Inspect fuses visually
Look for melted metal, discoloration, or corrosion on fuse ends. Replace any suspect fuses with the correct amperage.
Tip: If a fuse is questionable, test with the multimeter after replacement. - 5
Test fuses with a multimeter
Set to continuity or resistance. With the fuse out, touch the meter probes to the fuse terminals. No continuity means a blown fuse.
Tip: Test both ends and ensure probes are clean for accurate readings. - 6
Inspect relays and their sockets
Relays control high-current circuits. Check for corrosion and secure seating in sockets. Swap with a known-good relay if in doubt.
Tip: Relays can fail intermittently; test by swapping in a spare temporarily. - 7
Replace blown fuses and faulty relays
Install identical amperage fuses. Refit any relays that were swapped, ensuring snug connections.
Tip: Don’t exceed the fuse rating to avoid overheating. - 8
Reconnect and verify circuits
Reinstall the fuse box cover, reconnect the battery, and test the affected systems. Look for warning lights and confirm proper operation.
Tip: If a circuit still fails, recheck wiring for shorts or ground faults. - 9
Document changes
Record fuse types, amperages, and any component replacements. A simple log aids future troubleshooting and maintenance.
Tip: Keep the log with the service manual or digital notes. - 10
Inspect for heat and finalize
Run the engine for several minutes and observe the fuse box area for unusual heat, smells, or loose connectors.
Tip: If you notice heat or burning odor, stop and seek professional help. - 11
Routine follow-up checks
Schedule quarterly inspections of the engine bay fuse box and adjacent wiring as part of ongoing maintenance.
Tip: Set a reminder to review circuits after storms or heavy use.
Your Questions Answered
Where is the engine bay fuse box typically located in most vehicles?
In most cars, the engine bay fuse box is placed near the front of the engine compartment, often close to the radiator or inner fender. The exact location is shown on the cover diagram or in the owner’s manual. If you’re unsure, consult the manual or a service guide for your specific make and model.
Most cars have the engine bay fuse box near the front of the engine compartment, typically close to the radiator. Check the diagram on the cover or your owner's manual for the exact spot.
How do I know which fuse controls a specific component?
Refer to the fuse box diagram on the cover or in the manual. It lists each fuse’s circuit and amperage. If the diagram is unclear, check the vehicle’s service guide or use a multimeter to trace feeds from the battery to the component.
Look at the diagram on the fuse box cover or in the manual to match fuses to circuits, or trace the circuit with a multimeter.
Can I drive with a blown fuse?
Some fuses protect non-essential systems; others protect critical ones. If a major system is affected (ignition, fuel, or engine management), don’t drive until the fuse is replaced or the fault is diagnosed. Always consult the manual if unsure.
If the fuse affects critical systems like ignition or fuel, don’t drive until it’s resolved.
Is it safe to replace fuses without tools?
You can replace fuses with basic tools, but using a fuse puller or insulated pliers reduces the risk of shorting adjacent blades. Ensure the vehicle is off and the battery is disconnected before touching any components.
Use a fuse puller or insulated pliers and disconnect the battery before replacing fuses.
What should I do if a fuse keeps blowing after replacement?
Repeated blows suggest a short or excessive load in the circuit. Re-check wiring for damaged insulation, connectors, or a faulty component. If you can’t locate the fault, seek professional diagnostic help.
If fuses keep blowing, there’s probably a wiring fault or overloaded circuit—consider professional diagnostics.
Should I replace relays with aftermarket options?
Prefer OEM-spec relays or compatible equivalents. Mismatched relays can cause improper operation or voltage spikes. If you replace a relay, test the circuit carefully afterward.
Use OEM or compatible relays and test the circuit after replacement.
What maintenance helps prevent fuse box problems?
Regularly inspect for corrosion, clean connectors, keep replacements on hand, and document changes. A quarterly check of the engine bay fuse box helps catch issues before they become failures.
Do regular checks and keep a simple log of changes to prevent future fuse box problems.
Watch Video
Highlights
- Know the engine bay fuse box layout and its role in protecting circuits.
- Use the correct amperage when replacing fuses to avoid damage.
- Test fuses with a multimeter to confirm faults beyond visual signs.
- Document changes for reliable future maintenance.
- When in doubt, consult a professional to avoid risky mistakes.