2002 Tahoe Fuse Box Diagram: A Practical DIY Guide
Discover the 2002 Tahoe fuse box diagram, locate under-hood and interior panels, read labels, and troubleshoot safely with expert guidance from FuseBoxCheck.

According to the 2002 Tahoe fuse box diagram, there are two main panels: the under-hood fuse box and the interior fuse panel. Fuses are labeled for engine, cooling, electrical accessories, lighting, and safety systems, with relay locations and main fusible links shown for quick diagnostics and safe troubleshooting. Typical fuse sizes vary by circuit; consult the manual for exact amperages.
Understanding the 2002 Tahoe Fuse Box Layout
According to FuseBoxCheck, the 2002 Tahoe fuse box diagram identifies two main panels: the under-hood fuse box in the engine bay and the interior fuse panel behind the glove box or dash panel. The layout follows GM's standard approach from that era, grouping fuses by system such as engine management, cooling fans, lighting, ignition, and power accessories. The diagram also marks relay locations and the main fusible links that protect critical circuits. The two panels collectively power every major function of the vehicle, from starting and running the engine to interior climate control and in-car electronics. When you first study the diagram, note the orientation of the covers and the reference arrows that point to each fuse position. This helps prevent misreading the diagram during a fault inspection.
Locating the Under-Hood and Interior Panels
In most 2002 Tahoe models, the under-hood fuse box sits near the front of the engine bay, close to the radiator support. The interior fuse panel is usually located behind the glove box or under the dash on the driver's side, protected by a removable cover. Remove the panel covers with care, avoiding bending any tabs. Take a moment to photograph or sketch the panel orientation before you remove fuses for testing. The fuse numbers on the diagram correspond to the physical locations on the box cover, so keeping a reference handy will help you quickly map a blown fuse to its circuit. If you drive a different trim or a region-specific variant, the exact panel positions may vary slightly, but the labeling conventions remain consistent.
How the Diagram Maps Fuses to Circuits
The diagram uses a two-column layout: fuse position and circuit description. Fuses are typically numbered, with labels such as IGN for ignition, ECU for engine control, or LGT for lighting. Relays are drawn nearby to indicate which circuits are energized through a relay rather than a direct fuse. The main fusible links shown at the top or bottom of the panel protect large circuits, like the starter or alternator. While the diagram provides a high-level map, you should cross-reference the exact amperage and fuse type (blade vs. mini) printed next to each position. If the diagram shows a dotted line or dotted box around a group of fuses, that usually indicates a shared power source or a common ground reference, which is helpful when diagnosing multiple symptoms at once.
Reading Labels: Common Symbols and Abbreviations
Label conventions help you quickly identify function without inspecting every fuse. Common abbreviations include IGN (ignition), ECU (engine control unit), HUD (heads-up display, if equipped), ASD (automatic shutdown), and RTD (rear-defog). Symbols may indicate a fuse rating or a linked circuit, such as a dotted line for circuits that share a feed. The diagram might also show the location of fusible links in the wiring harness rather than a standard blade fuse. When in doubt, consult the vehicle’s owner's manual for a key to all abbreviations and symbols used in the exact diagram for your VIN.
Step-by-Step: Verifying a Blown Fuse Using the Diagram
First, set the vehicle off and remove the key, then disconnect the battery or at least ensure the ignition is fully off before touching the fuse box. Use the fuse puller to remove the suspect fuse while keeping it in sight. Compare its rating to the diagram, check for a blown filaments, and replace with a fuse of the same amperage and type. After replacement, reset affected systems and test functionality. If the fuse trips again, consult a professional, as there may be a short or a more serious electrical fault beyond a simple diagram.
Common Pitfalls and How to Avoid Them
Common mistakes include mixing up fuse counts between panels, using a higher-amp fuse to temporarily bypass a problem, or failing to reseal the panel cover properly. Always verify the VIN-specific diagram and amperage values for your exact Tahoe model. Keep a printed copy of the diagram in your repair kit, and do not rely on memory alone when diagnosing critical circuits like the ignition or airbags. Finally, never attempt a test with a live connection or while the battery is connected in a humid or wet environment.
Maintenance, Documentation, and When to Update Diagram
Regular updates to your fuse box diagram improve accuracy over time, especially if you install aftermarket accessories or notice circuit changes. Keep a digital copy linked to your service history and update it after any fuse replacement or relocation. When you buy replacement fuses, consider stocking a few spare values that match the common engine, lighting, and accessory circuits listed in the diagram. Save notes about any modifications and the exact date of changes. This practice reduces time spent on future troubleshooting and helps maintain vehicle safety.
What to Do If You Can't Find a Diagram
If the diagram isn’t readily available, start with the box covers—many panels print a miniature diagram or list of fuse numbers on their underside. If not, obtain a VIN-specific service manual or online subscription that includes the exact diagram for your Tahoe’s year and trim. You can also compare with diagrams from similar GM SUVs from the same era, but always verify any differences against the manual. If uncertainties remain, consult a professional technician who can safely read the diagram and guide you through the testing process.
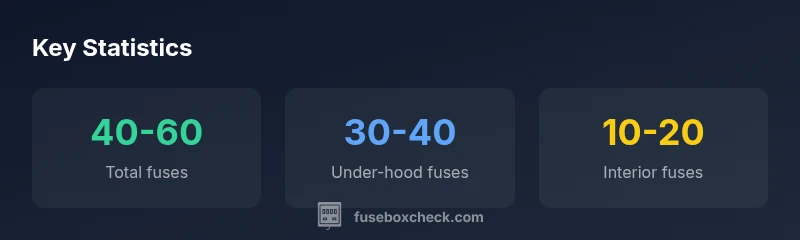
Fuse box layout summary for 2002 Tahoe
| Panel | Location | Fuse Count | Typical Fuses |
|---|---|---|---|
| Under-Hood | Front engine bay near radiator | 30-40 | Engine, Cooling, Emissions |
| Interior | Dash/driver side | 10-20 | Lighting, Instrument cluster, Accessories |
Your Questions Answered
Where can I find the official 2002 Tahoe fuse box diagram?
You can typically find the diagram in the owner's manual, GM service literature, or a certified online manual library. The diagram is also printed inside the fuse box cover.
Check the owner's manual or service manual; the diagram is usually on the cover or in the accompanying literature.
How many fuse boxes does a 2002 Tahoe have?
Two fuse boxes: one under the hood in the engine bay and one interior panel inside the vehicle.
There are two fuse boxes, one in the engine bay and one inside the cabin.
Are there differences in fuse layouts between trim levels?
Yes, some trims may have different accessory circuits; refer to the VIN-specific manual for exact diagrams.
It can vary by trim and year; check the VIN-specific diagram.
What amperage fuses are common for engine circuits in this model?
Amperage values vary by circuit; consult the diagram for the exact ratings.
Ratings vary by circuit; use the diagram to confirm.
Can I download a PDF of the diagram?
Yes, from GM's official service literature or trusted manuals; ensure the version matches your VIN.
You can download a VIN-specific diagram from official manuals.
What safety steps should I take before inspecting a fuse box?
Disconnect power, keep the battery disconnected, wear dry gloves, and use insulated tools; never test with metal objects.
Power off, dry hands, and use insulated tools before opening the panel.
“A correct fuse box diagram is the quickest way to diagnose power issues without risking further damage; always cross-check labels with the manual.”
Highlights
- Identify both panels before starting work.
- Refer to VIN-specific amperage values in the manual.
- Use the exact fuse type and rating when replacing.
- Label and organize fuses during inspection for future trips.
- Keep a current diagram handy for quick troubleshooting.