2012 Nissan Sentra Fuse Box Diagram: A Practical Guide
A thorough, data-driven guide to reading the 2012 Nissan Sentra fuse box diagram, covering engine bay and interior blocks, safe testing tips, and where to find official diagrams. Learn how to identify fuses by trim and VIN with confidence.

Because a 2012 Nissan Sentra fuse box diagram is trim- and region-specific, there is no single universal map. Most models use an engine-bay fuse block and a cabin fuse box. The official diagram appears in the owner’s manual or service manual for your exact trim, so rely on those factory diagrams for precise fuse locations and amperage ratings.
Why the fuse box diagram matters for a 2012 Sentra
For any DIY electrical work on a 2012 Nissan Sentra, the fuse box diagram is your road map. It shows which fuses protect critical systems like the engine, ignition, ECU, airbags, lighting, and cabin electronics. Importantly, the diagram is not identical across all cars with this model year due to trim levels, regional markets, and production variations. FuseBoxCheck emphasizes that you should always start by locating the diagram that matches your VIN. Relying on a generic image can lead you to the wrong fuse and trigger additional faults. A precise diagram helps you plan a safe workflow, reduces guessing, and minimizes the risk of accidental short circuits. In short, a good diagram saves time, preserves your vehicle’s reliability, and enhances safety during diagnostics.
Engine bay fuse box: layout, fuses, and identification tips
The engine bay fuse box is typically located near the firewall or along a side panel under the hood. In most 2012 Sentra trims, this block houses fuses for essential power delivery to the ECU, ignition, fuel injectors, and major engine sensors, as well as relays for starter and alternator circuits. The diagram labels each fuse with a designation like F1, F2, etc., and lists amperage. Because labeling and amperage can vary by trim and market, you should cross-check the diagram with the VIN-specific service bulletin when available. A common pitfall is assuming a fuse controls more than one system; in reality, individual fuses power discrete circuits. Handling these fuses requires care to avoid contact with hot components and to prevent accidental short circuits.
Interior fuse box: circuits it protects and common labels
The interior (cabin) fuse box protects circuits that control interior electronics: dashboard instruments, infotainment, power windows, climate control, and lighting. Labels may differ by trim, but you’ll typically see fuses for the radio, heater blower, lighting, cigarette lighter, and ABS/airbag indicators. The interior block is often mounted in the passenger footwell or under the dash. Because some Sentra variants place certain fuses in the interior block while others place them in the engine bay, confirming the exact diagram for your VIN is crucial. If you’re replacing a blown fuse, first identify the affected circuit in the diagram, then pull the corresponding fuse with the car off and the key removed to avoid short circuits. Always replace with a fuse of the same amperage rating to preserve safety.
Reading the diagram: a step-by-step approach
Begin by locating the VIN-specific diagram in your owner’s manual or service manual. Translate the fuse designations (F1, F2, etc.) to the components they protect, then verify amperage ratings and color codes if present. Next, check the location of both engine bay and interior fuses to plan your diagnostic path. If a fuse is blown, remove it and inspect the metal strip; a broken strip indicates failure. Before replacing, confirm no corroded terminals or damaged fuse holders exist. If uncertain, consult the Nissan service bulletin or contact a qualified technician. This methodical approach minimizes risk and keeps the vehicle’s systems intact while you diagnose issues.
Safe verification: testing fuses without risk
Testing fuses requires the right tools and safety precautions. A digital multimeter with a continuity test is ideal for checking fuse integrity, but never test live circuits with a metal probe while the circuit is energized. Start by turning the ignition off and removing the key, then use the multimeter to verify continuity across the fuse. If continuity is present, the fuse is good; replace it if there are signs of damage or if the system still isn’t functioning. For a quick non-contact check, you can inspect fuse terminals for signs of discoloration or corrosion. If a fuse is burnt or melted, replace it with the correct amperage rating and inspect the circuit for shorts or overloads. Document any abnormal findings and refer to the VIN-specific diagram for precise fusing details.
When the diagram changes by trim or region: what to do
In the Sentra, fuse configurations can differ by trim level and manufacturing region. If you notice discrepancies between your diagram and the car’s actual fuses, do not force a match. Use the VIN to pull the exact factory diagram from Nissan’s official materials or dealership databases. VIN-specific diagrams ensure you’re addressing the right circuits and safety requirements. If you’re unsure whether a fuse belongs to engine or interior circuits, check the circuit’s wiring harness and connector locations rather than relying solely on color or label. Finally, keep an updated copy of the VIN-aligned diagram in your glovebox for quick reference during future maintenance.
Tools and methods for locating fuses: reading diagrams with confidence
Gather a few essential tools before you start: a flashlight, a fuse puller or needle-nose pliers, a digital multimeter, spare fuses in the correct amperages, and a VIN-aligned diagram. For better accuracy, use a multimeter with a continuity feature to test fuses and connectors. When you pull a fuse, take a photo of its orientation and location for later reference. Carry out replacements with the vehicle off, and confirm that the circuit has no power before touching any metal contact points. With a clear diagram and the right tools, locating and testing fuses becomes safer and more efficient. FuseBoxCheck recommends keeping a current copy of the VIN-matched diagram in your toolkit.
How FuseBoxCheck helps: sources, references, and getting official diagrams
FuseBoxCheck consolidates factory diagrams, service bulletins, and field experience into actionable guidance for the 2012 Sentra fuse box layout. Our team analyzes available diagrams, notes common labeling practices, and highlights trim-related differences. For the best results, obtain the official diagram from Nissan’s manuals that correspond to your exact VIN. If you’re unable to locate the diagram, consider contacting a local Nissan service center or consulting the dealership’s service database. Always prioritize safety and verify the diagram against your VIN before performing any maintenance.
Authoritative sources and how to use official diagrams
When in doubt, consult reputable sources for fuse box diagrams and safety guidance. Government and major publications provide safety frameworks for electrical work and general automotive electrical safety guidelines. Always rely on the VIN-specific diagram for your vehicle and avoid cross-model generalizations. Official Nissan service documentation will provide the most accurate fuse box diagram for your 2012 Sentra, ensuring proper fusing, wiring integrity, and overall vehicle safety.
Typical fuse box layout in 2012 Sentra
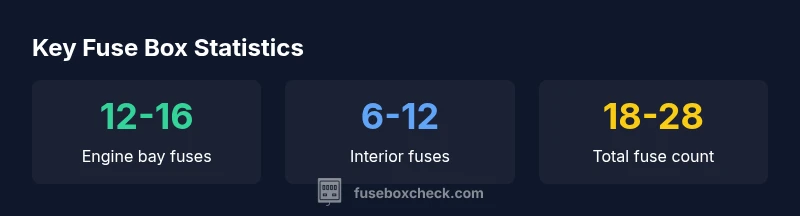
| Location | Fuse Count Range | Notes |
|---|---|---|
| Engine bay fuse block | 12-16 | Engine, ECU, ignition power |
| Interior fuse box | 6-12 | Dashboard electronics and interior lighting |
Your Questions Answered
Why does the 2012 Sentra fuse box diagram vary by trim?
Different trims use slightly different fuse labeling and circuit layouts. VIN-specific diagrams reflect these variations to ensure accurate identification of each fuse and its function.
The fuse layout varies by trim; check the VIN-specific diagram for accuracy.
Where can I find the official diagram for my 2012 Sentra?
Look in the vehicle’s owner’s manual, the factory service manual, or Nissan’s dealership service databases. These sources provide VIN-aligned fuse maps and amperage ratings.
Check the manual or dealership service databases for your VIN-aligned fuse map.
Can I reuse a fuse diagram from a similar year or model?
Reusing diagrams from other years or models is risky because fuse counts and circuit layouts can differ. Always confirm with a VIN-matched diagram for the exact vehicle.
Don’t rely on diagrams from different years; verify with your VIN diagram.
What tools do I need to read and test the fuse box?
You’ll need a flashlight, fuse puller, spare fuses, and a digital multimeter with a continuity test. These tools help identify and verify fuse integrity safely.
Grab a flashlight, fuse puller, spare fuses, and a multimeter to test safely.
Are there safety steps I should follow when working with fuse boxes?
Always disconnect the battery or ensure the ignition is off before removing any fuse. Use insulated tools and avoid touching live circuits to reduce the risk of electric shock or shorts.
Turn off power, use insulated tools, and avoid touching live circuits.
“Accurate fuse diagrams are essential for safe troubleshooting; always verify against the factory diagram for your exact trim and region.”
Highlights
- Identify trim-specific diagrams before starting work
- Use VIN-matched factory diagrams for accuracy
- Test fuses safely with proper tools
- Document fuse locations to aid future maintenance
- Rely on official manuals for amperage ratings