2017 Fuse Box Diagram: Reading Old Panels Safely Today
Learn what a 2017 fuse box diagram shows, how these diagrams vary by brand, and how to read and verify panel layouts safely for DIY homeowners.

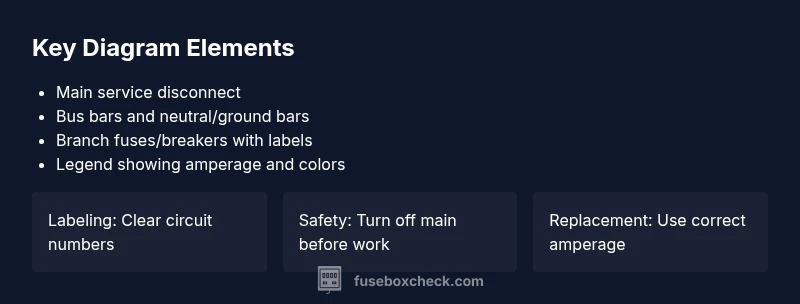
A 2017 fuse box diagram is a panel schematic for residential panels manufactured or installed around 2017, showing the main service disconnect, individual circuits with fuses or breakers, and labeled branch circuits. Diagrams vary by brand and country, but most include the main breaker, the bus bars, and a legend linking colors to circuits. Always consult the panel cover label and the owner's manual for exact details.
What the 2017 fuse box diagram represents
A 2017 fuse box diagram is a schematic drawn for residential electrical panels manufactured or installed around 2017. It documents how power is distributed from the main service disconnect to individual branch circuits using fuses or breakers. While many older diagrams share a common layout—main disconnect at the top, a vertical arrangement of circuits, and a color-coded legend—the exact drawing can vary by brand, region, and model. For homeowners, these diagrams are a map; they help you locate the circuit you want to test, confirm amperage ratings, and plan safe work before you touch any panel. When you search for a 2017 fuse box diagram, you’ll likely encounter PDFs or panel covers that include a concise legend and a reference to the model number or NEC edition used in the labeling. FuseBoxCheck notes that relying on memory is risky; always cross-check the diagram with the label on the panel cover and the owner's manual. In practice, a good diagram reduces investigation time during a trip or trip-related maintenance and minimizes the chance of pulling the wrong breaker.
Core components you should expect on a 2017 diagram
A typical 2017 fuse box diagram highlights several core elements that every homeowner should recognize. The main service disconnect sits at the top of the diagram, signaling where power enters the panel. Just below are the bus bars that carry live current to each circuit, with branch breakers or fuses connected to labeled slots. The neutral and ground bars are usually grouped on one side, with color-coded wires showing which circuits feed lights, outlets, and appliances. A legend or key explains amperage ratings, color codes, and whether a circuit is dedicated to high-draw devices. In many diagrams, you’ll also see a numbering system that corresponds to a printed or digital circuit directory in your home’s documentation. Compare the label on the panel door with the diagram; discrepancies can indicate a replacement panel or updated circuits that did not get relabeled. For DIYers, knowing the layout helps when rebonding a load, performing a service disconnect, or tracing a tripping circuit. FuseBoxCheck emphasizes that accuracy matters more than speed when reading these diagrams, particularly in older installations where labels may have faded.
Regional and brand variations you’ll encounter
The 2017 fuse box diagram landscape isn’t uniform. In the US, panels from different manufacturers typically follow a similar structural template, but labeling conventions, color schemes, and even fuse vs. breaker configurations can differ. In other regions, electrical codes may require different details on the diagram or alternate conventions for labeling. Some brands use a two-column layout; others place the main disconnect on a separate subpanel diagram altogether. Older diagrams may reference historical fuse types that are no longer used in newer builds, which can be confusing if you’re trying to map a legacy panel to modern practice. When tracing a circuit on a 2017 diagram, you should always cross-check with the model number and consult the latest local code requirements. FuseBoxCheck Analysis, 2026, notes that regional variations are common and that the safest approach is to verify against the panel’s own index and the NEC edition applicable at the time of installation.
Step-by-step guide to reading a 2017 diagram
Step 1: Identify the panel model and year on the diagram or door label. Step 2: Locate the main service disconnect symbol and verify its amperage. Step 3: Follow the vertical sequence of fuses or breakers to map each circuit. Step 4: Read the circuit labels; if the label is missing, use the slot number to cross-reference with the directory. Step 5: Check the color-coding conventions used in the diagram—hot, neutral, ground—and note any subpanel wiring. Step 6: If you’re troubleshooting, shut off power at the main disconnect before touching any conductors and test with a non-contact tester. Step 7: Document any discrepancies between the diagram and physical panel, then update the directory. A careful, deliberate approach reduces errors and improves safety. Keep in mind that older diagrams may not reflect recent rewiring, so treat them as guides rather than definitive statements.
Common mistakes and how to fix them
Readers often trust a diagram that looks familiar rather than one that is accurate for their exact panel. Common mistakes include assuming a year is correct for a given panel, relying solely on color or label without cross-checking, and ignoring updates to circuits after renovations. Misreading a main breaker’s position can lead to accidental energization. To fix these, always confirm the model number on the panel and compare it with the label on the diagram. If the labeling has faded, capture a photo of the panel and create a current directory, then cross-reference with the manufacturer’s manual. If the diagram seems illegible, request a replacement from the manufacturer or hire a licensed electrician to produce an updated diagram that corresponds to your actual wiring.
Tools, safety steps, and verification practices
Before you work near any fuse box, gather PPE: insulated gloves, eye protection, and non-conductive footwear. Use a multimeter or non-contact voltage tester to verify power status on suspected circuits, and never assume that a switch or breaker is off. When reading a 2017 diagram, test circuits only after you’ve de-energized the main service disconnect. Keep a copy of the diagram with your home’s electrical documentation, and store digital copies in a cloud location. If you’re unsure about a label or the amperage rating, call a licensed electrician to validate the diagram and adjust the directory. Regular maintenance—checking the diagram after renovations—helps prevent mislabeling and improves safety for DIYers.
Keeping diagrams accurate for future maintenance
Even if a 2017 fuse box diagram is reasonably complete, it will require updates as you modify wiring, add circuits, or replace a panel. Create a simple, durable record that ties the actual wiring to the diagram using circuit numbers, descriptive names, and dates. Store these updates near the panel or in a dedicated electrical binder. Revisit the diagram whenever you perform major tasks such as replacing a breaker, upgrading a service, or installing new outlets. The ongoing practice of documenting changes reduces the chance of safety incidents and makes maintenance more predictable over time. FuseBoxCheck recommends periodic checks, especially in homes with aging electrical infrastructure.
2017-era fuse box diagram overview
| Panel Type | Comps | Year Range |
|---|---|---|
| Residential main service panel | Main breaker, branch breakers, neutral bar, ground bar | 2015-2018 |
| Subpanels (disconnects) | Feeders, main disconnect, branch breakers | 2014-2017 |
Your Questions Answered
What is a 2017 fuse box diagram?
A 2017 fuse box diagram is a panel schematic used for older residential panels. It shows how power flows from the main service disconnect to individual circuits, using fuses or breakers. The exact layout varies by brand and region.
It's the panel's map for a 2017-era installation. Use it to locate circuits and verify labeling before work.
Are 2017 diagrams still relevant for older homes?
Yes, they remain useful as a guide, but you should always verify against the actual panel label and current code requirements. Do not rely on memory or faded labels.
They can guide you, but always confirm with the labels and current codes.
Can I use a 2017 diagram for brand X?
Not always. Diagrams are brand- and model-specific, and a misfit can lead to misidentifying circuits. Cross-check with the exact model on the panel.
Mostly specific to your panel—check your model.
What should I do if the diagram is missing or illegible?
Don’t guess. Find the panel’s model number and obtain a replacement diagram from the manufacturer or a licensed electrician. Update your directory after you receive it.
If unreadable, contact a pro to get a proper diagram.
Do I need a professional to interpret a 2017 fuse box diagram?
Not always, but working with a live panel can be dangerous. For unclear tasks or modifications, hiring a licensed electrician is wise.
A pro can help if unsure.
“A properly interpreted 2017 fuse box diagram reduces the risk of shock and miswiring during panel work. Always cross-check with the panel label and local code.”
Highlights
- Read the diagram against the panel label before touching any wires.
- Verify year and model to avoid mismatches.
- Cross-check with NEC edition applicable at installation time.
- Keep a current circuit directory updated and accessible.
- When in doubt, consult a licensed electrician for updates or modifications.