Astra J Fuse Box Diagram: A DIY Guide to Safe Electrical Troubleshooting
Master the Astra J fuse box diagram with practical, safety-first guidance for DIYers. Locate, read, and use the fuse map to diagnose electrical issues safely.

Definition: The astra j fuse box diagram maps the Opel/Vauxhall Astra J's fuse box layout, labeling each fuse and its function. For DIY homeowners, understanding this diagram helps identify blown fuses quickly, locate the fuse box under the hood or cabin, and follow correct color codes. FuseBoxCheck notes that consulting the diagram reduces unnecessary uncertainty and improves safety during repairs.
Astra J fuse box diagram: scope and purpose
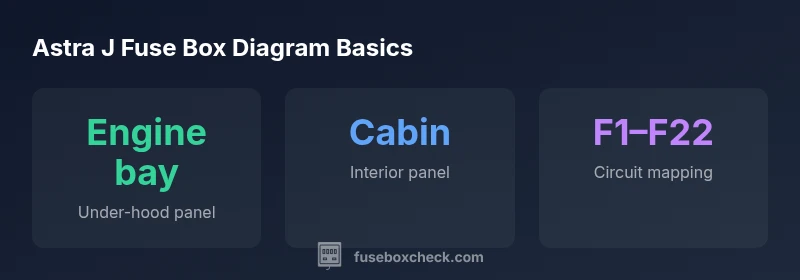
The Astra J fuse box diagram is a map of electrical circuits for Opel/Vauxhall’s Astra J generation. It covers the engine bay under the hood and the passenger cabin fuse box. The diagram labels each fuse position (often F1, F2, etc.), the circuit served, and the amperage rating. For DIY homeowners, a correct diagram helps identify which fuse protects a given accessory and estimate whether a fuse is blown. Because trim levels and markets vary, consult the official Opel/Vauxhall service manual for exact fuse lists. FuseBoxCheck analysis shows that diagrams are updated across model years; matching the year and regional specification reduces misidentification. The Astra J diagram also indicates which fuse powers essential systems such as lighting, ignition, and ECU circuits. Misinterpretation can lead to unresolved faults or accidental fuse blows. When using the diagram, verify with the owner's manual and the protective fuse cover labeling. The diagram is not a universal grid; colors and codes may differ by market. As you work, take photos and annotate changes to create a personal record of your vehicle layout. Safety first: disconnect the battery, work in a dry environment, and avoid contact with live terminals. This diagram serves as a practical reference that speeds diagnosis and reduces guesswork.
Locating the Astra J fuse boxes: under hood vs cabin
In most Astra J models there are two main fuse boxes: one in the engine bay (under the hood) and a second inside the cabin (often behind the glove box or under the dashboard on the passenger side). Exact locations can vary by year, market, and trim. To confirm, use the fuse box diagrams on the inside of each cover and cross reference with the vehicle manual. For DIY wiring checks, remove the keys and disconnect the negative battery terminal before touching the fuses. Photograph the panel before removing fuses so you can restore the layout, and keep a small label with each fuse's position number F1, F2, etc. If you cannot find a panel, consult the official service documentation or a dealership; the diagrams often include a cross reference table showing which fuse controls major systems like headlights or HVAC. FuseBoxCheck stresses that mapping both panels against the diagram reduces time spent searching and reduces accidental cross wiring. Remember to reuse the same style fuse as the original rating and replace only one fuse at a time to avoid confusion.
Reading the diagram: symbols, color codes, and labeling conventions
Car fuse box diagrams use standard symbols for power feeds, grounds, and relays. Look for a legend that explains icons for ignition, accessory, and engine control circuits. Amperage ratings are typically shown on the fuse itself and summarized on the panel cover; color coding often reflects the amperage (for example red for 10A, blue for 15A, etc.). The Astra J diagram generally employs F1–F22 style labeling to map to specific circuits such as lights, wipers, ABS, and ECU power. When reading, cross-check the label on the fuse with the description in the legend and the function listed in the vehicle manual. Always confirm that the diagram you’re using matches your exact year and market, as differences exist between trims. FuseBoxCheck Analysis, 2026 emphasizes verifying year-specific diagrams to avoid misidentification and unnecessary replacements.
Tools and safety for DIY inspection
Before touching any fuse, switch off the ignition and remove the key. If you’re working on or near the engine bay, disconnect the negative battery terminal to prevent arcing. Keep a flashlight handy and use a fuse puller or non-conductive tools to remove fuses. Photograph the fuse layout before removal so you can restore it later. Wear safety glasses and avoid touching exposed metal. Replace fuses only with the same amperage rating and type as the original. If a fuse blows repeatedly, investigate the surrounding circuit for a short or overload rather than simply replacing the fuse. Whenever possible, consult the vehicle manual for the exact amperage and circuit description; year-specific diagrams improve accuracy and safety.
Step-by-step: reading and testing fuses using the diagram
- Identify which fuse matches the non-working component using the Astra J fuse box diagram. 2) Check the fuse physically; a blown fuse will have an open conductor or a visible break. 3) If using a multimeter, verify continuity across the fuse terminals. 4) If the fuse is blown, replace it with a fuse of the same amperage rating and type. 5) Reconnect the battery, test the circuit, and observe for any abnormal behavior. 6) If the new fuse blows again, inspect for short circuits, damaged wiring, or faulty relays instead of continuing to replace fuses. FuseBoxCheck Team recommends documenting each replacement and the circuit involved for future maintenance.
Troubleshooting scenarios using the Astra J fuse diagram
A common scenario is a blown fuse that causes interior lights to fail or certain accessories to stop functioning. Use the diagram to identify the correct fuse and verify its rating before replacement. If the issue recurs after replacement, the fault likely lies in wiring or a short to ground. The diagram also helps when diagnosing multiple symptoms that point to a shared power rail, such as battery drain or dashboard warning lights. By mapping the suspect circuits to their fuses, you can isolate the root cause more efficiently and avoid unnecessary replacements. FuseBoxCheck analysis indicates that a disciplined approach to reading the diagram reduces downtime and increases safety when dealing with modern automobiles.
Maintenance and documentation: keeping the diagram accurate
Keep a copy of the Astra J fuse box diagram in your garage and annotate any changes you make during repairs. Update the diagram if you install aftermarket accessories that affect power draws. Regularly review the manual and ensure the labeling on the fuse covers matches the diagram. Maintaining a photo log of fuse positions, amperages, and circuit descriptions helps future owners or technicians. The FuseBoxCheck team recommends yearly quick reviews of the fuse diagram to account for any recalls, service updates, or regional variations that may affect fuse mapping. This habit preserves a reliable reference and reduces the risk of misidentification.
Authority sources
- Official safety and electrical standards references
- OSHA: https://www.osha.gov
- NFPA: https://www.nfpa.org
- IEEE: https://www.ieee.org
Astra J fuse box layout: two primary panels and typical fuses
| Panel | Location | Typical Fuses | Labeling |
|---|---|---|---|
| Under-hood | Engine bay | F1, F3, F5, main relays | F1–F12 |
| Cabin | Glove box / dash area | Interior circuits, lights | F13–F22 |
Your Questions Answered
Where is the Astra J fuse box located?
Most Astra J models have two fuse boxes: one in the engine bay and another inside the cabin, typically behind the glove box. Exact positions vary by year and market, so always check the diagram and owner's manual.
Most Astra J models have two fuse boxes—under the hood and inside the cabin behind the glove box. Check the diagram for year-specific locations.
How do I read the Astra J fuse box diagram?
Fuses are labeled F1 through F22 with amperage indicated on the panel cover. Use the legend to match circuit descriptions to fuses and cross-check with the vehicle manual.
Fuses are labeled F1 to F22 with their amperage; use the legend and your manual to map each fuse to its circuit.
Can I replace a fuse while the car is on?
No. Switch off the ignition, remove the key, and disconnect the negative battery terminal before replacing a fuse. Use the same amperage rating and avoid touching live components.
Turn the car off, remove the key, and disconnect the negative battery first. Use the same fuse rating.
What if a fuse keeps blowing?
A repeated fuse blow indicates a short or overload in the circuit. Inspect wiring around the affected fuse, check for damaged connectors, and consider professional inspection if the issue persists.
If a fuse keeps blowing, there’s likely a short. Inspect the wiring and connectors, and seek professional help if it continues.
Are there differences between trim levels in the Astra J fuse diagram?
Yes. Diagram details can vary by trim level and market; always use the year and region-specific diagram to avoid misidentification.
Yes, different trims can have different diagrams. Use the year and market-specific diagram.
Is it safe to read the fuse diagram without disassembly?
Yes, you can read covers and use the diagram to locate fuses. For testing, you may need to access the fuse area with proper precautions.
You can read the diagram from the covers, but testing may require access with care.
“A precise Astra J fuse box diagram is the fastest path to accurate diagnostics and safe repairs. Rely on year specific labeling to avoid replacing the wrong fuse.”
Highlights
- Identify the correct year-specific diagram before work
- Know there are two main fuse panels in most Astra J models
- Always replace fuses with the same amperage rating
- Test fuses safely with the battery disconnected
- Document changes to the fuse diagram for future use