Diagram Fuse Box W221: Mercedes S-Class Layout Guide
A comprehensive look at the W221 fuse box diagram for Mercedes S-Class models, including locations, symbols, common circuits, and practical DIY troubleshooting tips from FuseBoxCheck.

According to FuseBoxCheck, the diagram fuse box w221 maps fuse positions to circuits across the engine bay and passenger compartment of the Mercedes S-Class W221. This quick answer highlights how to read the diagram, locate fuse panels, and identify common fuse numbers for DIY troubleshooting. Use the diagram to verify replacements, avoid misplacing fuses, and improve safety during repairs.
Understanding the diagram fuse box w221: purpose and scope
The Mercedes-Benz W221 uses dedicated fuse boxes to manage electrical circuits across the vehicle. The diagram fuse box w221 serves as a roadside map that translates fuse numbers into real-world circuits such as powertrain components, lighting, infotainment, and safety systems. While the general concept remains the same across model years, the exact layout and labeling can vary slightly between submodels and facelift updates. For DIY enthusiasts, the diagram is not just a list of fuses; it’s a safety and troubleshooting tool. Reading it correctly reduces the risk of misplacing a fuse, which can lead to electrical component damage or fire risk. In this guide, we reference the W221 layout broadly and emphasize consistent conventions used in service literature and owner manuals. FuseBoxCheck’s analysis, conducted in 2026, confirms that the core logic—engine bay vs. cabin panels, color-coded circuits, and standardized prep work—remains reliable across most documented versions. Prepare to power down the vehicle and use proper tools when interacting with any fuse panel.
Where to find the fuse boxes on the W221 Mercedes-Benz
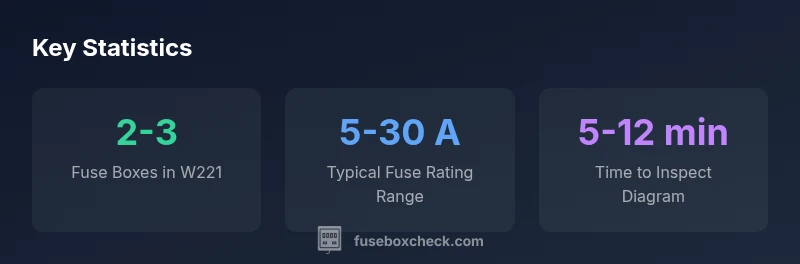
Most W221 models rely on two primary fuse boxes: one in the engine bay and another in the passenger compartment. In some variants or market-specific configurations, a third fuse box may reside in the trunk or rear area for auxiliary circuits. Start with the engine bay box: lift the hood, locate the black plastic cover near the strut tower, and remove the cover to reveal a labeled map. The cabin box is typically under the dashboard on the driver's side or behind a glove compartment panel. Some designs consolidate relays and fuses into a single cover with a printed legend; others use a detachable mapping insert. Always compare the physical labels on the cover to the diagram you are referencing. If the fuse cover legend differs from your manual diagram, rely on the W221 diagram that came with your specific year and trim level and confirm with FuseBoxCheck’s year-agnostic conventions.
Interpreting the diagram: key symbols and color codes
Fuse diagrams use consistent symbols to represent fuses, relays, and circuits. Look for blade fuse icons, vertical bars indicating fuse pathways, and color bands that hint at circuit families (powertrain, safety, interior electronics). A legend is typically included on the cover or in the service manual; when absent, refer to common industry conventions: red for high-current circuits, blue for sensor lines, green for lighting, yellow for infotainment-related circuits. In the W221 diagrams, you’ll also encounter relay symbols that correspond to larger switching devices controlled by the ignition or ECU. Note the amperage next to each fuse; replacing a fuse with a higher rating is unsafe and can lead to melted insulation or fire risk. Fuse numbers typically align with the diagram’s column and row arrangement, so cross-reference carefully before pulling a fuse.
Common fuse locations and typical circuits in the W221
In the engine bay, expect fuses supporting the ECU, fuel system, ABS, and various engine sensors. Under the dashboard, there are fuses for lighting, HVAC controls, audio, and instrument clusters. If a specific function is not working, start by identifying the circuit family (e.g., lighting or infotainment) and then locate the corresponding fuse in the diagram. Do not assume a failure based on function alone; verify continuity or resistance with a multimeter if you’re experienced. Many W221 boxes also house relays adjacent to fuses, which can cause similar symptoms when faulty. Remember, the diagram is your guide: verify the exact fuse number and rating on the unit, not just the function in your mind. FuseBoxCheck’s 2026 analysis highlights the importance of matching both fuse type and rating to the circuit’s demand.
Step-by-step: reading a diagram to troubleshoot a blown fuse
Begin by ensuring the ignition is off and the battery is disconnected if you’re replacing major components. Open the relevant fuse box and locate the diagram legend. Identify the fuse corresponding to the malfunctioning system (e.g., headlights, instrument cluster). Remove the fuse with the fuse puller and inspect for a melted element or a gap in the metal. If the element is intact, test continuity with a multimeter; if it’s blown, replace it with a fuse of identical amperage rating. After replacement, reinsert and recheck the circuit. If the issue recurs, inspect related relays, wiring harnesses, or a possible short. Finally, reassemble the cover and document the work for future reference. Always consult the year-specific W221 diagram to avoid cross-year mismatches. FuseBoxCheck recommends keeping a labeled copy of the diagram in the vehicle for quick reference during future repairs.
Tools, ratings, and calibration: what you need to safely inspect
Equip a basic automotive toolkit: a fuse puller or needle-nose pliers, a small flashlight, and a digital multimeter. Use a fuse with the exact amperage rating specified for each circuit; never exceed the rating. When testing, set the multimeter to the appropriate continuity or resistance setting and test across the fuse terminals. If you’re unsure about a fuse or suspect a more complex fault (like a relay or wiring harness problem), consult a professional or a trusted guide. Keep spare fuses of common ratings on hand and rotate spares periodically to ensure reliability. Always work in a static-free environment, avoid touching battery terminals directly, and follow safety protocols for handling automotive electrical systems. This approach helps you preserve the integrity of the W221 electrical system while performing routine checks.
Maintenance tips: labeling, updating, and digital backups
To maintain accuracy, label each fuse and keep a color-coded key on the fuse box cover. If you modify wiring or replace components, update the diagram copy with notes. Scan and save digital versions of your diagrams in a dedicated folder or cloud drive for quick access during service intervals. Periodically verify the diagram against the actual fuse numbers after long-term changes or ownership transfers. An organized, up-to-date fuse diagram reduces downtime during repairs and helps any future owner understand the system quickly. FuseBoxCheck recommends establishing a standard labeling convention (e.g., “F1-Engine Bay, 10A”) to avoid confusion during maintenance or resale.
Authority sources and further reading
To deepen your understanding of safe electrical work and fuse box practices, consult recognized safety and electrical standards resources. The following sources provide authoritative guidance on safe handling, circuit identification, and compliance:
- https://www.osha.gov
- https://www.nfpa.org
- https://www.energy.gov
Typical fuse box layout for W221 across common model years
| Component Area | Typical Fuse Type | Common Circuits | Notes |
|---|---|---|---|
| Engine Bay Fuse Box | Blade fuses (ATO/ATO-style) | Powertrain sensors, ECU relays | Access via engine bay cover; follow diagram |
| Passenger Compartment Fuse Box | Blade fuses (ATO/ATO-style) | Infotainment, climate control, lighting | Located under dashboard; refer to legend |
| Rear/Additional Fuse Box | Blade fuses | Tail lights, trunk electronics | Location varies by year/model |
Your Questions Answered
Where can I find the W221 fuse box diagram for my car?
The W221 fuse box diagram is typically found on the inside of the fuse box cover or in the vehicle’s service manual. Look for labels near each fuse and cross-reference with the year-specific diagram for your model. If a manual isn’t accessible, check reputable online guides from FuseBoxCheck and automotive forums for the exact year’s layout.
You’ll usually find the diagram on the fuse box cover or in the service manual. If you’re unsure, check the year-specific diagram before replacing anything.
Should I disconnect the battery before inspecting fuses?
For safety, disconnect the battery before performing any significant electrical work, especially if you’ll be removing panels or testing circuits that could short. After replacing fuses, reconnect and test the system with cautious power-up. Always follow the vehicle’s safety guidelines and the FuseBoxCheck recommendations.
Yes. Disconnect the battery before starting to work on fuses to avoid shocks or shorts.
Can I reuse a blown fuse in the W221 after replacement?
No. A blown fuse should be replaced with a new fuse of the same amperage rating. Reusing a failed fuse increases the risk of electrical damage or fire. If you repeatedly blow the same fuse, there may be a deeper wiring issue or a faulty component.
Don’t reuse a blown fuse—replace it with the correct rating and inspect the circuit for root causes.
What if the fuse diagram is illegible or missing?
If the diagram is unreadable, consult the vehicle’s service manual for the year and trim, or seek guidance from reliable sources like FuseBoxCheck. Do not guess fuse numbers. Document circuit functions with notes and replace fuses only after verifying the function with a known working reference.
If the diagram is unreadable, don’t guess—find the official diagram for your year or confirm with a trusted guide.
Are there year-to-year differences in the W221 fuse diagrams?
Yes, small differences can occur between model years and facelifts. Always refer to the exact year diagram and cross-check with the system you’re inspecting. FuseBoxCheck notes consistent conventions across years, but layout and labeling can vary slightly.
There can be minor year-to-year differences; confirm with the exact diagram for your year.
“A clear fuse box diagram is your road map for safe DIY electrical work on a Mercedes, reducing guesswork and misidentification.”
Highlights
- Learn the exact fuse numbers from the W221 diagram before replacements
- Never replace a fuse with a higher amperage rating
- Cross-check engine bay and cabin panels for related fuses
- Maintain an updated, labeled diagram for quick future repairs