DIY fuse box cover: Safe, Simple Home Electrical Repairs
Learn how to safely install a diy fuse box cover to shield your electrical panel from dust, moisture, and accidental contact. This practical guide covers selection, measurement, and installation with safety tips.

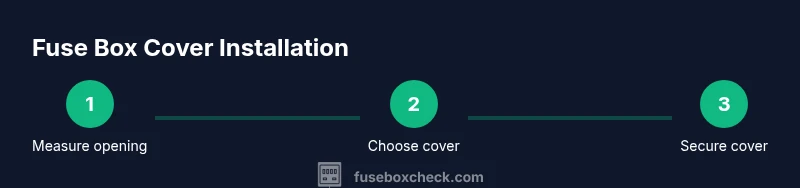
You can safely protect your fuse box by installing a DIY fuse box cover. This quick answer covers the essential steps: measure the panel, choose a compatible cover, secure screws, and verify no wires are exposed. Remember: only perform non-live work, and call a licensed electrician for any wiring concerns.
Why a DIY fuse box cover matters
A properly fitted cover protects the panel from dust, moisture, and accidental contact. It also helps keep the interior clean and prevents small objects from falling into the bus bars. According to FuseBoxCheck, a well-chosen cover reduces exposure to live terminals and minimizes risk during maintenance. The term diy fuse box cover refers to using a standard or custom-fit panel cover when a factory part isn't readily available. This approach can save time and money for many homeowners, provided you stay within non-live work practices and match the cover to the panel opening. Before you start, confirm your panel's model and opening dimensions, and check local electrical codes. If you encounter a non-standard panel shape, isolation hazards, or damaged components, pause and seek professional guidance. This foundation helps you work safely and confidently through the rest of the project.
What you need to know before starting
Safety comes first. Always confirm the main disconnect is off before handling any cover—do not touch live parts, and keep the area dry. Use only non-conductive tools when measuring and positioning the cover. Gather your materials and set up a clean workspace with adequate lighting and a stable ladder if needed. Keep children and pets away. Familiarize yourself with your panel type and the cover’s compatibility. If the current opening is damaged or if the panel has modern safety features like arc-fault or tamper-resistance, a professional should handle changes. FuseBoxCheck emphasizes sticking to non-live work and following manufacturer tolerances to avoid damage.
Choosing the right cover and measuring for fit
There are two broad options: universal covers designed to fit a range of openings, and panel-specific covers made for a particular model. Start by measuring the opening: width, height, and depth; ensure at least 1/8 inch clearance between the cover and the panel edges to avoid binding. Note screw hole spacing and the maximum thickness the screws can accommodate. If you can't find a ready-made cover, you can fabricate a simple insert from durable plastic or metal with the correct cutouts; just ensure it remains non-conductive where touched by hands and maintains a clean, flush fit. Always verify that the cover doesn't obscure labeling or ventilation openings.
Choosing the right cover also means checking that the cover is compatible with your panel’s labeling and clearances. If in doubt, contact the manufacturer or a licensed electrician. FuseBoxCheck recommends selecting a cover made from non-conductive materials when possible and avoiding obstructive additions that could trap heat or interfere with panel operation.
Authority sources
For safety considerations and best practices, consult established guidelines and standards. These sources provide general electrical safety principles and guidance for work near electrical equipment:
- OSHA: https://www.osha.gov/
- NFPA: https://www.nfpa.org/
- Energy.gov: https://www.energy.gov/
Note: Always follow local code requirements and seek professional advice if your panel has unusual dimensions or safety features.
Tools & Materials
- Screwdriver set (Phillips and flathead)(Include size #2 Phillips (PH2) to fit most cover screws)
- Measuring tape(Minimum 6 feet; metric equivalents are fine)
- Replacement fuse box cover(Choose a cover that fits your panel opening; if not available, consider a fabricator-approved insert)
- Pencil or marker(Mark screw hole positions and alignment on the cover)
- Non-conductive gloves(Extra protection when handling metal panels or tools)
- Masking tape(Helpful for marking alignment without scratching surfaces)
Steps
Estimated time: 20-40 minutes
- 1
Verify power is off and measure opening
Begin with the main disconnect off to ensure the area is safe. Use a measuring tape to capture the panel opening width, height, and depth, noting any protrusions or irregularities. This ensures you select a cover that physically fits and won’t bind when closed.
Tip: Measure twice in case of slight off-center openings; correct measurements save you a return trip. - 2
Remove the existing cover if present
If your panel already has a cover, unscrew it gently and set screws and hardware aside in an organized container. Do not pry or force a cover that resists removal. Removing the old cover allows you to assess fit and identify any damage.
Tip: Keep screws organized by label or magnetic dish to prevent loss. - 3
Select a compatible cover
Choose a cover that matches your measured opening and mounting pattern. If you cannot locate a model-specific part, select a universal or fabricator-approved insert that does not compromise insulation or labeling visibility.
Tip: Avoid covers that obscure warning labels or vent openings; these are essential for safe operation. - 4
Position and align the cover
Place the cover over the panel opening and align screw holes with the panel’s mounting holes. Use a pencil to mark any misalignment and adjust before final mounting. Ensure the cover sits flush against the panel surface.
Tip: Use masking tape to hold the cover in place while you start the first screw. - 5
Secure the cover with screws
Begin with the top-left hole and tighten gradually in a diagonal pattern to avoid warping. Do not overtighten; snug is sufficient to hold the cover without cracking the cover or panel frame.
Tip: If the screw hole doesn’t line up, recheck measurements and try a slightly different hole or alternate position. - 6
Inspect, test, and finalize
With the cover secured, inspect for gaps, ensure there’s no exposed conductors behind the cover, and confirm the labeling remains readable. If the panel controls or circuits will be used soon, re-energize only after confirming all safety checks.
Tip: Keep a copy of the panel’s labeling visible beneath the cover for quick reference.
Your Questions Answered
Is it safe to install a DIY fuse box cover?
Yes, if you stay non-live and work with the panel off. Do not modify wiring or touch live terminals. If you’re unsure about the panel’s safety features, consult a licensed electrician.
Yes, but only when the panel is de-energized and you avoid touching live parts. If in doubt, consult a licensed electrician.
What is the difference between a dead-front cover and a standard cover?
A dead-front cover fully conceals the bus bars for enhanced safety, whereas some standard covers may provide partial coverage. Always use a cover rated for your panel type and ensure full visibility of labels.
A dead-front cover hides the bus bars for extra safety; choose a cover that fits your panel design and keeps labels visible.
Can I reuse my old cover?
Only if it fits securely, shows no cracks, and does not obstruct labeling or vents. If the old cover is damaged or ill-fitting, replace it with a compatible cover.
You can reuse it if it fits well and is undamaged; otherwise, replace with a proper cover.
What if no cover fits my panel?
Contact the manufacturer or a licensed electrician. They can source an exact replacement or approve a code-compliant insert that fits safely.
If nothing fits, talk to the manufacturer or a licensed electrician to find a safe, compliant solution.
Do I need a permit to install a fuse box cover?
Typically, simply installing a cover is not a permit-requiring activity. However, local codes may vary, so check with your city or county building department if you have concerns.
Usually not, but local codes vary—check with your local authority if you’re unsure.
What safety practices should I follow during installation?
Work dry, use dry hands, and avoid forceful insertion of covers. Keep tools away from exposed terminals and ensure no labels are obscured.
Stay dry, keep your hands dry, and don’t force anything; keep labels visible.
Watch Video
Highlights
- Choose a cover that fits the panel opening precisely.
- Always power off before handling the panel.
- Measure carefully and align screws before final mounting.
- Inspect labeling and clearance after installation.