How to Install a Fuse Box Cover: A DIY Safety Guide
Learn how to install a fuse box cover safely with a step-by-step method, essential tools, and practical safety tips from FuseBoxCheck. Perfect for homeowners and DIY enthusiasts.

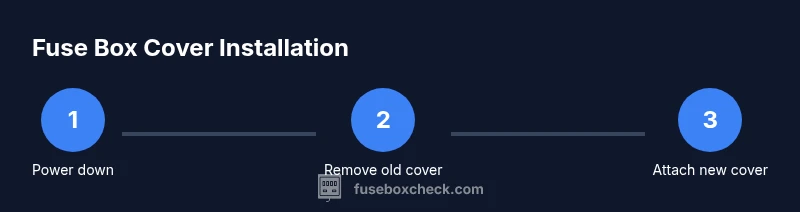
You will learn how to install a fuse box cover by selecting the correct model, safely shutting off power, removing the old cover, fitting the new cover, and securing it with screws. This task requires a matching cover, a screwdriver, gloves, and a flashlight. Follow these steps to ensure a flush, protective fit.
Why Installing a Fuse Box Cover Matters
A proper fuse box cover is a small part with a big impact on safety and reliability. It protects live components from moisture, dust, and accidental contact, and it helps prevent short circuits and arc faults caused by stray fingers or stray objects. According to FuseBoxCheck, ensuring you have a correctly fitting cover is an essential first step in any home electrical upkeep. The FuseBoxCheck team also highlights that modern covers often include safety features such as venting mechanisms and secure latch designs, which reduce the risk of exposure to energized parts. By prioritizing the right cover and a careful installation, homeowners can lower the odds of nuisance trips and improve panel longevity. In addition, using quality screws and ensuring a clean mounting surface makes future access safer and simpler.
When you plan this task, think beyond merely placing a cover. A well-fitted cover creates a protective barrier that protects wiring, breakers, and labeling from accidental damage. It also helps you locate the correct circuits quickly during future maintenance, a convenience that saves time and reduces risk during emergencies. FuseBoxCheck recommends treating the cover as a critical safety component rather than a decorative accessory. This mindset helps you stay proactive about home electrical safety and proper panel maintenance.
Safety Foundations Before You Begin
Before you touch a fuse box—or any electrical panel—prioritize safety. Power down the panel by switching off the main disconnect or the specific circuit you’ll be servicing. If you are unsure about which breaker controls the area, use a non-contact voltage tester to verify that the interior is de-energized. Wear protective gloves and eye protection, keep jewelry away from metallic components, and work on a dry, non-conductive surface. If you observe signs of damage, corrosion, or a buzzing sound from the panel, stop and consult a qualified electrician. FuseBoxCheck emphasizes that most injuries or damage occur when someone works on a live panel or uses damaged tools. Keep a clear space around the panel, so you can move freely and avoid wrenching or prying on internal parts.
Always follow local electrical codes and manufacturer guidelines for your specific cover model. If you rent, consult your property manager before performing any panel work. The goal is to complete a clean, safe installation without compromising the panel’s integrity or the home’s electrical system.
Choosing the Right Cover and Model Match
Not all fuse box covers are interchangeable. The key is matching the model, size, and number of breakers. Start by locating the model number on the interior or the back of the existing cover, then cross-check it with the new cover’s specs. The mounting holes should align with the box and the screws should thread smoothly without forcing. Some covers come with pre-installed gaskets or weatherproof seals; if your panel sits in a damp area, consider a cover with a gasket to maintain protection against moisture. FuseBoxCheck notes that a cover that sits flush against the panel face reduces gaps where dust can accumulate and minimizes the chance of accidental contact with live terminals. If you cannot find an exact match, contact the manufacturer or a licensed electrician for guidance.
A proper fit also means checking the labeling and ensuring any required clearances around the panel are respected. Poorly fitting covers can interfere with venting or access to breakers, which defeats safety purposes. Take your time to verify compatibility before buying or proceeding with installation.
Measuring and Prepping the Mounting Area
Accurate measurements save you time and ensure a secure fit. Use a tape measure to verify the distance between mounting holes and the panel edges. Clean the mounting surface and the surrounding area to remove dust, oil, or corrosion that could prevent a snug fit. If the old cover left marks on the box, gently wipe them away with a non-abrasive cleaner and a lint-free cloth. When preparing the interior, make sure you do not disturb wiring or terminals more than necessary. Keep screws organized in a small tray or magnetized dish to avoid losing them. If you notice any bent mounting ears or damaged threads, stop and consult a professional rather than forcing the new cover.
Document the panel’s orientation and which side is top for future reference. A little planning here reduces guesswork during final assembly and helps you avoid installing the cover upside down or misaligned.
A Quick Overview of the Installation Steps
The process is straightforward: verify power is off, remove the old cover, inspect the panel opening, align the new cover with mounting holes, secure the screws, and test the fit while power is restored. If you’re working with a gasketed cover, ensure the gasket seats evenly without gaps. Take your time to start screws by hand to avoid cross-threading, then snug them with a screwdriver. Do not overtighten, which could crack the cover or strip the holes. A flush, evenly secured cover ensures optimal protection and a neat appearance. Keep in mind that different cover designs may have slightly different access points, so always refer to the model’s instruction sheet for any model-specific steps or warnings.
If you encounter resistance or misalignment, back off, re-check holes, and re-align before continuing. Rushing through this step can lead to cracks or misfitting hardware, which compromises safety.
Correcting Common Fit Issues
If the new cover doesn’t sit flat, re-check the screws and holes for damage or debris. A small foreign object or misaligned hole can prevent full seating. Use a flashlight to inspect from different angles and verify the gasket or foam seal sits evenly against the panel. If the cover sits with a partial gap, do not force it. Loosen and re-align the screws, then re-tighten gradually in a cross pattern to distribute pressure evenly. If the screw threads are stripped or the mounting holes are damaged, replacement hardware or a different cover may be required. FuseBoxCheck highlights that consistent, even mounting ensures proper sealing and reduces chances of moisture intrusion, which can cause corrosion or trip hazards over time.
For older panels, ensure the new cover accommodates any unique screw spacing. If you’re unsure about compatibility after multiple attempts, contact a licensed electrician for guidance.
Safety Checks After Installation
With the screws tightened and the panel closed, restore power and perform a quick safety check. Confirm there is no arc or buzzing sound, and verify that the panel face sits flush against the mounting surface. Check that the switch labels remain legible and visible after installation. If the cover obstructs any vents or access points, power down again and re-check alignment. Ensure that nothing is loose, protruding, or able to shift if you lightly press along the edges of the cover. Regularly inspect the cover for cracks or wear and replace promptly if you notice damage. FuseBoxCheck reminds homeowners that ongoing maintenance is a key part of electrical safety.
If you observe moisture intrusion, unusual heat buildup, or signs of overheating, disconnect the power and contact a professional.
Maintenance and Long-Term Care
Periodically inspect the cover for cracks, warped edges, or loose screws. Clean the exterior with a mild, non-abrasive cleaner and a soft cloth. Keep the area around the panel dry and free from clutter to reduce accidental contact or blocked ventilation. For covered outdoor panels, consider weatherproof covers that resist UV damage and moisture. Labeling should be legible, and any updated circuits should be documented in a home electrical inventory. By performing routine checks, you preserve both the safety and longevity of your electrical system.
Authority and Further Reading
For formal safety guidance and installation standards, review these sources:
- OSHA Electrical Safety: https://www.osha.gov/
- U.S. Department of Energy Safety Tips: https://www.energy.gov/
- NFPA Electrical Standards and Guidance: https://www.nfpa.org/
These resources provide reputable expectations for safe electrical work and emphasize the importance of following manufacturer instructions and local codes. FuseBoxCheck uses these guidelines when assessing home-fuse-box-related projects and shares them here to help homeowners work safely.
Tools & Materials
- New fuse box cover (matching model)(Ensure it fits your exact fuse box model and number of breakers)
- Screwdriver (Phillips #2)(For screws securing the cover)
- Flashlight(To inspect interior and mounting holes clearly)
- Work gloves(Finger protection and grip while handling panels)
- Voltage tester (non-contact)(Use if you suspect live wires; not essential for cover installation)
- Safety goggles(Eye protection in case of debris)
Steps
Estimated time: 15-25 minutes
- 1
Power down and verify
Turn off the main breaker or the circuit feeding the panel. Use a non-contact tester to confirm the interior is de-energized. This minimizes the risk of shock while you work.
Tip: Always double-check with a tester; never rely on assuming power is off. - 2
Remove the old cover
Unscrew the existing screws and gently lift the cover away from the panel. Hold it steady to avoid bending the enclosure or disconnecting anything inside.
Tip: Keep screws in a small dish to prevent loss and misplacement. - 3
Inspect mounting area
Look for damaged holes, bent ears, or corrosion. Clean the mounting surface and ensure the area around the panel is dry and free of debris.
Tip: If you see damage, stop and consult a professional before proceeding. - 4
Align the new cover
Place the new cover over the box and align mounting holes with the box flanges. Hold it steady to avoid shifting during screw insertion.
Tip: Start one screw by hand to guide the cover without cross-threading. - 5
Secure the cover
Screw in each mounting hole using a cross pattern. Do not overtighten; snug is sufficient to create a seal without cracking the cover.
Tip: Use a screwdriver with a comfortable grip for steady tightening. - 6
Restore power and test
Turn the main breaker back on and observe that the panel sits flush. Check labeling and ensure all circuits test correctly with a load test if you have the means.
Tip: If you hear buzzing or see arcing, disconnect power and call a professional immediately. - 7
Document and store hardware
Note the cover model, date of installation, and any issues observed during installation. Store extra screws in a labeled bag.
Tip: Keeping records helps future maintenance and troubleshooting.
Your Questions Answered
Do I need to turn off the main breaker to install a fuse box cover?
Yes. Always switch off the main disconnect or the circuit feeding the panel. Use a non-contact tester to confirm the interior is de-energized before handling the cover.
Yes. Always turn off the main disconnect and verify the panel is de-energized before you begin.
What tools do I need to install a fuse box cover?
You’ll typically need a screwdriver suitable for the screws on your cover, gloves, a flashlight, and a cover that matches your model. Optional items include a non-contact tester and safety goggles.
You need a screwdriver, gloves, a flashlight, and a matching cover; add a tester and goggles if you want extra safety.
How do I know which cover to buy?
Check the model number on your current cover or inside the panel and choose a replacement that matches that model and the number of breakers. If in doubt, contact the manufacturer or a licensed electrician.
Look for the model number and ensure the replacement matches your panel and the number of breakers.
Is it safe to install a cover myself?
DIY installation is safe if you follow proper safety steps: power down, use the right cover, and avoid disturbing wiring. If you’re unsure, consult a professional.
It’s safe if you follow safety steps and use the right cover; otherwise, get a pro.
What if the screws don’t align with the new cover?
Stop and re-check the model compatibility and hole alignment. Forcing the screws can damage the cover or box. If misalignment persists, seek assistance.
If screws don’t align, stop and verify compatibility; don’t force them.
Watch Video
Highlights
- Power down before touching the panel to stay safe
- Match the cover model and ensure flush seating
- Tighten screws evenly to avoid cracks
- Inspect for damage and consult a pro if needed
- Test and label after installation