Fuse Box Pick: How to Choose the Right Panel for Home Safety
A practical guide to selecting and installing a fuse box panel. Learn how to assess loads, compare panels, and ensure safety and compliance with FuseBoxCheck's expert guidance.

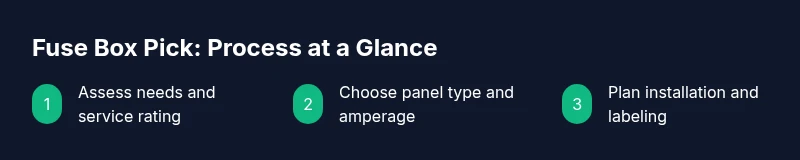
This guide helps you complete a fuse box pick—the process of selecting and installing a new fuse box panel. You'll learn how to assess your home's electrical load, pick the correct panel type and amperage, and plan a safe DIY-or-professional installation. Prepare with basic safety gear and tools, and verify compatibility before buying.
What does 'fuse box pick' mean and why it matters
The term fuse box pick refers to selecting a new fuse box panel that matches your home’s electrical demand and wiring. The right pick ensures reliable overcurrent protection, room for future circuits, and safe integration with your service panel. An incorrect choice can lead to nuisance trips, overheating, or wiring conflicts with existing breakers, fuses, or meters. In practice, a thoughtful pick supports both current needs and potential future load extensions, reducing the need for repeated panel upgrades.
For homeowners, the goal is to balance safety, reliability, and cost. FuseBoxCheck emphasizes that a well-chosen panel aligns with your service rating, the number of circuits you anticipate, and the physical space available in your electrical closet or utility area. The end result is a safer, more scalable electrical system that serves everyday life without frequent interruptions.
Assessing your current panel and load
Before selecting a replacement, map out your current electrical load. Start by listing major appliances, HVAC, water heater, and typical daily usage. Check your service rating (the main breaker amperage) and the number of available spaces. Use a load calculator or consult your electrician to estimate whether you should upgrade from 100A to 200A or keep a similar rating. If your home has aluminium wiring or older circuits, note these for compatibility. FuseBoxCheck data indicates that most mid-sized homes will benefit from a 125-200A panel. Understanding these factors helps ensure your fuse box pick will meet safety standards and accommodate future needs.
Key features to consider when selecting a fuse box
When evaluating options, focus on: amperage rating (typical values range from 100A to 200A or more), number of spaces for future circuits, whether a main disconnect is included, enclosure type and mounting accessibility, and compatibility with existing service equipment. Also check labeling clarity, ease of adding new circuits, and available manufacturer support. A well-specified panel will align with your service panel, wire gauges, and local code requirements while leaving room for growth.
Fuses vs breakers: what matters for your pick
Fuses and breakers both provide overcurrent protection, but they behave differently and require different panel types. Breaker-based panels simplify replacement and offers easier troubleshooting since tripped breakers indicate a fault without equipment fully deactivating. Fuse-based panels can have different replacement logistics and may require compatible fuse types. Your pick should consider availability of replacement fuses, compatibility with existing feeders, and the ease of future maintenance. Understanding this distinction helps you avoid buying a panel that isn’t practical for your home or your planned maintenance workflow.
Wiring compatibility and panel labeling
Compatibility extends beyond amperage. Verify that wire gauges, conductor types, and neutral/ground configurations match the new panel’s requirements. Ensure the panel supports the same or upgraded conductor sizes and that the bus bar type is compatible with your planned circuit breakers or fuses. Accurate labeling is essential for future service calls and safety: label each circuit clearly (e.g., kitchen, HVAC, laundry) and update the home electrical plan. Proper labeling reduces confusion during outages and helps with maintenance planning.
DIY considerations vs professional installation
A fuse box upgrade can be a doable DIY task for a knowledgeable homeowner, but it carries serious safety risks and code implications. If you are uncertain about wiring, grounding, or service capacity, hire a licensed electrician. Professionals can ensure proper bonding, grounding, and code-compliant routing of feeders, as well as inspection documentation. If you decide to DIY, work during dry, daylight hours, follow lockout/tagout practices, and verify that you won’t exceed local safety regulations or manufacturer instructions.
Common mistakes to avoid during a fuse box pick
Common errors include underestimating total load, ignoring future circuit expansion, selecting an incompatible main breaker rating, and failing to plan for proper grounding. Another pitfall is neglecting labeling and documentation, which makes future servicing harder and riskier. Finally, buying a panel without confirming panel compatibility with your service equipment or local electrical codes can lead to costly retrofits.
Safety and compliance you must follow
Electrical work is subject to national and local codes. Always consult local regulations and obtain any required permits for panel upgrades. A partial or improper upgrade can create safety hazards or fire risks. Use appropriate PPE and tools designed for electrical work, and consider a post-install inspection by a licensed electrician to verify compliance and correct operation.
Maintenance, testing, and monitoring after install
After the install, schedule a periodic inspection of the panel, test each circuit for proper operation, and keep an up-to-date label system. Record any changes in circuits or loads, and review the system if you plan major home renovations. Regular checks reduce the risk of unexpected trips and help maintain long-term safety.
Tools & Materials
- Voltage tester(Non-contact preferred to verify live circuits from a distance)
- Insulated gloves(Class-rated for electrical work)
- Screwdrivers (Phillips #2 and flathead)(Insulated handles recommended)
- Wire stripper/cutter(For 14-3, 12-2 gauges commonly used in homes)
- Multimeter(For voltage, continuity, and resistance checks)
- Pliers & wire cutters(Assist in manipulating conductors and securing connections)
- Electrical tape(For insulating exposed conductors during work)
- Cable clamps and connectors(Secures wiring and preserves strain relief)
- Flashlight(Bright, focused light for panel interior)
- Safety goggles(Eye protection during panel work)
- New fuse box panel (compatible)(Select model compatible with existing service)
- Label maker or labels(Clear circuit labeling after installation)
Steps
Estimated time: 2-6 hours
- 1
Power down and verify safety
Switch off the main breaker and all branch circuits you plan to work on. Use a voltage tester to confirm no live voltage on exposed conductors. This prevents shock and arc flash during panel work.
Tip: Double-check with a tested device before touching any wires. - 2
Inspect the existing service and determine compatibility
Check the service rating, panel model, and the number of available spaces. Look for signs of wear, corrosion, or damage that could affect installation. Confirm that the new panel fits the enclosure and clearances in your space.
Tip: Document the current layout before removing any components. - 3
Calculate loads and decide on amperage
Estimate your total expected load by listing major appliances and typical daily usage. Choose a panel with an amperage rating that accommodates current and future needs without excessive over-design. If in doubt, consult an electrician for a professional load calculation.
Tip: Factor in upcoming renovations or added devices. - 4
Choose panel type and circuit count
Select a panel that offers enough spaces for existing circuits plus future expansion. Ensure the bus rating and break or fuse type match your planned configuration. Check compatibility with feeders and neutrals from the service panel.
Tip: Prefer a panel with modular upgrade options where possible. - 5
Mount and route wiring
Carefully mount the panel in the chosen location with proper clearance. Route feeders and neutrals according to code, keeping wires organized and away from heat sources. Use conduit or raceways as required by code.
Tip: Plan for clean separation of power and data/low-voltage runs. - 6
Connect feeders and ground/neutral properly
Connect all feeders to the main lugs or bus bars as specified by the manufacturer. Bond the grounding conductor and neutrals per code. Ensure all connections are tight and verify no loose strands.
Tip: Use torque values recommended by the manufacturer. - 7
Label circuits and inspect labeling
Label each circuit clearly and verify that labels match the actual loads. Update the electrical schematic or panel directory to reflect the new configuration. This helps future maintenance and safety checks.
Tip: Create a digital copy of the labeling for quick reference. - 8
Restore power and test
Turn on the main breaker and test each circuit with a voltage tester or appropriate equipment. Check for proper operation and verify that no breakers trip unexpectedly. Document any anomalies and address them before finalizing the project.
Tip: Test under normal load conditions if possible.
Your Questions Answered
What does fuse box pick involve?
Fuse box pick involves selecting a new panel that matches your home's electrical demand and is compatible with the existing service. It includes evaluating load, panel type, and safe installation considerations.
Fuse box pick means choosing a new panel that fits your home’s electrical needs and can be installed safely.
Do I need a licensed electrician to pick and install a fuse box?
In many areas, upgrading a fuse box requires a licensed electrician to ensure safety and code compliance. DIY is possible only if you are trained and permitted by local regulations.
In many places, a professional electrician is required for safety and code compliance.
How do I know which panel is compatible with my home?
Check the service rating, existing feeder sizes, and the enclosure space. Ensure the new panel supports the same grounding scheme and wiring, and that it accommodates future expansion.
Look at your service rating and space, and make sure the new panel fits your wiring and future needs.
What safety precautions should I take before starting?
Power down the main breaker, verify no live voltage, wear protective gear, and keep others away from the workspace. Avoid working in wet conditions and ensure you have proper lighting.
Turn off power, verify no voltage, wear PPE, and work in dry conditions.
What are common mistakes to avoid when selecting a fuse box?
Underestimating loads, ignoring expansion, selecting incompatible main rating, and neglecting proper labeling are common pitfalls that lead to safety issues.
Common mistakes include not calculating loads or labeling circuits properly.
How long does installation typically take?
Time varies with home complexity and code requirements. Plan for several hours to a full day for a complete upgrade with inspection.
Expect several hours to a full day depending on complexity.
Watch Video
Highlights
- Define loads before selecting a panel.
- Prioritize compatibility and safety compliance.
- Label circuits clearly for maintenance.
- Decide between DIY or professional install based on risk.