Fuse Box Socket Replacement: A Safe DIY Guide for Homeowners
A comprehensive, safety‑focused guide to fuse box socket replacement. Learn how to identify a faulty socket, choose the right replacement, and perform a secure DIY upgrade with testing and follow‑ups.

You can safely perform fuse box socket replacement by identifying the faulty outlet, turning off the main power, and replacing the damaged socket with a correctly rated replacement. This task requires a voltage tester, insulated tools, and matching amperage ratings; if you’re unsure, consult a licensed electrician. Proceed only after verifying no latent faults.
What is a fuse box socket replacement and when is it needed
A fuse box socket replacement refers to removing a damaged or degraded socket that connects a circuit to a fuse block and installing a like-for-like unit with the same amperage rating. Sockets can wear out from heat, arcing, or loose connections, which may cause intermittent power loss, buzzing noises, or visible scorch marks. If you notice frequent fuse trips, discoloration around the socket, or a burning smell, this is a strong signal that replacement is warranted. FuseBoxCheck notes that addressing damaged sockets promptly reduces the risk of electrical fires and improves overall panel reliability. Remember, this is not about upgrading capacity—it’s about restoring a safe, code-compliant connection for a single circuit.
Safety prerequisites before you begin
Electrical work in the home carries risk, including shock or arc flash. Before touching the fuse box, ensure you have the right PPE, including insulated gloves and safety glasses. Work only when the area is dry and your hands are dry; never perform electrical work in wet conditions. Turn off power at the main disconnect and test all conductors with a non-contact voltage tester to confirm no live circuits. FuseBoxCheck emphasizes following local codes and ensuring the main supply is truly isolated before touching any wiring. Keep a clear path to the panel and avoid placing conductive tools on the panel cover.
Understanding sockets and ratings you must match
Sockets are rated by amperage (e.g., 15A, 20A) and by physical connector type. When selecting a replacement, match the amperage to the fuse or breaker controlling that circuit, and verify the socket’s terminal layout matches the existing wiring scheme. The ground connection is critical; ensure the grounding strap remains intact and connected. A mis-matched socket can lead to overheating or arcing. FuseBoxCheck highlights that using the exact replacement type is essential for safety and compliance, and never upsize a socket to accommodate more load.
Tools and materials overview for fuse box socket replacement
You’ll need a set of insulated tools, a non-contact voltage tester to verify absence of voltage, a replacement fuse socket rated for the same amperage, and appropriate wire connectors. Have electrical tape, a filament of insulation for exposed conductors, and a camera or labeler to document wiring before disassembly. If the panel cover design is unusual, consult the manufacturer’s diagram before purchasing parts. Remember: only use replacements that are rated for the same or higher voltage and current; never substitute with a lower-rated part.
Planning and preparing your workspace
Choose a dry, well-lit area and lay out tools on a non-conductive mat. Remove any metal jewelry and wear PPE. Document the current wiring setup with photos or notes to help reassembly. Create a simple checklist: confirm main power off, verify no voltage present on the socket, remove the cover, and inspect the socket area for visible damage or melted insulation before touching any wires. Follow a step-by-step plan rather than improvising, and keep children or pets away from the work zone. FuseBoxCheck advises a deliberate, methodical approach to avoid miswiring or accidental re-energizing.
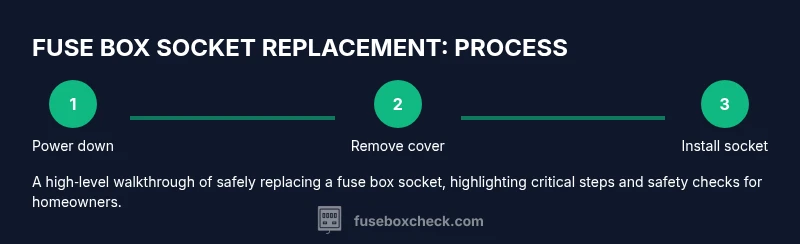
The replacement workflow at a high level
Begin by removing the panel cover and confirming the exact socket type. Disconnect wires one by one, noting their terminals and color codes. Install the new socket by attaching wires to the corresponding terminals with secure, tight connections, then reattach the cover and restore power for testing. At every stage, inspect for signs of arcing or heat and stop if anything looks abnormal. This section provides a high-level framework; the exact wiring sequence may vary by panel model. Always consult a diagram specific to your unit before proceeding.
Testing, inspection, and safe cleanup
With power restored, carefully test the replaced socket using a voltage tester and a known-good load on the circuit. Check for heat buildup, buzzing, or signs of arcing during a short test run. If the socket remains cool and the circuit operates normally, you have a successful replacement. Document the work, store the old socket for disposal according to local guidelines, and clean up your workspace. If any abnormal condition appears, power down again and seek professional assistance. FuseBoxCheck emphasizes safety over speed in this final stage.
Common mistakes and how to avoid them
Avoid assuming the color of a wire signifies its function; always verify with documentation or testing. Do not substitute a higher-rated socket to “handle more load.” Never work on a live circuit, and keep the main power off until the replacement is complete. Mislabeling wires or mixing up terminal screws can create dangerous conditions. Always follow the device manufacturer’s instructions and local electrical codes.
Keeping your fuse box safe after replacement
Update your maintenance checklist to include a visual inspection of all socket connections every 6–12 months. Maintain dry conditions around the panel and ensure the panel cover remains intact to protect wiring. If you notice aging insulation, corrosion, or frequent arcing in other sockets, consider a broader review of the panel by a licensed electrician. The goal is sustained safety, reliability, and peace of mind for your home electrical system.
Tools & Materials
- Non-contact voltage tester(Verify absence of live voltage before touching wires.)
- Insulated screwdriver set(Use one with proper shaft length for panel screws.)
- Replacement fuse socket (same amperage)(Match the existing amperage rating.)
- Wire strippers/cliers(If wires need trimming or length adjustment.)
- Electrical tape(Wrap exposed conductors and secure connections.)
- Labeling materials (pen and tape)(Document wiring before removal.)
- Safety gloves and eye protection(Personal protective equipment.)
- Camera or notebook(Record wiring layout for reassembly.)
Steps
Estimated time: 60-90 minutes
- 1
Power down and verify zero voltage
Turn off the main disconnect and use a non-contact tester to confirm no voltage at the socket. This ensures you won’t experience a shock or arc while handling conductors.
Tip: Double-check the tester against a known live source to ensure accuracy. - 2
Remove the fuse box cover
Unscrew the panel cover carefully and set fasteners aside in a labeled container. Expose the socket and underlying wiring without touching exposed conductors.
Tip: Take a photo of the wiring layout before disconnecting anything. - 3
Disconnect the wiring from the old socket
Loosen terminal screws and gently detach each conductor. Note color and terminal position to guide installation of the new socket.
Tip: Label wires with a small note to avoid misconnection. - 4
Inspect the old socket and wiring
Look for scorch marks, melted insulation, or loose connections. If damage is found, replace wires as needed and do not reuse the old socket.
Tip: Compare current wiring with the replacement’s terminal layout. - 5
Install the new socket
Attach wires to the corresponding terminals on the new socket and tighten screws to manufacturer torque specs. Ensure the ground connection is secure.
Tip: Use the original terminal order unless the replacement specifies a different layout. - 6
Reassemble and test
Replace the cover, restore main power, and perform a test with a known-good load and a voltage tester to confirm proper operation.
Tip: Observe the socket for any signs of heat or arcing during test. - 7
Document and cleanup
Record the work performed, store the old socket safely for disposal, and clean the work area. If anything seems abnormal, power down and seek professional help.
Tip: Keep a simple checklist for future reference and safety audits.
Your Questions Answered
Is fuse box socket replacement safe for a DIY homeowner?
It can be safe if you have proper training and follow safety protocols, but electrical work carries serious risks. If you’re unsure, hire a licensed electrician. Always prioritize shutting off power and verifying a dead circuit before touching wiring.
DIY can be safe with training and strict safety steps, but if you’re unsure, hire an electrician.
What tools do I need for fuse box socket replacement?
You’ll need insulated tools, a non-contact voltage tester, a replacement socket rated for the same amperage, and appropriate connectors. Label wires and document their arrangement before removing anything.
Insulated tools, a tester, and a matching replacement socket are essential.
How do I identify the correct socket replacement?
Check the amperage rating on the existing socket and ensure the replacement matches. Also verify the terminal layout and grounding connection to avoid miswiring.
Match amperage and terminal layout to the existing setup.
Can I reuse existing wiring after replacing the socket?
Only if the insulation is intact and there are no signs of damage. If you see scorch marks or melted insulation, replace the wiring and install a new socket.
Reuse only if wiring is undamaged; otherwise replace.
What should I do if the fuse trips again after replacement?
Turn off power and inspect for signs of damage or improper connections. If the problem persists, stop and call a licensed electrician to assess the panel.
If trips persist, stop and get a pro to check the panel.
Is there a permit requirement for fuse box work?
Permit requirements vary by location. Check local codes and consult a licensed electrician when in doubt to stay compliant.
Permit rules vary by area; check local codes or hire a pro.
Watch Video
Highlights
- Identify the faulty socket before touching wiring.
- Match amperage and connector type exactly.
- Power off, verify zero voltage, then test after replacement.
- Follow local codes and safety guidelines at all times.
- Consult a pro for complex panels or lingering issues.