Replacing a fuse in a fuse box: a homeowner's guide
A practical, safety-focused guide to replacing a fuse in a fuse box with step-by-step instructions, safety tips, and troubleshooting for homeowners and DIY enthusiasts.

You will safely replace a fuse in a fuse box by identifying the correct fuse, selecting a compatible replacement, and testing the circuit. Before you begin, turn off the main breaker, wear protective gear, and verify you have the right fuse type (cartridge or blade) for your panel. If unsure, consult a licensed electrician.
What replacing a fuse in a fuse box accomplishes and safety disclaimers
Replacing a fuse in a fuse box restores power to a circuit after a fuse has blown and protects wiring from overheating. It’s a common DIY task for homeowners, but it carries electrical risks. This guidance emphasizes safety and proper fuse matching to prevent further problems. According to FuseBoxCheck, safety and correct fuse type are essential when performing any fuse replacement. Always avoid work if you notice burning smells, melted components, or heat emanating from the panel. If you’re unsure about the fuse type or the panel age, pause and call a licensed electrician. Throughout this process, remember that you are working with live electrical components, and complacency can lead to shocks or fire. Keep your work area dry, well lit, and organized, and never rush a replacement.
Fuse types and ratings you need to know
Fuses come in several styles, including cartridge fuses for some panels and blade fuses for others. The amperage rating is printed on the fuse body and determines the maximum current allowed on that circuit. Using a fuse with too high an amperage defeats protection, while a fuse with too low a rating can cause nuisance trips. The correct fuse must match both the type (blade vs cartridge) and rating (for example, 15A or 20A) for your panel. If you can’t locate a rating on the fuse itself, consult your panel’s labeling or the manufacturer documentation. When in doubt, choose the replacement fuse that matches the original rating exactly rather than guessing. FuseBoxCheck recommends keeping a labeled spare kit with the right fuse types for common circuits.
Safety preparations before you touch the panel
Safety must come first. Turn off the main breaker and unplug or switch off equipment on the circuit you’ll service. Use dry hands, work on a dry surface, and wear insulated gloves and safety goggles. Have a non-contact voltage tester ready to confirm the absence of live voltage before touching any conductors. Keep children and pets away, work in a well-lit area, and avoid leaning over the panel. If you feel uncertain, stop and seek professional help. The FuseBoxCheck Team emphasizes that safe practice minimizes the risk of electric shock and fire, so do not proceed if any risk indicators are present.
How to inspect and choose the right fuse
Begin by removing the panel cover with the correct screwdriver. Inspect the fuse’s appearance for a blown filament, a melted glass, or any obvious sign of an open circuit. Compare its type to the panel’s cartridge sockets or blade holders. Read the amperage on the fuse body and verify the same rating for the replacement. If the rating is unclear, do not operate the panel; consult the manufacturer documentation or a pro. Keep a record of the identified fuse type and rating for future reference, and consider replacing mismatched or aged fuses in other circuits as part of regular maintenance.
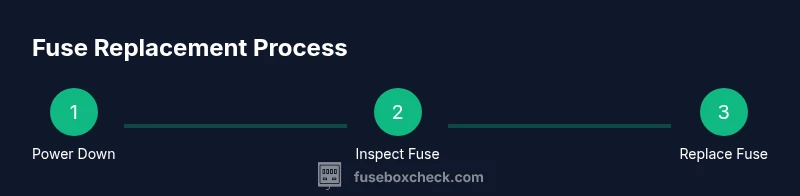
Step-by-step overview of the replacement workflow
This section provides a high-level workflow you will execute in the practical steps that follow. It is not a substitute for the detailed steps below, but it helps you visualize the process. First, power down the main breaker and verify no voltage is present. Next, remove the panel cover and locate the blown fuse. Then, extract the old fuse using insulated pliers, ensuring you do not touch the metal ends. Select a replacement fuse with the exact type and amperage rating, insert it fully, and reseat the fuse holder. Finally, restore power, test the circuit, and close the panel. A calm, methodical approach reduces risk and improves reliability.
Visual checks: using a tester and identifying a blown fuse
A blown fuse often shows a darkened glass body, a melted filament, or a noticeably open circuit. Use a non-contact voltage tester to confirm the absence of voltage before handling any components. After installing the replacement, recheck that the circuit is delivering power by cycling the corresponding switch and observing outlets, lights, or devices on that circuit. If the fuse trips immediately after restoration, power down again and reassess the load on that circuit. Document the results so you can compare with future maintenance.
Troubleshooting if the fuse trips again
If a replacement fuse blows again, there is likely an underlying issue, such as an overloaded circuit, a short to ground, or a failing appliance connected to that circuit. Start by unplugging all devices on the circuit and resetting the main breaker, then reinsert and test the fuse with a cautious approach. If it still trips, isolate sections of the circuit or move nonessential loads to other circuits. Persistent trips warrant professional evaluation, as repeated fusing can indicate wiring faults or panel aging that requires specialized tools and expertise.
Aftercare: testing, labeling, and panel closure
After a successful replacement, test the entire circuit by gradually reintroducing loads and verifying normal operation. Label the circuit clearly on the panel cover or a nearby chart to help future maintenance. Replace the panel cover securely and tidy up your workspace. Keep a small kit with spare fuses and a notebook noting the fuse type and amperage for future reference. This practice reduces guesswork during emergencies and speeds up DIY triage for future issues.
When to call a pro and safety limits
Know your limits. If the panel shows signs of aging, overheating, burning smells, or physical damage, contact a licensed electrician immediately. If you are not confident in identifying the correct fuse type and rating, or if the panel is older than code allowances, professional inspection is advisable. The FuseBoxCheck Team recommends seeking professional help for any uncertainty, for complex circuits, or when the panel requires rewiring or upgrading to meet current safety standards.
Tools & Materials
- Insulated screwdriver set (Phillips and flathead)(For removing panel screws and terminal caps without risking shock.)
- Non-contact voltage tester(To verify no live voltage before handling conductors.)
- Voltage tester or multimeter(Optional for more precise voltage checks.)
- Insulated pliers or fuse puller(Use to safely remove and insert fuses.)
- Protective gloves (insulated)(Protect hands from accidental contact and glass edges.)
- Safety goggles(Prevent debris or sparks from reaching eyes.)
- Flashlight or headlamp(Ensure good visibility inside the panel.)
- Replacement fuse(s) – correct type and amperage(Cartridge or blade fuses; match the panel’s rating exactly.)
- Labeling materials (masking tape, marker)(Label circuits for future maintenance.)
Steps
Estimated time: 15-30 minutes
- 1
Power down and prep
Turn off the main breaker and switch off devices on the target circuit. Verify the area is dry, well-lit, and free of clutter. Don’t proceed if your hands are wet or the panel feels warm to the touch.
Tip: Use a flashlight to inspect the panel clearly before touching any components. - 2
Open panel and locate fuse
Carefully remove the panel cover with the appropriate screwdriver. Look for a fuse with a blown filament, a darkened glass, or a visible gap in the metal ribbon. Compare the fuse type to the socket to confirm blade or cartridge compatibility.
Tip: If the fuse is difficult to remove, do not force it—recheck the alignment and tools. - 3
Check fuse type and rating
Read the amperage rating on the fuse body and verify against the panel labeling or original documentation. Do not replace with a higher rated fuse unless the panel documentation explicitly allows it, as this increases fire risk.
Tip: If the rating is unreadable, do not proceed—consult manufacturer docs or a pro. - 4
Remove the blown fuse
Carefully extract the old fuse using insulated pliers or a fuse puller. Do not touch the metal ends with bare hands. Place the used fuse in a safe container for disposal.
Tip: Keep the removed fuse in view so you can compare it with the replacement. - 5
Install the replacement fuse
Insert the new fuse firmly into the correct slot so it seats evenly. Ensure the type (blade or cartridge) and amperage match exactly. Do not force the fuse into an ill-fit socket.
Tip: Avoid touching the metal ends with your fingers; use pliers for handling. - 6
Restore power and test the circuit
Turn the main breaker back on, then flip the circuit switch to verify power returns. Test a few outlets or lights on that circuit to confirm proper operation and absence of a recurring trip.
Tip: If the circuit trips again, power down and re-evaluate the loads on that circuit. - 7
Close panel and tidy up
Replace the panel cover securely and replace tools in your workspace. Label the circuit on the panel or nearby for future reference.
Tip: Keep a small fuse kit handy for quick future maintenance.
Your Questions Answered
What is the safest way to replace a fuse in a fuse box?
Turn off the main breaker, verify no voltage present, and use insulated tools to remove and replace the fuse. Match the fuse type and amperage precisely and avoid touching hot components. If in doubt, consult the panel documentation or a professional.
Turn off power, verify no voltage, use insulated tools, and match fuse type and rating. If unsure, call a professional.
Can I reuse an old fuse for a replacement?
Reusing an old fuse is not recommended. Fuses are designed for single use and may degrade or fail without visible signs. Always replace with a new fuse of the correct type and rating to maintain protection.
You should replace with a new fuse of the right type and rating instead of reusing an old one.
What should I do if I can’t locate the blown fuse?
If the fuse isn’t obvious, check the panel labeling and documentation for circuit mappings. If you still can’t locate it, avoid improvising by guessing the rating and seek a pro for identification and replacement.
If you can’t find the blown fuse, don’t guess the rating—consult the docs or a professional.
Why do fuses blow, and should I upgrade the panel instead?
Fuses blow to protect wiring from overheating due to overloads, short circuits, or faulty devices. Replacing the fuse alone may not solve the underlying issue. If blowouts become frequent, consider having an electrician evaluate the panel and circuits.
Fuses blow to protect wiring. Frequent blowouts may mean you need a panel check by a pro.
Do I need to shut off the main breaker for every fuse replacement?
Yes, turning off the main breaker is a standard safety step before replacing a fuse. It minimizes the risk of shock and arcing while you work inside the panel.
Yes, always switch off the main breaker before working on the fuse box.
What if the panel is old or shows signs of damage?
Do not attempt risky work on an old or damaged panel. Aging panels can pose fire hazards and may require rewiring or replacement by a licensed electrician.
An old or damaged panel should be inspected by a professional for safety.
Watch Video
Highlights
- Know why replacing a fuse matters and that correct fuse type protects wiring
- Always shut off power and verify no voltage before touching the panel
- Use the exact fuse type and rating; mismatches are a safety risk
- Label circuits after replacement to ease future maintenance
- If unsure, seek professional help rather than risking damage