Fuse Box Waterproof: How to Protect Your Electrical Panel
Learn practical, safety-focused steps to keep your fuse box waterproof. This FuseBoxCheck guide covers enclosure options, sealing methods, maintenance, and best practices for homeowners and DIY enthusiasts.

To waterproof a fuse box safely, you will seal water entry points, protect cables, and use weatherproof enclosures or a sealed outdoor-rated box. Start by turning off power at the main panel, then inspect for moisture, leaks, and corroded components. Use non-conductive sealants and appropriate gaskets; never bypass ground or safety features.
Understanding the risk of water exposure in electrical panels
Water and electricity are a dangerous mix. The term fuse box waterproof describes proactive protection to keep moisture out of the panel enclosure, cables, and breakers. In damp climates or near exterior walls, risks include rainfall, sprinkler overspray, plumbing leaks, and condensation, each capable of causing rust, insulation damage, and tripped circuits. According to FuseBoxCheck, waterproofing starts with a clear risk assessment: identify how water could reach the panel and plan protective measures accordingly. Understanding these pathways helps you choose the right approach and avoid over-sealing or trapping moisture inside.
Evaluate the panel’s location—exterior walls, garages, basements with high humidity, or flood-prone areas—and plan weather-rated enclosures, gasketed doors, and proper drainage. Keep the area around the fuse box dry and uncluttered, and ensure there are no liquids stored nearby. Regular inspections matter: even a small seal crack can allow water ingress during heavy rain or dew formation. The goal is to minimize moisture exposure while maintaining accessibility for maintenance and emergency shutoffs. By following best practices and consulting trusted resources, you’ll improve safety for your home and reduce the risk of electrical fires or failures.
Assessing your fuse box location and exposure
Assessing exposure is the first practical step in making a fuse box waterproof. Start by mapping all potential water pathways around the panel: roof leaks, wall gaps, window splashes, sprinklers, and plumbing vents. If the fuse box sits in a damp garage, basement, or exterior wall, expect higher humidity levels and occasional direct splash risk. Document conditions with photos and notes so you can tailor a protection plan. Next, verify the panel’s accessibility for safety shutoffs; waterproofing should not obstruct operation or maintenance. Consider ventilation and heat buildup, since sealed environments can trap moisture if not properly vented. The core aim is to reduce moisture intrusion without compromising electrical accessibility or heat dissipation.
Practical questions to answer include: Is there standing water after rain? Are door seals intact or cracked? Do you see rust, white oxidation, or dampness on conduits? If you identify a moisture source, prioritize a combination of enclosure upgrades, sealant strategies, and drainage improvements. Keep a maintenance log and schedule seasonal checks to catch early signs of wear. FuseBoxCheck’s guidance emphasizes proactive planning and routine checks as essential parts of home electrical safety.
Waterproofing options and best practices
There are several proven approaches to fuse box waterproofing, and the best choice depends on location, budget, and existing infrastructure. Outdoor-rated weatherproof enclosures with gasketed doors offer a simple, durable solution for exposed panels. If replacing the enclosure isn’t feasible, high-quality silicone sealants and gasket materials can seal joints and entry points around conduit and cables. For added protection, use cable glands or strain reliefs to seal every cable entry point, preventing water ingress at the entry. In damp environments, provide a drainage path for any incidental moisture and ensure air can circulate to avoid condensation buildup. Never seal active connections or dismantle safety features; waterproofing should preserve, not compromise, electrical safety. A layered approach—enclosure + seals + cable entries + proper drainage—yields the most robust protection and reduces the chance of failures during storms or humidity surges.
Materials, tools, and safety precautions
Before starting any waterproofing project, gather essential tools and materials. You’ll need an outdoor weatherproof enclosure (NEMA 3R or IP-rated), gasket kits, cable glands or strain reliefs, non-conductive silicone sealant, electrical tape or heat-shrink tubing, a caulk gun, a screwdriver set, a multimeter for voltage checks, and safety gear (insulated gloves and eye protection). Additionally, have a utility knife, a tape measure, and a clean rag for prep work. Safety is paramount: always isolate power at the main panel and verify there is no voltage present before touching conductors. Work with a dry surface and avoid working during lightning or heavy rain. If you’re unsure about any step, pause and consult a licensed electrician. Appropriate gear and careful planning reduce the risk of electric shock, arc flash, or circuit damage.
Common mistakes and how to avoid them
Common mistakes include sealing too aggressively, trapping moisture inside, or choosing an enclosure that isn’t rated for outdoor use. Don’t rely on paint, caulk, or improvised tape as a long-term waterproof solution. Avoid sealing around live components or removing a panel cover with power present. Misjudging venting needs can also cause condensation buildup. Always verify that sealants are electrical-grade and compatible with your enclosure materials. Finally, neglecting maintenance is a frequent pitfall—set reminders to inspect seals, test gaskets, and replace damaged components. A thoughtful, scheduled approach is key to sustained waterproofing and electrical safety.
Authority resources and maintenance plan
For authoritative guidance on electrical safety and waterproofing, refer to trusted sources:
- OSHA: https://www.osha.gov
- U.S. CPSC: https://www.cpsc.gov
- NFPA: https://www.nfpa.org
Create a simple maintenance plan: quarterly quick checks of the enclosure, annual full inspection of seals and gaskets, and a documented record of any replacements or repairs. This plan helps catch degradation early and keeps your fuse box waterproof over time.
Tools & Materials
- Outdoor weatherproof enclosure (NEMA 3R/IP65)(Rated for exterior use; fits your fuse box dimensions; allow space for cables and drainage.)
- Gasket kit for enclosure door(Ensure compatibility with your model; compresses to seal all edges.)
- Cable glands or strain reliefs(Seal every cable entry to prevent water intrusion.)
- Non-conductive silicone sealant(Electrical-grade, cure time as specified by manufacturer.)
- Electrical tape or heat-shrink tubing(Seal exposed conductor wraps and terminations after sealing entries.)
- Caulk gun and silicone caulk(Use for exterior seams around the enclosure where appropriate.)
- Screwdriver set (Phillips and flat-head)(For panel screws and enclosure mounting.)
- Multimeter (voltage tester)(Verify power is fully isolated before working; confirm no residual voltage.)
- Insulated gloves and safety goggles(Personal protective equipment; non-conductive gear is essential.)
- Utility knife(Trim sealant and gasket materials as needed.)
- Measuring tape(Confirm enclosure fit and clearance around cables.)
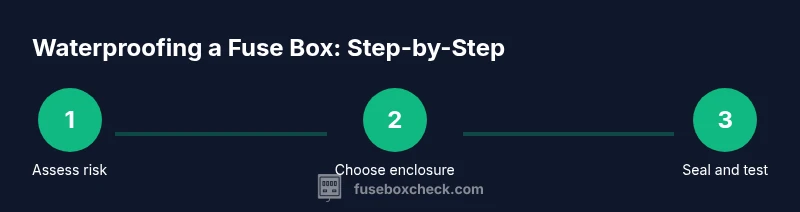
Steps
Estimated time: 2-3 hours
- 1
Power down and verify safety
Begin by turning off power at the main disconnect and any local breakers feeding the panel. Use a multimeter to verify there is no voltage present before touching conductors. Wear insulated gloves and safety goggles to protect against unexpected energizing.
Tip: Double-check that the main shutoff is accessible from a dry location. - 2
Inspect exterior and identify entry points
Carefully inspect the fuse box exterior for cracks, loose screws, and seal integrity. Note all potential water entry points such as around conduits, cable entries, and the door seal. Take photos to document existing conditions before making changes.
Tip: Mark suspect areas with removable tape for later sealing. - 3
Choose enclosure and sealing method
Select an outdoor-rated enclosure (NEMA 3R or IP65) that fits your panel and offers space for cable glands. Decide between a full enclosure upgrade or sealing only vulnerable joints with gasket material and sealant. Ensure the chosen method preserves access for maintenance.
Tip: Prioritize a method that allows for future service without removing the entire enclosure. - 4
Prepare seals and install enclosure
Mount the enclosure securely, ensuring it is level and supported. Install gasket doors, attach cable glands, and run cables through strain reliefs. Apply non-conductive silicone sealant around joints as directed by the product guidelines.
Tip: Do not over-tighten mounting screws; allow the gasket to compress properly. - 5
Seal all entries and doors
Seal every cable entry point with glands and sealant. Ensure the door seal sits flat without gaps and test the closure to confirm a tight seal. Clean any excess sealant after curing for a neat finish.
Tip: Give sealant sufficient cure time before exposing to moisture. - 6
Test waterproofing and restore power
After curing, perform a controlled water exposure test if appropriate, or allow natural rain exposure to confirm effectiveness. Re-energize using the main disconnect and monitor for any moisture or condensation. Document findings and schedule a follow-up inspection.
Tip: Never rush the test; ensure the area is monitored for leaks and signs of moisture.
Your Questions Answered
What does waterproofing a fuse box involve?
Waterproofing a fuse box involves protecting the panel from moisture using outdoor-rated enclosures, gaskets, and properly sealed cable entries. It also includes ensuring safe access for maintenance and following electrical safety standards.
Waterproofing a fuse box means using weather-rated enclosures and sealants to keep moisture out while keeping the panel safe and accessible.
Is DIY waterproofing safe for most homes?
DIY waterproofing can be safe if you follow proper safety steps, use rated materials, and never work with live electricity. For complex or moist environments, consult a licensed electrician.
DIY waterproofing is possible, but make sure you’re following safety rules and consider a professional for complex or high-moisture cases.
What if water is already inside the fuse box?
If water is inside the fuse box, power must be shut off, and the panel should be inspected by a qualified electrician. Do not operate or seal over damaged components. Water intrusion can cause short circuits or corrosion.
If you see water in the panel, turn off power and call an electrician—do not touch live parts.
Do all fuse boxes need waterproofing?
Not all fuse boxes require waterproofing. Indoor, well-protected panels may only need routine maintenance. Outdoor or damp locations benefit most from waterproofing measures and weather-rated enclosures.
Waterproofing is especially important for outdoor or damp locations, but indoor panels still need maintenance checks.
How long does a DIY waterproofing project take?
A typical DIY waterproofing project can take 2-3 hours, depending on enclosure type and existing condition. Allow extra time for curing sealants and testing.
Most DIY waterproofing projects run about a few hours, plus curing time for sealants.
When should I call a licensed electrician?
Call a licensed electrician if you encounter water inside the panel, damaged wiring, corroded components, or if your local codes require professional work for outdoor panels.
If you see water, damage, or code concerns, it’s best to call a licensed electrician.
Watch Video
Highlights
- Assess exposure before choosing a waterproofing method
- Use outdoor-rated enclosures and proper seals
- Seal all cable entries and test thoroughly
- Maintain records and schedule regular checks
- Prioritize safety and consult a professional when unsure