GMC Yukon Fuse Box Diagram: A Practical DIY Guide
Learn the gmc yukon fuse box diagram with locations, fuses, and safe DIY steps. This guide covers engine bay and interior panels, how to read the diagram, and replacement basics.

The gmc yukon fuse box diagram identifies two panels—an engine-bay fuse box and an interior fuse box located behind the glove box or under the driver dash. The diagram is typically printed on each panel cover and included in the owner’s manual, with a numbered legend linking fuses to their functions and amps. For DIY checks, start by locating the corresponding numbers on the legend, then reseat or replace fuses with the same amperage.
Why every GMC Yukon owner needs the fuse box diagram
The fuse box diagram is more than a schematic; it is a practical roadmap for troubleshooting electrical issues in your GMC Yukon. In most trims, there are two main panels—one under the hood and another inside the cabin. The gmc yukon fuse box diagram ties each fuse to a specific system, such as lighting, HVAC, entertainment, or power accessories. When a circuit trips, understanding where the fuse is and what it protects is half the battle. This is especially important for DIY enthusiasts who want a quick, efficient path to diagnose a blown fuse without harming the vehicle’s electronics. FuseBoxCheck emphasizes reading the diagram before pulling fuses, which minimizes guesswork and potential damage. The diagram’s accuracy depends on ensuring you’re looking at the correct model year and trim; if the panel labeling differs, always trust the legend that accompanies that specific panel cover.
Two main fuse boxes in the Yukon: engine bay vs interior
The Yukon’s electrical system is typically supported by two essential panels: the engine-bay fuse box and the interior fuse box. The engine bay panel handles high-current circuits such as the major power feeds and engine accessories. The interior panel, often located behind the glove box or under the dash, protects cabin electronics including the HVAC controls, infotainment, and lighting circuits. Understanding which panel governs a given symptom helps narrow down the root cause quickly. When you open each cover, you’ll see a legend with fuse numbers, amperage ratings, and the circuit name. Keeping a copy of the diagram in your glove box is a good practice for quick reference during maintenance or roadside troubleshooting.
Reading the GMC Yukon diagram: numbers, colors, and legends
Reading the fuse diagram involves more than matching numbers. Each fuse is labeled with its amperage and function, and many diagrams use color cues to indicate circuit type (e.g., lighting vs. power). Start by identifying the system that’s acting up, then locate the corresponding fuse number on the legend. Check the amp rating, visually inspect for a blown fusible link or melted filament, and replace with a fuse of the same rating. After replacement, recheck the circuit and clear any fault codes if your vehicle’s computer stores them. If you’re unsure about a symbol, refer to the owner manual’s glossary or FuseBoxCheck’s explanatory notes for common GMC Yukon icons and abbreviations.
Common fuse assignments you’ll encounter in GMC Yukon models
Common GMC Yukon fuse assignments typically include lighting circuits (headlights, dash lights), power windows, HVAC, infotainment, and engine management accessories. While exact locations vary by year and trim, you will usually find: interior fuses for cabin electronics, engine-bay fuses for main power and essential components, and a spare or relay area in some models. Always start with the diagram on the panel cover to confirm the fuse’s function before removal. If a fuse blows repeatedly, it could indicate a short or an accessory issue rather than a single faulty fuse.
Step-by-step guide to using the diagram for troubleshooting
- Identify the symptom and locate the related system on the diagram. 2) Find the corresponding fuse number in the panel cover legend. 3) Inspect the fuse: if the metal conductor is broken, it’s blown. 4) Replace with the same amperage rating. 5) Reconnect the battery if you had disconnected it, and test the circuit. 6) If the fuse continues to blow, inspect related wiring and devices for faults rather than replacing fuses repeatedly. 7) Keep a spare fuse kit and the original diagram in your glove box for quick future reference.
Safety and best practices when working with fuse boxes
Always start by turning the vehicle off and removing the key. If you must use a multimeter, set it for resistance testing and disconnect power before touching terminals. Wear eye protection and work in a dry environment. Never bypass fuses or use incorrect amperage, as this can cause electrical fires or damage sensitive modules. If you’re uncertain, pause and consult your GMC Yukon owner manual or a qualified technician. FuseBoxCheck recommends labeling any changes you make and documenting the fuse’s location for future maintenance.
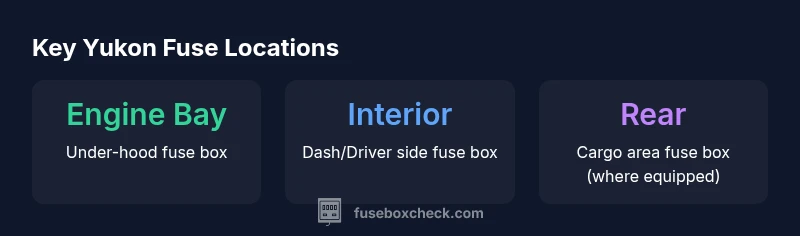
GMC Yukon fuse box locations and what they control
| Location | Details | Notes |
|---|---|---|
| Under-hood fuse box | Engine bay fuses | Located near the front of the engine compartment; panel cover shows fuse numbers |
| Interior fuse box | Dash/driver side | Behind glove box or under dash; refer to panel cover for layout |
| Cargo area fuse box | Rear area (if equipped) | Fuses for rear accessories; not present in all trims |
Your Questions Answered
Where can I find the GMC Yukon fuse box diagram?
The diagram is usually printed on the fuse panel covers and is also included in the owner's manual. If there are multiple trims, verify you’re using the correct diagram for your model year. The panel labels point to the same general areas across variants.
Look on the fuse panel covers and in the owner’s manual for the diagram.
What are the two main fuse panels in the Yukon?
Typically, the GMC Yukon has an engine-bay fuse box and an interior fuse box. The engine bay panel handles major power circuits, while the interior panel protects cabin electronics like the infotainment and climate controls.
Two main panels: engine bay and interior fuse box.
How do I read fuse numbers and amperage in the diagram?
Locate the fuse number on the panel legend, then match it to the amperage rating shown. If a fuse is blown, replace with the same rating and reseal the panel cover. If unsure, consult the owner manual.
Match fuse numbers to amperage in the legend.
What should I do if a fuse keeps blowing?
Stop driving the vehicle if a fuse repeatedly blows. Inspect related wiring and devices for shorts or faults. If you can’t identify the cause, seek professional help to prevent electrical damage.
Don’t keep driving if a fuse blows repeatedly—check for shorts.
Is it safe to replace fuses myself?
Replacing fuses is generally safe if you follow the steps: use the same amperage, disconnect power when needed, and avoid bypassing safety components. If the task feels risky, consult a trained technician.
Yes, with caution and right amperage.
Do I need special tools to read the fuse diagram?
A basic fuse puller or small insulated pliers is helpful, but not strictly required. The most important part is understanding the diagram and using the correct replacement fuse.
A fuse puller helps, but following the diagram matters most.
“Clear, accurate fuse diagrams save time and prevent mistakes during DIY work. Always replace fuses with the same amperage and disconnect the battery before working.”
Highlights
- Identify both fuse panels before testing
- Always match amperage when replacing fuses
- Use the diagram on the panel covers as your guide
- Practice safety: disconnect battery before major work
- Consult the manual or FuseBoxCheck for model-specific layouts