Honda Accord 2006 Fuse Box Guide: Location, Testing, and Safety
Learn where the Honda Accord 2006 fuse box is, how to safely access it, and how to diagnose common fuse issues with step-by-step guidance from FuseBoxCheck analysis.

The Honda Accord 2006 fuse box setup includes two main panels: an under-hood fuse box in the engine bay near the left front fender and an interior fuse box behind the glove box. The under-hood panel protects engine bay circuits, while the interior box handles dashboard and interior accessories. Always consult the owner's manual for exact locations and amperage ratings before testing fuses.
Honda Accord 2006 fuse box layout and responsibilities
The 2006 Honda Accord uses two primary fuse panels to manage electrical circuits: the under-hood fuse box located in the engine bay near the left-front fender, and an interior fuse box tucked behind the glove box. Each panel serves distinct responsibilities, with the under-hood box protecting critical engine and powertrain circuits, and the interior box supplying power to the dashboard, lighting, radios, and other cabin accessories. For DIY diagnostics, it helps to understand what each panel typically guards so you can pinpoint issues faster. The FuseBoxCheck team notes that having a clear map of fuse locations and amperage ratings improves safety and reduces the risk of overreaching into the wrong circuit. Always verify the exact layout and fuse values in the vehicle’s owner's manual and on the fuse panel cover or diagram.
Understanding the layout also reduces the chance of misinterpreting fuse symbols, which can vary slightly by trim level or market. If you’re working with an imported or modified Honda Accord, cross-check the fuse diagram for that specific vehicle to avoid misidentification. Using OEM or OEM-compatible fuses is strongly advised to maintain electrical integrity and warranty considerations.
In summary, when you think about the honda accord 2006 fuse box, remember: planning first, then action, and always align with manufacturer specifications. This disciplined approach makes fuse testing safer and more reliable.
Safety first: preparing to access the fuse panels
Before touching any fuse panels, power should be off and the battery disconnected to minimize electrical shock or short circuits. Wear eye protection and gloves to guard against sharp edges on the fuse box covers. Use insulated tools and avoid wearing loose jewelry that could catch on wiring or terminals. Occupants should avoid leaning over the engine bay when the hood is open to reduce risk of contact with moving parts. If you must test a circuit while the car is off, keep ignition keys out of the vehicle to prevent accidental arming. When you’re ready to proceed, use the owner’s manual diagram to identify the specific fuse you’ll inspect, then remove and visually inspect the fuse for a broken filament or a blackened appearance. If you’re uncertain, consult a professional or a trusted DIY guide before proceeding.
A practical trick is to have a portable flashlight handy and to document fuse numbers with a photo before removal. This helps you restore the correct fuse after testing and avoids mismatches that could cause future problems. Finally, never substitute a blown fuse with a higher-amp fuse as a temporary fix; this disguises faults and can overheat wires, risking damage or fire.
With these precautions, you’ll perform fuse testing in a controlled, safe manner. The FuseBoxCheck approach emphasizes safety, accuracy, and adherence to OEM specifications.
Key differences between interior and under-hood fuses and what they protect
Interior fuses generally protect comfort and convenience features such as the radio, climate control, interior lights, and power windows. They’re often in the passenger-side dash area and use smaller amperages. Under-hood fuses support critical engine functions, ABS, charging systems, and major power distribution. These are typically rated higher due to the higher current requirements of ignition and fuel systems. In the Honda Accord 2006, a single fuse panel commonly covers both cockpit electronics and engine bay circuits, but the exact split can vary by trim. It’s crucial to consult the fuse diagram on the panel cover or in the owner’s manual to avoid cross-wiring or mislabeling circuits.
Knowing which panel handles a fault helps you decide whether to check inside the cabin or in the engine bay first. The FuseBoxCheck analysis highlights that many repeated issues stem from a single misidentified fuse or a weak connector rather than a broad electrical fault. By reading the fuse map carefully, you can triage faster and reduce downtime.
Locating and inspecting the under-hood fuse box
To locate the under-hood fuse box, pop the hood and look for a rectangular plastic cover near the left front of the engine bay. Release the latch or screws, then remove the cover to reveal the fuses and a diagram. Check for a blown fuse by inspecting the metal strip through the transparent window or by testing with a multimeter on continuity. Use the fuse puller tool or insulated pliers to extract the suspect fuse for inspection. If the fuse is intact but the circuit remains non-functional, inspect nearby wires for damage, pinched insulation, or corroded terminals that could create resistance or a short. Always replace with an identical amperage rating. FuseBoxCheck recommends taking a clear photo of the layout for future reference.
After replacing, re-seat the fuse fully and recheck the circuit. If repeated blows occur, there may be a short or an overloaded circuit; this should prompt further diagnosis rather than another fuse swap.
Locating and inspecting the interior fuse box behind the glove box
The interior fuse box in the Honda Accord 2006 is commonly located behind the glove box. Remove the glove box door by releasing its stops or hinges, depending on trim. Once removed, you’ll see a fuse panel with a diagram showing each circuit. Use a fuse puller to remove the suspected fuse, then inspect for a melted or broken filament. If you’re unsure, you can test continuity with a multimeter between the fuse terminals. When replacing, choose the same amperage rating as indicated by the diagram. Keep the panel cover aligned during reassembly to ensure the fuse diagram remains readable. If the interior fuses repeatedly blow, check for a faulty device like a malfunctioning window motor or sunroof switch that might be drawing excess current and causing the fuse to fail.
Maintaining a tidy dash area helps prevent accidental connections and makes future testing quicker. FuseBoxCheck recommends documenting the fuse layout and keeping spare OEM fuses in your toolkit for expedient replacements.
Step-by-step diagnostic approach to a blown fuse
Begin by confirming the fuse is indeed blown with a visual check or continuity test. If it’s blown, remove the fuse and replace it with a fresh fuse of the same amperage rating, then test the circuit. If the fuse blows again, disconnect all devices on that circuit to isolate the fault, and gradually reconnect items to identify the culprit. If the problem persists after isolating devices, inspect wiring harnesses for damage, chafed insulation, or exposed conductors. A parasitic draw test with a multimeter can help detect small, continuous current drains when the car is off.
When troubleshooting, document the exact fuse numbers and their circuits. Replacing only with OEM-equivalent fuses is critical for safety and reliability. If you’re unable to locate the fault or the fuse continues to blow, consult a professional technician who can run more advanced diagnostics and safely repair any wiring or component issues.
Common causes and preventive maintenance for the Honda Accord 2006 fuse box
Common causes of blown fuses include short circuits, damaged wiring insulation, or a faulty electrical component drawing too much current. Preventive maintenance includes periodic fuse inspection during routine service, replacing worn fuse covers that obscure the diagram, and keeping the fuse box clean from dust and corrosion. Regular checks of battery connections, alternator output, and ground points can also reduce nuisance fuse blows. Avoid adding aftermarket electrical accessories that aren’t compatible with the car’s electrical system without a professional review. Keeping the fuse box and wiring neat—without loose wires that can rub against belts or moving parts—prevents accidental shorts. The FuseBoxCheck team emphasizes consistent, careful maintenance and using OEM fuses to protect circuits and preserve vehicle reliability.
Honda Accord 2006 fuse panel layout overview
| Panel | Location | Typical Amperage (A) |
|---|---|---|
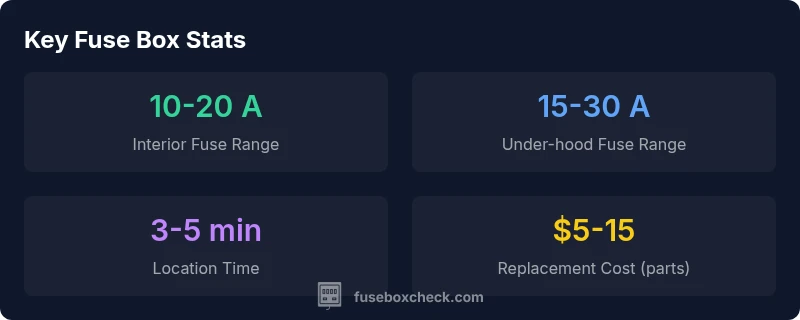
| Under-hood fuse box | Engine bay near left-front fender | 15-30 A |
| Interior fuse box | Behind glove box (cabin) | 10-15 A |
| Power distribution/IG area | Instrument panel area | 5-10 A |
Your Questions Answered
Where is the fuse box located on a 2006 Honda Accord?
There are two main fuse panels: one under the hood in the engine bay near the left-front fender, and one interior panel behind the glove box. Always refer to the owner’s manual diagram for exact locations.
There are two fuse panels: under the hood and behind the glove box. Check the manual for exact spots.
What amperage fuses are used in the interior panel of a 2006 Honda Accord?
Interior fuses typically range from 10 to 15 amps, depending on the circuit. Always verify the exact rating on the fuse diagram or in the owner’s manual.
Interior fuses are usually 10 to 15 amps; check the diagram for the exact rating.
Can I drive with a blown fuse?
If the blown fuse protects a non-critical circuit, the car may operate, but it’s unsafe to drive with a blown fuse in a critical system. Replace with the correct amperage and inspect the circuit for further issues.
Usually you should not drive with a blown fuse, especially in essential circuits. Replace with the right fuse first.
How do I tell if a fuse is blown vs a bad relay?
A blown fuse typically shows a broken filament or a blackened appearance. Use a multimeter to check continuity. If the fuse is intact, the issue may be with the relay or the circuit it controls.
Check the fuse visually and with a meter; if intact, test the relay or circuit.
Why do fuses keep blowing on this model?
Repeated blows often indicate a short or an overloaded circuit, a faulty device, or a damaged wiring harness. Systematic diagnosis and inspection of the related components are required.
Repeated blows usually mean a short or overload; inspect the related wiring and devices.
Is it safe to replace a fuse with a higher amperage rating to prevent blowing?
No. Replacing with a higher amperage can overheat wires and cause a fire. Always use the OEM rating for that circuit and investigate the cause of the blow.
No, don’t up the amperage; find and fix the root cause instead.
“Regular fuse checks save time and prevent hidden electrical issues; always verify amperage ratings with the owner’s manual and replace only with OEM-equivalent fuses.”
Highlights
- Act first to locate both fuse panels before testing
- Always use OEM-equivalent fuses and verify amperage ratings
- Inspect for damaged wiring around fuses during testing
- Avoid higher-amp fuses as a fix for repeated blows