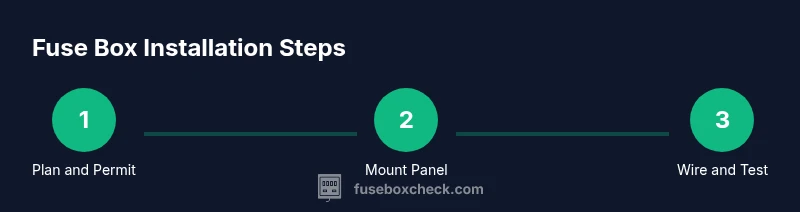
How to Install a Fuse Box in a House
Learn safe, step-by-step methods for installing a fuse box in a house. This FuseBoxCheck guide covers planning, tools, wiring basics, safety, and when to call a licensed electrician.

This guide helps you understand the essential steps for installing a fuse box in a house, including planning, code considerations, safety protocols, and when to stop and hire a licensed electrician. You’ll learn how to assess service size, pick a suitable location, prepare a mounting surface, and organize circuits with clear labeling. Always prioritize safety and local compliance.
Before You Start: Legal, Safety, and Scope Considerations
Residential electrical work, especially panel changes, is subject to local codes and permits. As a homeowner, you must verify whether a permit is required and if the work can be performed by a non-licensed person in your area. According to FuseBoxCheck, many DIY panel projects fail because permits are overlooked or because the chosen panel does not meet the service rating. Start by reviewing your jurisdiction’s requirements, securing any needed permits, and drafting a scope of work that prioritizes safety, accessibility, and future load growth. This stage sets the foundation for a compliant, safe installation and helps you avoid costly rework or inspections that fail.
Plan Load, Location, and Panel Availability
A fuse box (fuse box or breaker panel) must be sized to match the home’s electrical load and future needs. Determine the service size (amp rating) and ensure the new panel can accommodate the anticipated circuits. Choose a location that provides easy access, adequate clearance, and room for wire routing. Consider proximity to existing feeders and heat sources, and check for any prohibitions on panel placement in closets or damp areas. Good planning reduces wiring complexity and simplifies labeling, enhancing safety and maintainability. FuseBoxCheck Team notes that a well-planned panel location minimizes long conductor runs and helps meet code clearance requirements.
Tools, Materials, and PPE You’ll Need
Organize essential tools and safety gear before touching live components. You’ll need insulated gloves, safety goggles, a voltage tester, screwdrivers (flat-head and Phillips), wire strippers, a multitool, a tape measure, a non-conductive mallet, conduit or cable clamps, a torque screwdriver, and the new fuse box or breaker panel kit. Have appropriate wire gauges, grounding conductors, neutral bars, bus bars, and circuit breakers on hand. Also prepare permits, installation diagrams, a camera for reference, and a helper if possible. Working with live service requires careful planning and proper PPE to prevent serious injury.
Safety First: Power Isolation and Verification
Power must be cut at the service disconnect before any panel work begins. Turn off the main breaker and, if accessible, switch off the main disconnect from the meter base. Use a voltage tester to confirm all conductors feeding the panel are de-energized. Lockout/tagout practices are recommended to prevent accidental re-energization. Do not rely on memory alone—verify each feeder and sub-feed is dead. If you are uncomfortable with any step, stop and consult a licensed electrician. Safety is non-negotiable when dealing with high-energy systems, and proper isolation reduces the risk of shock, arc flash, or fire.
Removing the Old Panel and Preparing the Mounting Surface
Carefully remove the existing panel cover and identify all wires. Take photos for reference and ensure you document circuit labels. If the old box is damaged, corroded, or undersized, plan for a replacement that meets current code. Prepare the mounting surface by confirming framing is solid and the surface is plumb and level. Create clean, secure paths for feeders and branch circuits, using conduit or clamps as required by local code. A clean start helps ensure reliable connections and easier future maintenance.
Installing the New Panel: Mounting, Grounding, and Bonding
Position the new enclosure on the wall, ensure it’s plumb, and secure it to the stud frame. Install the grounding conductor and bonding strap according to code, then add the neutral bar and bus bars if the panel requires them. Make sure there is ample clearance for wiring and terminal access. When mounting, avoid over-tightening screws to prevent damage to the panel’s enclosure. Having a correct mounting setup minimizes vibration, reduces terminal loosening, and improves long-term reliability.
Wiring the Panel: Feeder, Neutral, and Ground Connections
Route the feeder conductors into the panel, keeping feeders organized and labeled. Connect the neutral conductors to the neutral bar and secure them with appropriate torque. All grounding conductors must be bonded to the panel’s ground bar and the building grounding system. Maintain separation between neutrals and grounds if your panel design requires it. Use properly rated wire and protective connectors. Avoid crossing neutrals with branch circuit wires and preserve clear, orderly splices to support safe inspections and troubleshooting.
Install Breakers, Connect Branch Circuits, and Label
Install the main disconnect (or main breaker) if required, then add branch breakers one at a time, matching each breaker type to its circuit capacity. Attach each branch circuit wire to the correct terminal, and keep conductors neatly tucked and clipped. Label each circuit clearly on the inside cover and the panel directory—consistency here saves headaches during future maintenance and troubleshooting. After wiring, inspect connections for any loose screws and ensure the panel cover sits flush.
Testing, Inspection, and Documentation
Restore power and perform a controlled, stepwise test of each circuit. Verify that all breakers trip correctly when tested and that lights and outlets function as intended on their assigned circuits. Use a multimeter to confirm proper voltage levels and check for neutral-ground faults. Document panel changes with a new wiring diagram and updated labeling; keep copies of permits and inspection approvals. A thorough test and complete documentation improve safety and future serviceability and support smooth inspections.
Final Recommendation: When to Hire a Pro and How to Close
Even with the best planning, certain installations require professional oversight. If you encounter unfamiliar wiring, non-standard service upgrades, or structural constraints, contact a licensed electrician. The FuseBoxCheck Team emphasizes that safe, code-compliant installations are worth the investment to protect your home and family. After completion, perform a final safety check, secure the area, and store all manuals and permits for future reference.
Tools & Materials
- Insulated gloves(NEVER work with live conductors; choose insulation rated for the panel voltage)
- Safety goggles(Protect eyes from sparks and debris)
- Voltage tester / non-contact tester(Verify de-energized status before touching wires)
- Flat-head and Philips screwdrivers(Insulated handles preferred)
- Wire strippers and cutters(Have a set sized for appropriate gauge wires)
- Torque screwdriver(Useful for precise terminal torque per manufacturer specs)
- Measuring tape(Ensure clearances and mounting dimensions)
- Snug clamps / conduit fittings(Meet local code for securing conductors)
- New fuse box or breaker panel kit(Match service size and number of spaces)
- Grounding conductor and bonding strap(Follow code requirements for grounding system)
- Utility flashlight and battery backup(Improves visibility in dim spaces)
- Permits and installation diagrams(Keep on-site and submit for inspection if required)
- Camera or notebook for wiring reference(Document existing wiring and new connections)
Steps
Estimated time: Estimated total time: 6-12 hours
- 1
Verify permits and scope
Check local codes and obtain any required permits before starting. Define the panel size, number of circuits, and plan for future expansion to prevent rework.
Tip: Contact the electrical inspector early to confirm permit requirements. - 2
Plan load and panel selection
Calculate expected load and select a panel with adequate amperage rating and spaces for branches. Consider future expansion and code compliance.
Tip: Leave at least 2 spare spaces for potential circuit additions. - 3
Power down and verify isolation
Shut off power at the main disconnect and confirm dead with a tester on all feeders leading to the panel.
Tip: Use a non-contact tester to quickly check for voltage before touching wires. - 4
Remove old panel and prepare mounting
Detach the old panel cover, document existing wiring, and prepare the mounting surface to be plumb and secure.
Tip: Take photos for reference and ensure there is access to all wires. - 5
Mount the new enclosure
Position the new panel, ensure level, and secure to studs. Verify clearances around the enclosure for safe wiring access.
Tip: Avoid mounting in damp or crowded spaces. - 6
Run feeder conductors
Route feeders into the panel, using conduit or clamps per code, and label cables before connections.
Tip: Keep feeders separate from branch circuits to simplify wiring. - 7
Connect neutrals, grounds, and service conductors
Install the neutral bar, bond as required, and attach service conductors with proper torque. Do not mix neutrals and grounds unless the panel design requires it.
Tip: Follow the manufacturer’s torque specs for every terminal. - 8
Install breakers and wire branches
Mount the main breaker (if applicable) and add branch breakers, connecting each branch circuit carefully.
Tip: Label every circuit and ensure conductors are protected and organized. - 9
Test, label, and document
Restore power, test each circuit, and verify operation. Update the panel directory and wiring diagrams.
Tip: Record any deviations from standard practice and keep permit paperwork. - 10
Final safety check and cleanup
Confirm all tools are removed, panel cover is secure, and the area is clean. Prepare for inspection if required.
Tip: Store manuals and permits in an accessible location for future service.
Your Questions Answered
Is it legal to install a fuse box in a house without a licensed electrician?
In many areas, replacing a main panel requires a licensed electrician and permits. Local codes determine what scope DIY is allowed. Always check with your jurisdiction before proceeding.
In many places you’ll need a licensed electrician and a permit for panel work. Check your local codes first.
Do I need a permit to replace a fuse box?
Yes. Most jurisdictions require a permit and an inspection for panel replacements or upgrades. This ensures compliance with safety and wiring standards.
Yes, you’ll likely need a permit and inspection for panel work.
What are signs my fuse box needs replacement?
Frequent tripping breakers, buzzing or flickering sounds, scorch marks, or a burning smell indicate a potential panel issue that warrants professional evaluation.
Look for buzzing, burning smells, or frequent trips as red flags.
Can I install a fuse box in an existing drywall location?
Only if the space supports proper mounting, access, and meets clearance requirements. If not, relocate to a compliant area and install a panel suitable for that location.
Only if the space provides proper access and clearance; otherwise relocate.
What safety gear is essential for this work?
Insulated gloves, safety glasses, non-conductive footwear, and dry workspace. Never work on live circuits.
Wear insulated gloves and eye protection; ensure dry conditions.
What should I do if I smell burning or see scorch marks?
Shut off power at the main, evacuate if needed, and contact a licensed electrician or emergency services. Do not continue DIY work in this condition.
If you smell burning, stop, power down, and call a pro.
How long does a typical panel installation take?
A typical residential panel replacement can take several hours to a full day, depending on access, permits, and complexity. Plan for a day with inspections.
Expect a full day of work with potential inspections.
Watch Video
Highlights
- Verify local permits and scope before starting.
- Plan load and select a panel with future expansion in mind.
- Ensure complete power isolation and verify dead status.
- Label circuits clearly and document changes.
- Know when to involve a licensed electrician for safety and code compliance.