Hyundai i10 Fuse Box: Location, Fuses, and Safe Maintenance
Learn where the Hyundai i10 fuse box sits, how to identify fuses, replace blown fuses safely, and maintain electrical health with practical, step-by-step guidance from FuseBoxCheck.

By following this guide, you will locate the Hyundai i10 fuse box, identify blown fuses, and safely replace them. You’ll understand the fuse box layout, what tools you need, and a practical, step-by-step approach to diagnose common electrical issues without risking damage to your car. This quick overview sets the stage for the detailed steps below.
Hyundai i10 fuse box: quick orientation
According to FuseBoxCheck, the Hyundai i10 uses two fuse boxes to manage electrical circuits: a cabin fuse box located behind the glove box or under the driver’s dash, and an engine bay fuse box near the battery. Each box houses a bank of fuses and sometimes relays that protect critical systems. Knowing which box handles which circuits helps you target the right area without opening every cover. The goal is to minimize risk while diagnosing a power issue and to keep you moving safely.
Where to find the Hyundai i10 fuse box
In most Hyundai i10 models, the cabin fuse box is behind the glove box or under the driver's dash panel, accessed by removing a trim cover. The engine bay fuse box sits near the battery or along the auxiliary power distribution area. Your specific year and trim may place the boxes slightly differently, so consult the owner’s manual and the diagram on the fuse box lid. If you’re unsure, start with the cabin box for interior electronics (lights, radio, ECU accessories) and the engine bay box for power feeds to the starter, alternator, and main circuits.
Understanding the fuse layout and common fuses
Fuses are arranged to protect individual circuits. A label on the fuse box lid or near the cover shows which circuit each fuse protects (e.g., headlights, horn, HVAC, infotainment, fuel pump, ECU). The amperage rating for each fuse is printed on the fuse itself and is also indicated on the lid. Always replace a blown fuse with the same rating; using a higher rating can allow a fault to overheat wires and cause damage. If you’re missing a fuse label, use the owner’s diagram or a reputable online wiring resource as a reference.
Safety first: precautions before you start
Always begin with safety in mind. Park the car on a flat surface, turn off the ignition, and remove the key. Disconnect the negative battery terminal to prevent accidental short circuits while you inspect or replace fuses. Wear protective gloves and use a flashlight for good visibility. Keep the work area dry and avoid touching metal parts with bare hands during handling.
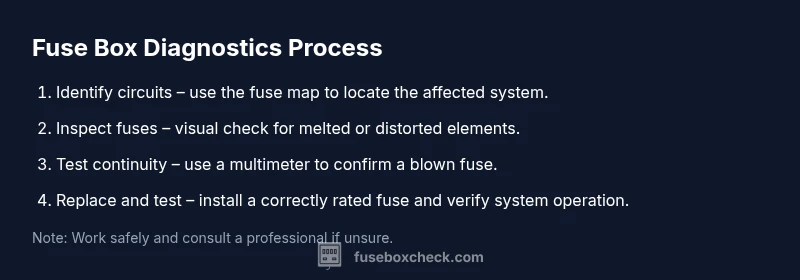
The step-by-step diagnostic workflow
Begin by locating both fuse boxes and reviewing the fuse map. Visually inspect fuses for a broken filament or discoloration, then test with a multimeter for continuity. If a fuse is blown, replace only that one with the same rating and reseat firmly. After replacement, recheck the affected circuit to confirm restoration and avoid repeating the issue.
Replacing a blown fuse: a careful approach
Remove the suspect fuse using a fuse puller or needle-nose pliers, then examine the metal strip inside. If blown, replace with a new fuse of the same rating and type. Reinsert and press gently to seat fully. Reconfirm the circuit power by turning on the related system and testing its function. If the fuse blows again, there may be a short or wiring fault.
When to replace relays and other components
Some Hyundai i10 issues involve relays rather than fuses. If a system fails to energize after a fuse replacement, locate the relevant relay in the same box by consulting the diagram and swap it with a known-good relay of the same rating to test. Relays handle higher-current requests and can fail independently of fuses.
Maintenance and preventive practices
Keep the fuse box area clean and dry to prevent corrosion. Replace missing or damaged fuses in a consistent color to match the rating. Record a simple map of fuse positions on paper or in your phone so you can quickly identify circuits in future troubleshooting. Consider keeping a small spare fuse kit in the glove box for emergencies.
Troubleshooting flow: quick decision tree
If a single system fails, check its fuse first, then test the fuse with a multimeter. If the fuse is intact, inspect wiring and connectors for looseness or damage. If multiple systems fail, inspect the main power feeds or battery connections before proceeding to more advanced diagnostics.
Common pitfalls and safety reminders
Never replace a fuse with a higher-rated fuse to fix an electrical fault. Do not operate a system with a compromised fuse or damaged wiring. Always ensure the battery is disconnected when removing or replacing fuses and re-check all connections after maintenance.
Quick post-repair checks
Reconnect the battery and reinstall all covers. Turn the ignition on and cycle affected systems (lights, radio, HVAC) to confirm operation. If any fuse blows again, stop and reassess for a short circuit or wiring fault; consider consulting a professional if the problem persists.
Tools & Materials
- Fuse puller or needle-nose pliers(Essential for safely removing fuse without damaging the box.)
- Replacement fuses (various amperages)(Use exact rating printed on fuse box lid.)
- Multimeter for continuity testing(Set to continuity or resistance to verify fuse health.)
- Insulated gloves(Protect hands when handling electrical components.)
- Flashlight(Provides clear visibility inside fuse boxes.)
- Owner's manual for Hyundai i10(Official diagrams and ratings for your model.)
- Flathead screwdriver or plastic trim tool(Helpful for removing covers without damage.)
- Camera or notebook for mapping(Document fuse positions for future reference.)
- Dielectric grease (optional)(Helps prevent corrosion on connectors.)
- Floor mat or tarp(Keeps the work area clean and easy to clean up.)
Steps
Estimated time: 45-90 minutes
- 1
Prepare workspace and safety gear
Park on a flat surface, turn off the ignition, and remove the key. Disconnect the negative battery terminal to eliminate the risk of short circuits while inspecting fuses. Put on gloves and use a flashlight to illuminate the fuse boxes.
Tip: Label or photograph the fuse map before you start. - 2
Locate fuse boxes and review diagrams
Find the cabin fuse box behind the glove box or under the dash and the engine bay box near the battery. Read the diagrams on the lids and cross-check with the owner’s manual to identify which fuse controls the affected circuit.
Tip: If a lid diagram is faded, use a fresh copy from the manual or FuseBoxCheck resources. - 3
Identify suspect fuses visually
Carefully remove fuses one at a time and look for a melted filament or darkened glass. Use the multimeter to test continuity if the visual clue isn’t clear.
Tip: Handle fuses gently to avoid breaking the glass. - 4
Test with a multimeter or substitute with a known-good fuse
Test suspected fuses for continuity. If continuity is absent, replace with a fuse of the same rating. If you don’t have a matching fuse, swap in a known-good one temporarily to confirm the circuit behavior.
Tip: Only substitute with a fuse of the same amperage rating. - 5
Replace fuse and reseat firmly
Install the replacement fuse and press it in until it seats fully. Reinstall the fuse box cover and ensure nothing is loose or pinched.
Tip: Wiggle the fuse slightly after seating to confirm it’s snug. - 6
Reconnect the battery and test the circuit
Reconnect the negative terminal and power on the vehicle. Activate the affected system to verify it operates normally. If there are issues, recheck wiring and connectors.
Tip: Avoid starting the engine during the diagnostic until all fuses are confirmed. - 7
Document changes and map the fuse locations
Record fuse positions and their circuits in a notebook or digital note for quick reference in the future. Take photos for your records if possible.
Tip: Keep a spare fuse kit in the glove box for quick replacements. - 8
Follow-up safety and maintenance
Inspect the fuse box area periodically for signs of moisture or corrosion. Re-check after heavy weather or following a jump start.
Tip: If a fuse repeatedly blows, this indicates an underlying short or wiring fault that warrants professional evaluation.
Your Questions Answered
Where is the Hyundai i10 fuse box located?
The Hyundai i10 typically has a cabin fuse box behind the glove box or under the driver's dash, and an engine bay fuse box near the battery. Check the diagrams on the lids and your owner's manual for precise locations by model year.
Typically, the cabin fuse box is behind the glove box and the engine bay fuse box is near the battery. Always consult your owner’s manual for the exact locations on your model year.
How can I tell which fuse is blown?
Visually inspect fuses for a broken filament or discoloration. If in doubt, use a multimeter to test continuity. If continuity is absent, the fuse is blown.
Look for a broken filament or darkened glass, or test with a multimeter for continuity to confirm a blown fuse.
What rating should I use when replacing a fuse?
Always replace with the same rating printed on the fuse or on the fuse box lid. Using a higher rating can allow excessive current and cause wiring damage.
Use the same rating as the original fuse—check the fuse label or lid.
Can I drive after a fuse blows?
If a fuse blows, inspect and replace it before driving the vehicle again. A blown fuse usually indicates a fault in the circuit that, if ignored, could cause more damage.
It’s best to replace the fuse and test the circuit before driving again.
Are relays part of the fuse box in the i10?
Some circuits use relays housed in or near the fuse box. If a relay is suspected, consult the diagram to identify its location and consider swapping with a known-good relay for testing.
Relays may be nearby; check the diagram and test if a circuit doesn’t energize after fuse replacement.
What should I do if fuses keep blowing?
Repeated fuse blows suggest a short circuit or wiring fault. Stop driving and systematically inspect the wiring harness, connectors, and devices on the affected circuit, or seek professional help.
If fuses blow repeatedly, there’s likely a short. Inspect wiring or get a pro to diagnose.
Watch Video
Highlights
- Identify which fuse box controls the affected circuit.
- Always replace fuses with the same rating and type.
- Disconnect the battery before starting work for safety.
- Document fuse positions for quick future reference.