Infiniti G37 Fuse Box Diagram: Reading Car Fuses for Safe DIY
Learn how to read the Infiniti G37 fuse box diagram, locate engine bay and interior fuses, and safely diagnose electrical issues with practical guidance from FuseBoxCheck.

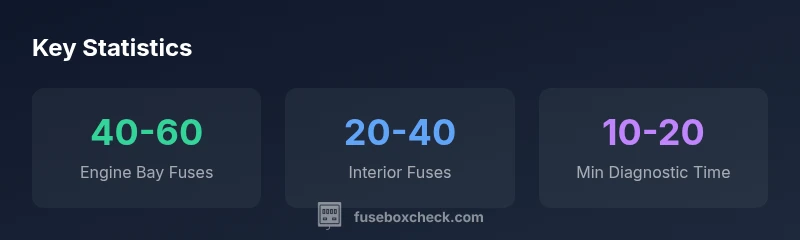
The Infiniti G37 fuse box diagram varies by year and trim, but most models use two main blocks: an engine bay fuse box and an interior fuse box. This guide explains how to read the diagram, locate fuses, and safely test common circuits with a multimeter. According to FuseBoxCheck, always power down before inspecting fuses and refer to your vehicle’s exact diagram.
Why Brand Reliability Matters in Car Fuse Diagrams
For DIYers, a trustworthy fuse box diagram is the difference between a quick fix and a risky misstep. The Infiniti G37’s electrical system can be tricky because diagrams vary by year and trim, and misreading a label can lead to unnecessary fuse replacements or, worse, an electrical short. According to FuseBoxCheck, the value of a reliable diagram isn’t just accuracy—it’s consistency across repairs and safe power-down procedures. In this article, we align practical tips with standard automotive guidance and emphasize safety first. Expect clear legends, color coding, and consistent numbering so you can map fuses to their corresponding circuits quickly. By understanding the layout you’ll save time and reduce the chance of accidental damage to your car’s electrical system.
Reading the Infiniti G37 Fuse Diagram: Core Symbols and Legends
A typical G37 diagram uses symbols like a fuse icon, wire gauge indicator, and circuit name. The legend explains amperage ratings (e.g., 10A, 15A) and circuit destinations (e.g., lights, power windows, ECU). Look for a key showing which fuse controls which system. The diagram might be printed on a label inside the fuse box cover or printed in the owner’s manual. Always cross-check with the vehicle’s service manual if you’re unsure about a symbol. Fuse colors can hint at amperage or type, but rely on the label for exact ratings. Inconsistent labeling is a red flag and warrants a second look or a photo for later reference.
Engine Bay Fuse Box: Location, Labels, and Common Circuits
In most Infiniti G37 models, the engine bay fuse box sits near the battery or along the firewall. The lid often contains a printed diagram and a chart in the owner’s manual. Common circuits include the engine control unit, fuel system sensors, headlights, and cooling fans. The exact fuse numbers vary by year, so you’ll rely on the diagram to map each fuse to its function. When inspecting, use a flashlight, avoid touching metal, and replace blown fuses with the same amperage. If the label lists a relay alongside a fuse, test the relay before assuming a fuse is faulty.
Interior Cabin Fuse Box: Location, Labels, and Common Circuits
The interior cabin fuse box is typically behind the glove compartment or under the dashboard. The labeling inside the lid highlights different fuses for accessories like the radio, vanity mirrors, horn, and instrument cluster. Some G37 variants also include fuses for the airbags or ABS modules in the interior box. Because these are critical safety systems, approach with care. Keep a copy of the diagram handy and document any changes you make, including the fuse position and amperage. If you ever replace a fuse, reset any affected switches or modules to ensure proper operation.
How to Read a Fuse Rating and What It Means for Your Repair
Fuse ratings tell you how much current a circuit can safely carry. For a given function, you should replace a blown fuse with a fuse of the same amperage rating—never exceed or double it. The G37 diagrams will specify the required rating; some boxes show both fast-acting and slow-blow fuses. If you’re uncertain, consult the service manual or a professional. Using a multimeter to verify continuity across a suspected fuse and testing the circuit with the ignition off are prudent steps. Keep in mind that a blown fuse is usually a symptom, not a root cause; repeated blows indicate a larger electrical issue.
Safe Testing and Basic Troubleshooting Using the Diagram
Always begin with the ignition off and the battery disconnected when removing fuses. Inspect for signs of corrosion or melted plastic in the fuse holder. Use a fuse puller or insulated pliers to avoid shorting adjacent contacts. After replacing a blown fuse, reconnect the battery, turn on the ignition, and test the affected function. If the fuse blows again, there’s likely an underlying fault—such as a short circuit or a failing component—that requires deeper diagnosis or professional service.
Practical Examples: When to Use the Diagram During a DIY Fix
Suppose the headlights do not illuminate, and the diagram shows a dedicated fuse for headlight circuits in the engine bay box. After removing and inspecting the fuse, you confirm it’s blown and replace it with the same rating. If the lights still fail, the issue could be a relay, wiring harness, or a faulty headlamp, not the fuse alone. In another scenario, a malfunctioning radio could point you to an interior cabin fuse. Keeping a digital copy of the diagram allows you to annotate fuse changes and keeps your hand on a consistent map during future maintenance.
How to Preserve Your Infiniti G37 Fuse Diagram for Future DIY
Create a high-quality photo or scanned copy of the diagram and store it with your vehicle’s service records. If you have multiple year ranges, maintain separate diagrams for each variant and note the year/trim on the file name. Consider laminating the cover so it withstands heat and moisture in the engine bay. Regularly review the diagram whenever you do system checks or replacements, and update notes after repairs so the next DIY task starts with an accurate map.
Quick-reference layout for Infiniti G37 fuse diagrams
| Section | What to Look For | Notes |
|---|---|---|
| Engine Bay Fuse Box | Labels, amperage, circuit names | Usually near the battery or firewall; contains main power circuits |
| Interior Cabin Fuse Box | Label colors, exact rating | Often behind glove box; includes accessories and safety-related fuses |
| Symbols & Legend | Fuse icons, relay indicators | Cross-check with manual for year-specific differences |
Your Questions Answered
How many fuse boxes does the Infiniti G37 have, and where are they located?
Most Infiniti G37 models have two main fuse boxes: one in the engine bay and one inside the cabin. The exact location and the fuse map depend on the year and trim, so consult the diagram on the box lid or the owner’s manual for precise details.
Typically two fuse boxes: engine bay and interior cabin. Check the diagram on the lid or in the manual for exact locations.
Can I replace fuses myself in the Infiniti G37 safely?
Yes, you can replace fuses yourself if you follow safety steps: power down the vehicle, locate the correct fuse using the diagram, replace with the same amperage, and test the circuit. If the fuse blows again, seek professional help to diagnose a possible short or failing component.
Yes, with proper safety steps and the right amperage fuse. If it blows again, get a pro to check for a short.
What’s the difference between a fuse and a relay in the G37 diagram?
A fuse is a protective device that interrupts current when a circuit is overloaded. A relay is an electrical switch controlled by a small current that can switch a larger current. The diagram will show both, with fuses protecting circuits and relays enabling larger power routing.
Fuses protect circuits; relays switch higher power. Both appear in the diagram with distinct symbols.
How do I read the fuse rating on a label?
Fuse ratings are printed on the fuse body or in the diagram legend, typically in amperes (A). Match the rating shown on the diagram and use the same rating when replacing. Do not up-rate a fuse to handle more current.
Check the amperage printed on the fuse or legend, and replace with the exact same rating.
What should I do if a fuse keeps blowing?
If a fuse blows repeatedly, there’s likely a short or a failing component in that circuit. Remove the power, inspect wiring for damage, and consult a service manual or professional. Avoid bypassing fuses to fix the problem.
Repeated blowing means a fault; don’t bypass—investigate wiring or components and seek professional help if needed.
“A reliable fuse box diagram is the backbone of safe DIY electrical work. Always verify the exact year and trim, and follow power-down procedures before inspecting fuses.”
Highlights
- Read the diagram before touching any fuses
- Identify engine bay and interior cabin fuse boxes
- Replace fuses with identical amperage ratings
- Use a multimeter to verify circuits when in doubt
- Document changes for future DIY tasks