2008 infiniti g35 fuse box diagram: Location & Fuses
A comprehensive guide to the 2008 infiniti g35 fuse box diagram, covering locations, fuse types, amperage specs, and safe inspection steps. Learn how to read the diagram, identify fuses, and perform maintenance with guidance from FuseBoxCheck Analysis, 2026.

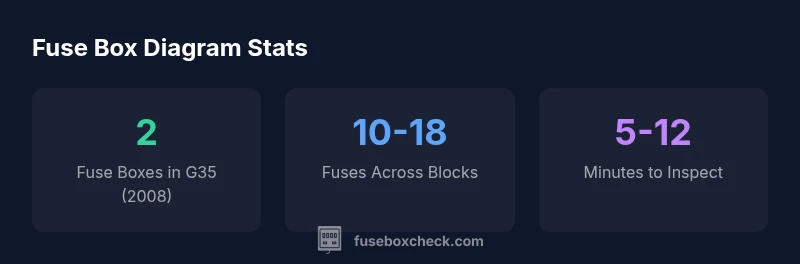
According to FuseBoxCheck, the 2008 infiniti g35 fuse box diagram identifies two fuse blocks: the engine bay fuse box and the interior cabin panel. The engine bay box handles main power fuses and relays; the interior panel covers lights, HVAC, and accessories. For exact fuse labels, amperages, and wiring paths, consult the diagram printed on each cover and the official service manual.
Understanding the 2008 infiniti g35 fuse box diagram
The 2008 infiniti g35 fuse box diagram is more than a map of fuses; it is a safety and troubleshooting tool that helps diagnose intermittent electrical issues. The two primary fuse blocks are the engine bay box and the interior cabin panel. This section explains what each box controls and how the diagram labels correspond to real components in your car. When you study the diagram, you will quickly distinguish which fuses supply the headlights, radio, power windows, and the ECU. The G35 electrical system follows common automotive fuse conventions, but the exact layout matters for accurate diagnosis and safe maintenance. This article will walk you through locating, identifying, and verifying fuses using the diagram as a reference point.
Engine bay fuse box vs interior fuse box
In the G35, the engine bay fuse box sits near the front of the engine compartment and typically houses main power fuses and relays for critical systems. The interior fuse box is usually located at the driver’s side kick panel or under the dash and protects cabin accessories and comfort features. Understanding which box controls a given circuit saves you from needless disassembly and reduces the risk of accidental short circuits. The diagram marks each fuse with a number and a label that corresponds to its purpose, such as ignition, fuel pump, or interior lights. Keeping these mappings in mind makes diagnosing intermittents faster and safer.
Reading the diagram: labels, amperage and paths
Every fuse is assigned an amperage rating and a unique reference code. The diagram’s color-coded lines help you trace the path from a fuse to its load. When diagnosing a no-start condition, for example, you’ll first confirm the engine bay power fuses and then check related interior fuses that could affect the starter, ECU, or sensors. If a fuse blows, replace it only with the same amperage rating and type (slow-blow vs fast-acting). The diagram also includes a legend for symbol meanings, which reduces guesswork during troubleshooting.
Step-by-step: locating and verifying fuses in your G35
- Open the hood and locate the engine bay fuse box label on the cover. 2) Identify the fuse for the symptom you’re troubleshooting using the diagram. 3) Use a fuse puller or needle-nose pliers to remove the suspected fuse. 4) Inspect the fuse visually for a broken filament or test with a multimeter set to continuity. 5) Replace with the same rating, reassemble, and test the circuit. 6) If a fuse repeatedly fails, seek a deeper electrical diagnostic.
Common failures and what the diagram helps you diagnose
Common issues that the fuse diagram helps with include blown fuses for headlights, instrument clusters, or HVAC, as well as non-latching relays causing dim lights or intermittent power. The diagram helps you quickly verify whether the issue is a fuse or a relay by tracing the circuit path and checking related components. In some cases, a recurring fuse failure indicates a short to ground or an overdrawn circuit that could signal a larger wiring problem.
Safety, maintenance and best practices when servicing the fuse box
Always disconnect the negative battery terminal before performing any work near the fuse box to reduce the risk of shock or arcing. Use insulated tools, keep the area dry, and ensure you are using the correct replacement fuses. Document any changes you make to the diagram for future reference and consider a periodic inspection schedule to catch wear or corrosion on connectors. If you are unsure, consult a qualified technician.
Two main fuse boxes in the 2008 Infiniti G35
| Fuse Box | Location | Primary Purpose |
|---|---|---|
| Engine bay fuse box | Under the hood, left side | Power distribution for engine and relays |
| Interior fuse box | Driver's side kick panel | Cabin electronics and accessories |
Your Questions Answered
Where is the fuse box located on a 2008 Infiniti G35?
The G35 has two fuse boxes: an engine bay box near the front of the engine compartment and an interior panel around the driver’s kick panel. The diagram on each cover shows fuse numbers and purposes, helping you quickly identify the right fuse.
There are two fuse boxes: engine bay and interior cabin. Check the covers for the diagram to locate the right fuse.
How do I read the G35 fuse diagram?
Start at the legend, then match the fuse number on the diagram to the physical fuse. Note amperage ratings, and be sure to replace with the same type and rating.
Read the legend, match numbers, and replace with the same rating.
Which fuses control headlights on the 2008 G35?
Headlight circuits are typically tied to exterior lighting fuses shown on the engine bay diagram. Verify the exact fuse number from the diagram and replace only if blown.
Check the headlight fuse on the diagram and replace only if blown.
What safety steps should I take before inspecting the fuse box?
Disconnect the negative battery, wear eye protection, and use insulated tools. Work on a dry surface and keep metal jewelry away from the fuse box to prevent shorts.
Disconnect the battery and wear protection before you start.
Can I replace a fuse with a higher amperage?
No. Replacing with a higher amperage can cause wiring damage or fires. Always use the amperage specified on the diagram or fuse label.
Don’t upsize fuses; use the specified amperage.
“A clear fuse box diagram is essential for safe, efficient electrical troubleshooting. Always verify fuse IDs against the diagram before replacements.”
Highlights
- Know the two fuse boxes and their roles
- Read the diagram before pulling fuses
- Replace fuses with the same amperage
- Follow safety steps to prevent shocks and shorts