When to Replace a Fuse Box: A Practical Homeowner's Guide
Discover how to know when to replace a fuse box, what signs to watch for, and safe steps to plan an upgrade. A homeowner-focused guide from FuseBoxCheck for safer, up-to-date electrical panels.

By the end of this guide, you’ll know when a fuse box should be replaced, not just repaired. Look for age-related wear, frequent tripping, scorching smells, corrosion, and outdated panel ratings. You’ll also see the safe steps to assess risk and plan a professional upgrade if needed. This quick answer points to the core signs and explains why replacement is safer than prolonged patchwork.
Why replacing the fuse box matters for safety and reliability
The fuse box is the home's electrical command center. As panels age, insulation degrades, connections loosen, and breakers or fuses may trip under normal loads. A failing fuse box can increase the risk of electrical fires, shocks, and nuisance outages. For homeowners, understanding when to replace a fuse box is not merely about convenience—it's about safety, long-term reliability, and compliance with modern electrical standards. According to FuseBoxCheck, older panels installed before the 1990s often lack robust grounding, arc-fault protection, and proper labeling, which can complicate repairs and raise risk during upgrades. If you notice signs such as frequent fuse trips with no obvious overloaded circuit, a buzzing or sizzling panel, or colors around the panel housings indicating overheating, you should seriously evaluate replacement rather than patchwork fixes. In the long run, upgrading to a modern service with a properly rated main breaker can better support future loads and improve overall electrical resilience.
Signs your fuse box may need replacement
Look for clear indicators that the panel is approaching the end of its useful life. Age alone is a major factor—panels installed in the 1970s or earlier are far more likely to need replacement. Repeated nuisance trips, especially if breakers are not matching circuit loads, suggest worn components or mismatched protection. Physical signs matter too: a warm or discolored panel, melted plastic, corrosion on lugs, or a burning smell means immediate attention. If any part of the enclosure feels hot to the touch, stop using the area and contact a licensed electrician. Labels should be legible and accurate; if labeling is faded or missing, it will be harder to manage circuits during future work. Finally, if your panel is a fuse type rather than a modern circuit breaker panel, replacement is typically recommended to improve safety and reliability. These signals together help homeowners decide whether to upgrade now or plan a replacement soon.
Costs and risks of repair vs replacement
Repairing a fuse box can seem cheaper in the short term, but it often provides only a temporary fix and may never address fundamental safety flaws. A replacement, while more upfront, offers a more robust protection system, better compatibility with modern circuits, and a higher likelihood of passing future inspections. The cost and risk balance depends on several factors: the service size (how many circuits), whether a full panel upgrade is necessary, permit requirements, and the ease of routing new conductors to the meter. A cautious approach is to obtain multiple quotes from licensed electricians and discuss scope openly—proper wire sizing, grounding, and the inclusion of arc-fault and ground-fault protections can influence both safety and insurance considerations. FuseBoxCheck Analysis, 2026 notes that homes with older panels often benefit most from a full upgrade rather than piecemeal fixes, particularly when modern loads (HVAC, EV charging, large kitchen appliances) are in use.
Planning a replacement: steps and considerations
Replacement planning begins with a clear assessment of current service capacity and future needs. You’ll need to verify the main breaker size, panel type, and compatibility with AFCI/GFCI protections. Decide whether a full service upgrade (e.g., from 60A/100A to 200A) is warranted, based on load calculations and future electrical plans. Budget for permitting, possible utility coordination, wiring routes, and inspections. Discuss energy efficiency opportunities with your electrician, such as reorganizing circuits for balanced loads and labeling for quick future reference. Ensure the chosen panel has adequate spaces for future expansion and that wire routing avoids damp areas or crowded conduits. A well-planned replacement minimizes downtime and reduces the risk of subsequent complications.
Choosing a licensed electrician and planning permits
In most regions, panel work requires a licensed electrician and a permit. Start by confirming licenses, insurance, and a written warranty. Ask for a detailed written plan covering the new panel rating, grounding strategy, and AFCI/GFCI protection placement. Inquire about required permits and the inspection process, including the final inspection that verifies safe operation and compliance with codes. Schedule the work to minimize disruption, and ensure access to the main service disconnect. Gather all panel labeling, circuit maps, and a current home electrical plan to share with the electrician for a smooth transition.
Do-it-yourself vs professional: safety and legality
Working on a main service panel is high-risk work and is regulated in many areas. While some homeowners can perform basic, non-live tasks with power off, most jurisdictions require a licensed professional for panel replacement and main disconnect work. Attempting to bypass this requirement can void insurance, violate code, and create serious safety hazards. If you are determined to learn, limit yourself to low-risk, non-energized tasks such as labeling circuits on a de-energized panel and documenting the loads. Always confirm the scope of work allowed by your local codes before starting any panel-related project.
After replacement: maintenance and energy management tips
Once the new panel is installed, schedule a final inspection to ensure compliance and proper operation. Keep a current circuit map and labeling for easy future maintenance. Consider load management strategies—spread high-draw appliances across different phases if applicable and monitor the electrical load during peak usage times. Regularly inspect the panel area for warmth, corrosion, or moisture, and keep the surrounding space clean and dry. Invest in a home electrical safety plan that includes routine checks of outlets, cords, and GFCI/AFCI protections. This proactive approach helps sustain the benefits of your upgrade for years to come.
Planning next steps: making a decision with confidence
The decision to replace a fuse box hinges on safety, reliability, and the ability to meet current and future electrical needs. If you notice frequent trips, signs of overheating, or an outdated panel, replacement is a prudent choice. Involve a licensed electrician early to perform load calculations, discuss panel options, and align with local code requirements. With careful planning and professional execution, a fuse box upgrade not only reduces risk but also supports a safer, more efficient home electrical system for decades.
Tools & Materials
- Non-contact voltage tester(Use to verify power is off before touching any conductors)
- Voltage tester / multimeter(Check circuits and confirm proper voltage levels during installation)
- Insulated screwdrivers (Phillips and flat-head)(Insulation reduces shock risk while removing panel screws)
- Wire strippers and pliers(Prepare conductors and make clean connections)
- Electrical tape and wire nuts(Secure connections and insulate splices)
- New fuse box or circuit panel(Choose a panel that matches service capacity and wiring requirements)
- Grounding screws and bonding strap(Ensure proper grounding and bonding per code)
- Safety gloves and eye protection(Personal protective equipment for all panel work)
- Flashlight or headlamp(Improve visibility in cramped or dim spaces)
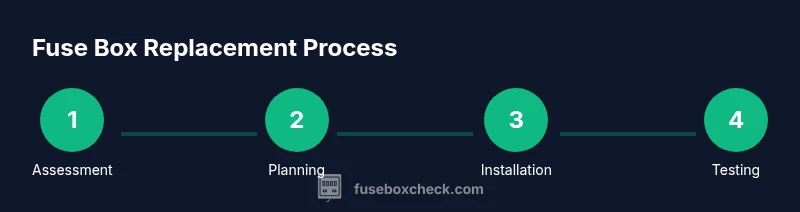
Steps
Estimated time: 2-6 hours (time varies by service size and permit requirements)
- 1
Identify service capacity and panel type
Locate the main service disconnect label and determine the amperage rating. Check whether the panel is a fuse box or a circuit breaker panel, and note the number of spaces available for future expansion.
Tip: Refer to the service panel label and ensure the new panel matches the existing service configuration. - 2
Shut off power and verify de-energization
Turn off the main breaker and verify zero voltage using a non-contact tester at the service entrance. Confirm that all downstream breakers are off after the main is opened.
Tip: If you detect any charge on exposed conductors, stop and call a professional. - 3
Remove panel cover and inspect wiring
Carefully remove the panel cover to inspect the interior for corrosion, damaged wires, or burnt insulation. Look for loose lugs and signs of overheating.
Tip: Document current wiring before disconnecting anything to aid reinstallation. - 4
Select a suitable replacement panel
Choose a panel with adequate amperage, grounding provisions, and space for future circuits. Confirm AFCI/GFCI protections as required by code and the home’s load profile.
Tip: Prefer a modern unit with clear labeling and pre-marked spaces for easy future upgrades. - 5
Plan wiring routes and obtain permits
Map the routing path for new conductors, and check permit requirements with the local building department. Coordinate with the utility if service disconnects or meter changes are needed.
Tip: Organize permits and inspection dates early to minimize downtime. - 6
Install the new panel and transfer circuits
Mount the new panel, bond the enclosure, reconnect conductors to the correct terminals, and attach the cover with labeled circuits. Avoid cross-connections and ensure clean, secure terminations.
Tip: Double-check that neutrals and grounds are separated (or bonded as required by code). - 7
Test functionality and label circuits
Restore power, test each circuit for proper operation, and verify AFCI/GFCI protections where applicable. Update the circuit directory and labels for future reference.
Tip: Proceed slowly; test loads on critical circuits first (HVAC, kitchen, water heater). - 8
Schedule inspection and document outcomes
Arrange a final inspection by the local authority to confirm compliance and safety. Keep records of the replacement, including the new panel model, permit numbers, and inspection outcomes.
Tip: Keep the inspection report accessible for insurance and future maintenance.
Your Questions Answered
Can I replace a fuse box myself?
In many places, main service panel work requires a licensed electrician and permits. Homeowners may perform small, non-live tasks, like labeling circuits, but full panel replacement is generally not recommended without a professional. Always check local codes before starting.
This job usually needs a licensed electrician and a permit. You can label circuits yourself, but replace panels only with proper authorization.
What signs indicate I should replace the fuse box rather than repair it?
Frequent tripping, signs of overheating, corrosion, an aging panel (especially pre-1990s), and missing modern protections like AFCI/GFCI are strong indicators that replacement is wiser than repair.
Look for overheating, corrosion, persistent trips, and outdated protections as reasons to replace.
Do I need permits for a fuse box replacement?
Most jurisdictions require a permit for panel replacement and a final inspection. Your electrician should handle permit applications and coordinate with the local building department.
Permits are usually required; your electrician will handle the paperwork and inspections.
How long does a fuse box replacement typically take?
Timeline varies with service size and inspection scheduling, but expect multiple hours to complete, plus time for any required inspections.
Usually several hours, plus any inspection time.
Will upgrading the fuse box affect my insurance?
A properly upgraded panel that meets code can improve safety and may influence your policy. Check with your insurer about coverage and any discounts for safety improvements.
Upgrading can improve safety and might affect insurance; confirm with your provider.
What labeling or documentation should accompany a replacement?
Maintain a current circuit map, labels for each breaker, and a copy of the inspection report. This helps future maintenance and insurance claims.
Keep circuit labels and the inspection report handy.
Watch Video
Highlights
- Assess safety and age before considering replacement.
- Advise replacement when the panel shows signs of overheating or corrosion.
- Plan permits and use a licensed electrician for the main service work.
- A modern panel improves safety and supports future loads.
- Document labeling and schedule inspections for compliance.