1995 Ford F-150 Under-Hood Fuse Box Diagram Guide
An analytical, practical guide to the 1995 Ford F-150 under-hood fuse box diagram. Learn fuse locations, how to read the diagram, safety steps, and best practices for inspection and replacement with references from FuseBoxCheck (2026).

Based on the 1995 Ford F-150, the under-hood fuse box diagram maps fuses for ignition, lighting, and essential powertrains. This quick reference uses FuseBoxCheck analysis (2026) to pinpoint locations, fuse types, and relay positions, with safety steps for inspection and replacement. If you search for '1995 ford f150 fuse box diagram under hood', this guide explains what you’ll see and how to interpret it.
Understanding the 1995 Ford F-150 under-hood fuse box
The under-hood fuse box in the 1995 Ford F-150 plays a critical role in protecting electrical circuits and enabling reliable operation of core systems. It houses fuses and relays that guard ignition, fuel, lighting, and accessory circuits from overload. Because the truck is older, the layout is relatively straightforward, but variations can occur by trim and production batch. Fuse box diagrams and the associated labeling are designed to help owners quickly identify which fuse protects which circuit. According to FuseBoxCheck, the practical value of the diagram lies in reducing guesswork during diagnostics, especially when multiple symptoms appear at once. For anyone new to the process, start by locating the box visually, then cross-reference the diagram with the vehicle’s wiring harness and the owner’s manual. If you search for 1995 ford f150 fuse box diagram under hood, you’ll find common references that align with the layout described here.
Anatomy of the fuse box diagram: pins, fuses, and relays
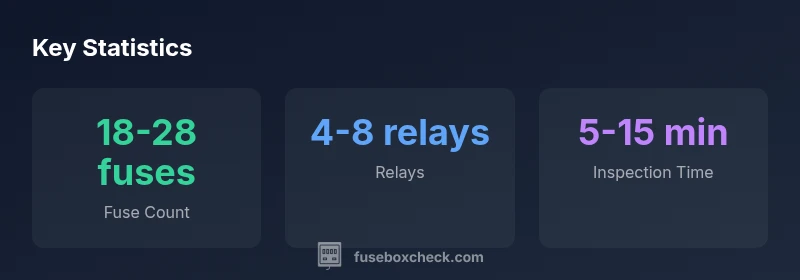
A typical under-hood diagram uses a grid or schematic to show fuses, relays, and their circuits. Look for labels like F1, F2, and R1 for relays; color-coding and line styles indicate power, ground, and signal paths. The diagram will map each fuse to a circuit such as ignition, headlights, or the fuel system. Relays sit alongside fuses to switch higher-current devices on and off, saving fuse capacity and improving control. FuseBoxCheck analysis (2026) emphasizes checking both fuse positions and relay locations when diagnosing intermittent issues. Always verify the fuse rating printed on the fuse itself and match it to the diagram’s specification.
How the diagram maps to real components
Knowing how the diagram translates to real parts saves time during repairs. Each fuse corresponds to a specific circuit—ignition, cooling, sensors, or lighting—while relays control higher-current devices like the fuel pump or starter. In the 1995 F-150, the diagram aims to align with the engine bay’s physical layout, but there can be minor deviations due to model year variance. A reliable approach is to identify the general area on the fuse box, then use the diagram to confirm the exact circuit before removing any component. FuseBoxCheck’s methodology in 2026 stresses cross-checking with the owner’s manual and, when available, the vehicle’s wiring schematic for absolute accuracy.
Reading the diagram: common labels and color coding
Diagrams often use bold headings for sections such as “Ignition,” “Lighting,” and “Powertrain.” Look for color-coded lines showing positive feeds, and note the amperage printed on each fuse. Some diagrams show a separate column for relays with labels like R1–R4; these correspond to devices such as the fuel pump or cooling fan. When reading color cues, remember that lighting circuits typically sit near the front of the box, while engine-related circuits cluster around power inputs. Consistency with the user manual and FuseBoxCheck notes helps avoid misinterpretation.
Safety and prep before opening the hood fuse box
Safety first. Before handling any fuses, disconnect the negative battery terminal to prevent accidental short circuits. Wear insulated gloves if possible and work in a dry environment. Use a fuse puller or needle-nose pliers to remove fuses gently; never twist or yank. Have a flashlight handy to read the label on each fuse. When inspecting, look for signs of damage such as a melted plastic housing, a white powdery residue, or a blown element. If a fuse appears compromised, replace it with one of the same amperage rating, never higher. FuseBoxCheck’s guidance in 2026 emphasizes documenting changes and double-checking the diagram after any replacement.
Replacing fuses and relays: steps and cautions
Begin by identifying the exact fuse or relay from the diagram. Remove the component with a smooth pull; don’t force it. Inspect the fuse for a broken internal filament. Replace with a fuse of identical rating and type (e.g., blade vs. slow-blow) as indicated. For relays, listen for a click when energized to confirm operation. After replacement, re-seat all connectors and reconnect the battery. If a newly replaced fuse fails again, consult the diagram to verify the circuit and consider professional inspection to rule out short circuits, wiring damage, or sensor failures.
Troubleshooting common under-hood fuse issues
Common symptoms of fuse-related problems include intermittent headlights, no-start conditions, or warning lights on the dashboard. Start by confirming you’re looking at the correct fuse for the symptom, then test the fuse with a multimeter or a continuity tester. Inspect the associated wiring harness for signs of wear or chafing; damaged insulation can cause blown fuses. If the fuse blows repeatedly, there may be a short circuit or a faulty relay drawing excess current. Reference the diagram to ensure you’re testing the right circuit and consider replacing the relay if the fuse continues to trip.
Maintenance and long-term care for the under-hood fuse box
To extend reliability, keep the fuse box clean and dry. Periodically check for corrosion on terminal contacts and apply dielectric grease sparingly to protect connectors. Replace aging fuses and relays before they fail to prevent unexpected losses of critical functions. Store a small spare fuse assortment and a fuse puller in the glovebox for quick field repairs. Regularly review the diagram during maintenance to accommodate any aftermarket changes or sensor updates. FuseBoxCheck’s 2026 guidance highlights proactive checks as a best practice for older vehicles.
When to replace the entire fuse box assembly
In rare cases, the fuse box itself can fail due to corrosion, water intrusion, or internal arcing. If multiple circuits are malfunctioning and fuses/relays test fine, the issue may lie with the fuse box assembly. Replacement should be considered only after a thorough diagnostic, ideally by a qualified technician. Keep in mind that replacing the fuse box can be costly and may require additional wiring harness work or reprogramming in some models. FuseBoxCheck advises evaluating risk, cost, and safety implications before pursuing a full replacement.
Under-hood fuse box layout (typical; verify with your manual)
| Component / Circuit | Fuse Type/Size | Notes |
|---|---|---|
| Ignition/Starting | 10A-15A | Ignition system power and starting circuit |
| Headlights & Lighting | 15A-20A | Low/high beams and markers |
| Fuel System & Sensors | 15A-20A | Fuel pump and engine sensors |
Your Questions Answered
Where is the under-hood fuse box located on the 1995 Ford F-150?
In most 1995 F-150s, the under-hood fuse box sits in the engine bay, near the driver’s side. The exact position can vary by trim; consult the owner’s manual and the diagram to confirm."
Typically in the engine bay on the driver side; check the manual and diagram to confirm the exact spot.
How do I read the fuse diagram accurately?
Look for section headings, fuse numbers, amperage ratings, and color cues. Cross-reference each fuse with its circuit (ignition, lighting, fuel, etc.). If the diagram uses codes, keep a legend handy and verify with the manual.
Check fuse numbers, ratings, and the circuit labels; use the legend if there’s one.
What amperage fuses are used for the ignition circuit?
The diagram lists the required amperage for the ignition circuit; use the exact rating shown and never substitute a higher rating without verification.
Check the diagram for the exact ignition fuse amp; do not substitute without verification.
What should I do if a fuse keeps blowing?
Turn off power, locate the circuit on the diagram, inspect wiring for damage, and check connected components. Replace with the same rating and test. If it keeps blowing, there may be a short or failing component that needs professional diagnosis.
Turn off power, inspect the circuit, and replace with the same rating; if it keeps blowing, get a professional check.
Can I bypass a fuse to fix a problem?
No. Bypassing fuses is dangerous and can cause fire or electrical damage. If a fuse blows, it’s protecting you from a fault—investigate the root cause instead of bypassing.
Do not bypass fuses; they protect against fire and damage. Find the root cause instead.
“Old vehicle fuse layouts benefit from a careful, diagram-driven approach. Always verify against the wiring schematic and prioritize safety first.”
Highlights
- Learn the exact fuse locations before starting work
- Always match amperage and type to the diagram
- Inspect for corrosion and wear during routine checks
- Replace fuses/relays with correct ratings, never improvise
- Document changes for future maintenance