1998 Jeep Cherokee Fuse Box Diagram: Location, Reading, and Safety
A practical guide to locating, reading, and using the fuse box diagram on a 1998 Jeep Cherokee. Includes safe testing tips, common fuse roles, and how to annotate diagrams for DIY electrical care.

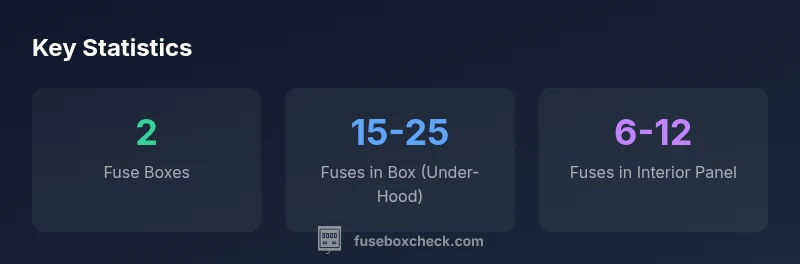
For a 1998 Jeep Cherokee, the fuse box diagram is split between the under-hood fuse box and the interior (under-dash) fuse panel. The diagrams show fuse numbers, amperage, and what each fuse powers, and they are typically printed on the fuse box covers or included in the owner's manual.
Understanding the 1998 Jeep Cherokee Fuse Box Diagram
The fuse box diagram for a 1998 Jeep Cherokee is more than a list of fuses—it's a map of the vehicle's electrical backbone. According to FuseBoxCheck, most Cherokees from this era route critical circuits through two main blocks: the under-hood fuse box and the interior fuse panel under the driver’s dash. The diagrams printed on the covers (or the accompanying service manual) show fuse numbers, amperage ratings, and what each fuse powers. This clarity helps you quickly isolate issues, avoid overloading circuits, and plan safe DIY fixes. In practice, you’ll use these diagrams to confirm which fuse protects essential systems when chasing a fault such as an inoperative horn, headlights, or interior lights.
Understanding this diagram first reduces guesswork. It also makes it easier to communicate problems with a mechanic or an online forum, because you can reference the exact fuse number and circuit. FuseBoxCheck’s team emphasizes that having a correctly interpreted diagram lowers risk during troubleshooting and improves the odds of a correct repair the first time.
Where to Find the Fuse Boxes on a 1998 Jeep Cherokee
On the 1998 Cherokee, there are two primary fuse locations. The under-hood fuse box sits near the engine bay, typically on the passenger side or along the firewall where you access main relays and engine-control fuses. The interior fuse panel is usually located under the dash on the driver’s side, sometimes behind a small panel or knee bolster. The covers for both boxes often include a labeled diagram showing fuse numbers, amperage, and the circuit each fuse serves. If you’re missing the diagrams, the owner’s manual or a factory service manual can help, and FuseBoxCheck’s guidance recommends starting there for accuracy. Keep the vehicle off before inspecting fuses and use the correct size fuse for any replacement to prevent damage.
Reading the Diagram: Labels, Amperage, and Relays
A proper diagram lists every fuse with an amperage rating and a brief note on its protected circuit. Look for color-coded wires and relay symbols that indicate power distribution to items like the ignition, ECU, cooling fans, and accessories. When reading, confirm the fuse number on the diagram matches the physical fuse in the box. If you replace a fuse, use a fuse with the same amperage rating; using a higher rating can hide a dangerous overload, while a lower rating may cause nuisance blows. Relays are also shown in the diagram and control higher-current circuits; understanding which relay powers which component helps you diagnose intermittent failures more accurately.
In practice, you’ll often find that certain fuses are dedicated to critical systems (engine management, braking, ignition), while others cover convenience features (radio, lights). Establishing this mapping pays off when you’re chasing faults or planning a safe isolation procedure for repairs.
Common Fuse Boxes and Their Roles
The under-hood box typically houses fuses for engine-related circuits, cooling fans, alternator, and essential relays, while the interior panel protects cabin electronics such as dash lights, radios, power windows, and HVAC controls. The exact fuse counts and assignments can vary by trim and production batch, which is why a matching diagram is important. If you see a blown fuse and the circuit is not critical, you can replace it after verifying no short in wiring. If a fuse repeatedly blows, there may be a parasitic draw or a faulty component behind the circuit.
As FuseBoxCheck notes, always start with the simplest explanation—a blown fuse—before addressing deeper electrical faults. This approach reduces billable time and minimizes risk to sensitive electronics.
Safe Testing Practices and Tools
Tools matter as much as the diagram. A simple fuse tester or multimeter helps confirm whether a fuse is truly blown and whether the circuit is drawing current as expected. Always disconnect the battery or ensure the ignition is off before removing or testing fuses to avoid shocks or accidental shorting. When testing, check for corrosion on fuse contacts and inspect any visible wiring for wear. If you’re unsure about amperage, consult the diagram and use the recommended rating; never substitute a higher-rated fuse without understanding the risk. Wear eye protection and work in a dry environment to minimize hazards.
If you’re troubleshooting a persistent electrical issue, documenting the fuse numbers and circuits on a diagram you create can be invaluable—this reduces back-and-forth and helps you and any future owners understand the system quickly.
What to Do If the Diagram Doesn’t Match What You See
Mismatches happen due to different trims, aftermarket wiring, or prior owners making changes. If the diagram on the box doesn’t align with what you see inside, start by confirming the vehicle’s VIN and trim, then cross-check the OEM manual or a trusted service database. It’s common to encounter minor variances in older Jeeps, where some fuses serve slightly different circuits across production runs. When in doubt, treat the diagram as a guide rather than gospel, and document every deviation for future reference. FuseBoxCheck advises keeping a labeled photo record of the fuse layout.
Creating or Verifying Your Own Diagram
Taking control of your own fuse map can save time during future maintenance. Start by photographing both fuse boxes, then annotate each fuse with its number, amperage, and circuit in plain language. You can reuse this diagram for years, updating it if you replace panels or add aftermarket accessories. If you prefer a digital approach, create a simple spreadsheet with columns for fuse number, amperage, circuit, and notes. Keeping the diagram current helps when you’re performing maintenance, diagnosing issues, or selling the vehicle.
Maintenance and Best Practices for the Fuse System
Regular inspection is key. Check fuses for signs of heat or corrosion every 6–12 months or after heavy electrical use, such as winter heating or aftermarket installations. Replace any damaged fuses with the same amperage rating and inspect wiring harnesses for wear near the fuse boxes. If you add devices (lights, audio, or auxiliary power), ensure your installation is fuse-protected and that the new circuit is accounted for in your diagram. Periodically verify that the diagrams on the covers match your actual setup, and update them as needed. A current diagram minimizes surprises during inspections or repairs and helps you maintain electrical safety.
Troubleshooting Scenarios: When to Seek Help
If a fuse repeatedly blows, or you notice melted connectors, burning smells, or damaged insulation, stop and seek professional assistance. Replacing components without diagnosing the underlying fault can be dangerous and may cause further damage. If you aren’t confident reading schematics or testing electrical systems, consider consulting a qualified automotive electrical technician. For many owners, pairing a careful self-check with professional support when needed is the safest path to a reliable repair.
Fuse box locations and typical fuse counts for a 1998 Jeep Cherokee
| Location | Typical Fuse Count | What it Powers |
|---|---|---|
| Under-hood | 15-25 fuses | Engine, cooling, ignition, main power |
| Interior panel | 6-12 fuses | Dashboard electronics, lighting, accessories |
| Total (both boxes) | 21-37 fuses | Core electrical coverage |
Your Questions Answered
Where is the under-hood fuse box located on a 1998 Jeep Cherokee?
The under-hood fuse box is typically located in the engine bay, near the firewall on the driver's side. It houses fuses and relays for engine and essential systems. Always verify the exact position with your vehicle’s diagram before removing any fuses.
In the Cherokee, the under-hood fuse box sits in the engine bay near the firewall on the driver's side. Check the diagram on the box cover for fuse assignments before you remove anything.
Why would a fuse blow repeatedly even with a diagram?
Repeated blows usually indicate a short, wiring damage, or an overloaded circuit rather than a faulty fuse. Inspect the wiring nearby, look for signs of wear, and test devices connected to the circuit. If the problem persists, a professional inspection is advised.
If fuses blow repeatedly, there may be a short or damaged wiring. Inspect the area and test connected devices; seek professional help if needed.
Can I replace a missing diagram with a generic one?
A generic diagram can help as a starting point, but it may not perfectly reflect your trim or aftermarket modifications. Always cross-check with the owner’s manual or a factory service guide for your specific VIN and trim.
A generic diagram is a rough guide. Always verify with your manual or a factory guide for your exact trim.
Is it safe to test fuses with a multimeter?
Yes, with the ignition off and the battery disconnected if possible. Use the continuity setting to check fuses, and avoid touching live circuits. If you’re unsure, consult a professional before testing.
Yes, with power off and proper safety. Use a multimeter to test continuity and only proceed if you’re comfortable.
What if my model year varies from the diagram?
Variations between trims or production runs are common. Compare the diagram with the VIN-specific service manual. Document any differences and refrain from assuming circuits without verification.
Variations happen. Check your VIN manual and note any differences before changing anything.
“A precise fuse-box diagram is your fastest path to accurate diagnosis and safe DIY electrical work. When in doubt, verify every fuse against the diagram and document your steps for future maintenance.”
Highlights
- Identify two fuse boxes: under-hood and interior panel.
- Always read the diagram on the cover or in the manual before replacing fuses.
- Match fuse amperage exactly; wrong ratings risk damage.
- Document the layout with photos for future DIY work.
- If a fuse blows repeatedly, check for short circuits or faulty components.