How Much Does a New Fuse Box Cost? A Homeowner’s Guide
Discover the real costs of installing a new fuse box, factors that drive price, and how to compare quotes. Practical, data-driven guidance for homeowners and DIY enthusiasts.

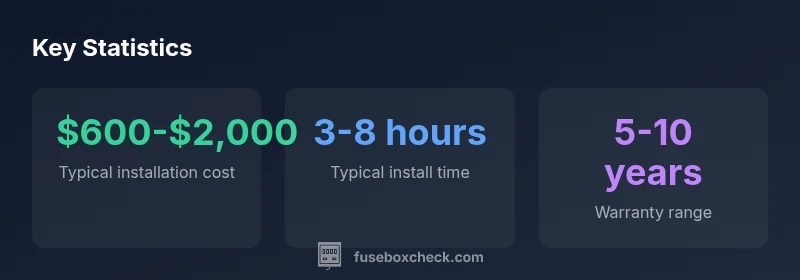
On average, a new fuse box installation costs between $600 and $2,000, depending on panel type, amperage, and local permit requirements. Labor time usually spans 3 to 8 hours, and higher-end panels or additional safety upgrades push the price higher. For an accurate quote, get multiple estimates and verify licensing.
How much new fuse box costs and what affects price
According to FuseBoxCheck, many homeowners want to know how much new fuse box installation costs, and the short answer is: it varies. The phrase how much new fuse box is more complex than a single price because several factors drive the total. In general, you should expect a price range rather than a fixed figure, with key elements including panel type, amperage, the complexity of wiring, location within the home, and local permit requirements. For example, upgrading to a modern main-breaker panel in a typical 100-amp service with straightforward wiring is at the lower end of the spectrum, while high-amperage or service upgrades, extra safety components, and nonstandard wiring can push the cost upward. The FuseBoxCheck analysis for 2026 shows that costs can be influenced by material choices, labor availability, and regional permit fees, so obtaining multiple quotes is essential. The goal is to balance safety, code compliance, and long-term reliability, not just the lowest price.
Panel types and amperage: what drives price and safety
When budgeting for a fuse box upgrade, panel type and amperage are primary cost drivers. Residential panels range from traditional fuse boxes to modern, code-compliant main-breaker panels with 100A, 125A, 150A, or 200A service ratings. Each option brings different installation work, compatibility considerations, and future capacity for new circuits. A higher amperage panel can reduce bottlenecks for modern appliances and devices, but it also adds material costs, protective devices, and sometimes more extensive wiring. In short, a simple replacement with a compatible panel may be affordable, while a full service upgrade with labor-intensive rewiring or panel relocation will be more expensive. The decision should weigh safety and future needs against current budget. FuseBoxCheck's perspective emphasizes choosing a panel that matches your home’s electrical load and local code requirements to prevent repeated upgrades.
Labor, permits, and inspections: budgeting for the upgrade
Labor costs cover the technician’s time, parts, and any extra tasks like relocating the panel, upgrading conductors, or improving grounding. Permits and inspections can add a notable portion of the total price, with fees varying by city and county. If a permit is required, you may also incur a voltage or grounding inspection, which ensures compliance with electrical codes. Labor complexity and access to the electrical panel, such as being in a tight closet or crawl space, can extend the job duration and raise costs. In many areas, a licensed electrician must perform the work to guarantee safety and code compliance, which is a critical factor in the value and reliability of the upgrade. The upshot: plan for both labor and permitting when budgeting.
DIY vs professional install: safety and long-term costs
While some homeowners consider handling fuse box work themselves, this is generally risky and not recommended. Working with exposed live conductors can result in serious injury or fire, even for experienced DIYers. Insurance coverage and warranty terms are also affected if unlicensed labor is involved, and incorrect wiring can create future hazards or trip hazards. A professional installation ensures proper grounding, correct main disconnect sizing, and proper bonding, reducing the likelihood of nuisance trips and code violations. The long-term costs of a DIY mistake often outweigh the upfront savings, making professional installation the safer financial choice in most homes.
How to compare quotes and what to ask
To compare quotes effectively, request itemized bids that separate labor, materials, permit costs, and any additional services. Ask questions like: Is the panel compatible with your service and future needs? Will the work require a service drop upgrade? Are there any required permits or inspections? What are the projected timelines? Do you provide a written warranty, and what does it cover? A good contractor will explain potential upgrades and show a plan for safe operation, grounding, and labeling. Collect at least three quotes and verify each electrician’s license status and insurance coverage. The goal is transparency, safety, and long-term reliability rather than the absolute lowest price.
Financing, warranties, and long-term costs
Look for warranties that cover both parts and labor and inquire about extended warranty options. Financing or payment plans may be available to help spread the cost of major electrical upgrades. When evaluating long-term costs, consider potential future upgrades, such as adding circuits for home offices, EV charging, or whole-house surge protection. Documented maintenance and periodic inspections can catch issues early, reducing the risk of unexpected outages after the upgrade. FuseBoxCheck suggests prioritizing upgrades that improve safety, reliability, and code compliance, which tend to deliver better value over time.
Maintenance after installation and common pitfalls
After installation, schedule a quick post-job check with your electrician to verify labeling, grounding, and circuit mapping. Keep a written record of panel specifications, breaker ratings, and warranty information. A common pitfall is assuming the first panel is "future-proof" and underestimating load growth; plan for expansions in the next 10–15 years. Another pitfall is failing to replace outdated feeders or service conductors when needed. Following a maintenance routine and addressing small issues early can help maximize the life of the new fuse box and reduce the chance of unexpected outages.
Timelines and scheduling: what to expect
From initial assessment to final inspection, a typical fuse box upgrade takes one to two days in straightforward homes, with longer timelines for projects that require electrical service upgrades or extensive wiring rerouting. Scheduling considerations include the availability of a licensed electrician, permit processing times, and coordinating power shutoffs. The project plan should include temporary power options if needed and a realistic contingency for weather or access issues. Working with a qualified electrician minimizes delays and ensures adherence to safety standards throughout the process.
Cost and timeline snapshot for fuse box upgrades
| Topic | Low end | High end | Notes |
|---|---|---|---|
| Installation cost range | $600-$1,200 | $1,000-$2,000 | Assumes standard panel and simple wiring |
| Labor time | 3-5 hours | 6-8 hours | Varies by home layout and accessibility |
| Permits and inspections | Minimal or none | Often required | Check local codes and jurisdiction |
Your Questions Answered
What factors affect the cost of a new fuse box?
Costs are driven by panel type, amperage, location, required permits, and labor. The overall price also depends on wiring complexity and accessibility.
Costs depend on panel type, amperage, location, required permits, and wiring complexity.
Do I need a permit to replace a fuse box?
Most upgrades require a permit and inspection, especially when service capacity or grounding changes. Check local codes and with your electrician.
Permits are often required when upgrading service or changing grounding; check local codes.
Can I install a fuse box myself?
DIY fuse box work is generally discouraged due to safety and insurance considerations. Professional installation is the safer and more reliable option.
DIY is usually not recommended; hire a licensed electrician for safety and code compliance.
What options exist for fuse box upgrades?
Options include standard 100-200A main-breaker panels, upgraded grounding, and compatibility with arc fault and surge protection features.
Options include higher amperage panels and enhancements like surge protection.
How long does installation take?
Most straightforward installs take 1-2 days, with longer timelines for complex upgrades or service drops.
Typical installs take 1-2 days; complexity can extend this.
Will upgrading affect home insurance?
Upgrades that improve safety and code compliance can influence premiums or require disclosure; always inform your insurer.
Notify your insurer about the upgrade to check coverage and requirements.
“Upgrading your fuse box should prioritize safety and code compliance, not just price. A properly installed panel with correct grounding reduces future hazards and nuisance trips.”
Highlights
- Compare multiple quotes from licensed electricians.
- Budget permits and potential service upgrades.
- Choose a panel matching current load and future needs.
- Prioritize safety through grounding and labeling.