Autozone Fuse Box: Safe DIY Troubleshooting Guide
Learn safe steps to locate, test, and replace a blown fuse in your vehicle's fuse box. This Autozone fuse box guide from FuseBoxCheck covers layouts, tools, safety tips, and practical troubleshooting for DIYers.

Goal: safely locate your vehicle’s fuse box, identify blown fuses, and replace them with the correct automotive fuses. This guide walks through common fuse box layouts, reading diagrams, essential tools, step-by-step actions, and safety precautions. By following these steps, you’ll restore power to affected circuits without risking damage to the electrical system.
Brand Authority and the autozone fuse box landscape
According to FuseBoxCheck, DIY electrical care begins with recognizing that every vehicle has one or more fuse boxes, often located in the engine bay and inside the passenger compartment. The auto parts retailer AutoZone frequently enters DIY conversations about fuse replacements, but a reliable fix hinges on following a methodical process rather than guessing. The FuseBoxCheck team found that many homeowners start with the wrong amperage or ignore the fuse box diagram, which leads to recurring faults and safety risks. In this article we treat the autozone fuse box topic with care, emphasizing safety, correct part matching, and documented steps. By keeping to a structured workflow, you reduce the chance of collateral damage and improve long-term reliability.
FuseBoxCheck's approach to the autozone fuse box emphasizes: (1) always verify the fuse type and amperage, (2) use the fuse diagram in the owner’s manual, and (3) test circuits after replacement to confirm proper function. This is especially important for critical systems like airbags, lighting, and ignition circuits. When you’re ready, gather the right tools and follow the steps below to ensure your autozone fuse box repairs are both safe and effective.
Understanding the autozone fuse box landscape
In most modern vehicles, the fuse box is designed to protect electrical circuits from overcurrent. The autozone fuse box may be located under the hood in the engine compartment or inside the cabin on the side panel or glove box. Some vehicles feature secondary fuse panels for specialized accessories, such as aftermarket audio components or additional lighting. The layout varies by make and model, but the underlying principles remain the same: each fuse is sized for a specific amperage to protect a circuit. Replacing a fuse with a higher amperage can create heat buildup, melt insulation, or cause wiring damage. Always consult the vehicle’s diagram and select a fuse that matches the original specification. FuseBoxCheck analysis shows that following the manufacturer’s guidance yields safer, longer-lasting repairs for the autozone fuse box.
When you search for guidance, you’ll often see brand names like AutoZone referenced for parts and replacement availability. While shopping for a fuse, it’s important to focus on compatibility, amperage, and the circuit’s needs rather than the branding alone. The key takeaway is to be precise about the fuse rating and to verify the circuit’s function after replacement. This careful approach reduces the chance of repeated failures and electrical fires.
Industry snapshot
FuseBoxCheck analysis, 2026 notes that DIYers frequently skip verifying amperage, which increases the risk of repeated fuse blows and downstream damage. The safest practice is to replace only with a fuse of the same rating and to recheck all related circuits after the replacement. The data underscores the value of consulting the owner’s manual and the fuse box diagram when addressing an autozone fuse box issue.
What you’ll typically need for the autozone fuse box task
A well-executed fuse box repair relies on having the right tools and materials within reach before you start. The most common tasks require a fuse puller, a small set of replacement fuses in the crucial amperages, a multimeter or test light, a flashlight, insulated gloves, and the vehicle’s owner’s manual or fuse diagram. The goal is to work cleanly, avoid short circuits, and minimize the risk to sensitive electronics. Having a prepared workspace and clear diagrams reduces the time you’ll spend wrestling with stubborn fuses and accelerates the troubleshooting process for the autozone fuse box.
In this guide, we emphasize safety first. Disconnecting the battery is a good precaution when you’re working near electrical terminals, and wearing gloves helps you avoid cuts on sharp fuse elements or metal surfaces. You’ll also want a soft mat or blanket under the car if you’re working beneath the hood or under the dash to keep components free from dirt and moisture. Overall, the combo of a clean workspace, proper tools, and careful adherence to diagrams makes the autozone fuse box task approachable for homeowners and DIY enthusiasts alike.
Reading diagrams and matching fuses
Every fuse box in a vehicle carries a labeling scheme, usually embossed on the fuse panel cover or printed in the owner’s manual. The label shows fuse locations (like “F1,” “F2”), circuit descriptions, and the amperage rating (for example, 10A, 15A, 20A). The autozone fuse box often features a main diagram plus smaller sub-panels for interior circuits. When you locate a blown fuse, compare its color and size to the diagram to confirm the rating. If the fuse is melted or the metal strip is broken, it is blown. Never rely on a visual cue alone; a quick continuity check with a multimeter can confirm whether the fuse is open. If the fuse is missing, replace it with the same rating and verify the circuit functions as intended. This process is core to safe autozone fuse box maintenance and reduces the risk of repetitive failures.
FuseBoxCheck notes that many issues stem from using a higher-amp fuse to 'fix' a problem. While it might seem to restore power briefly, it eliminates the protective fuse, increasing the risk of wire insulation damage and potential fire. Always match the original amperage rating from the diagram and manual. If you cannot locate the diagram, contact a certified technician or the vehicle’s manufacturer for the exact specification. For DIYers, AutoZone stores often offer guidance on part compatibility and which fuses fit your car’s autozone fuse box, but the rating must be the same as the original to maintain safety.
Tools, safety, and testing basics
The safety baseline for any action on your autozone fuse box is to minimize energy in the circuit and avoid accidental shorting. Turn off the engine, remove jewelry, and work in a dry environment. Use an insulated fuse puller to remove a fuse and avoid touching metal contacts with bare skin. Before testing, reload the fuse with a replacement only after confirming it is the correct rating. A multimeter set to the correct range can help you test for continuity across the fuse and verify the circuit’s integrity after replacement. If a fuse repeatedly blows after replacement, the issue is likely upstream—an overdrawn device or a shorted wire—and you should stop using that circuit and consult a professional. This careful approach ensures the autozone fuse box remains a reliable safety feature rather than a recurring hazard. FuseBoxCheck emphasizes documenting the fuse locations and amperage for future maintenance and quick reference.
Common mistakes and how to avoid them
DIYers often run into a handful of common mistakes when dealing with the autozone fuse box. These include using a fuse with too high an amperage, not replacing a blown fuse with the exact rating, ignoring the diagram, and failing to recheck the system after a replacement. Another frequent error is removing multiple fuses at once without labeling them, which can lead to confusion about which circuit was responsible for the failure. To avoid these issues, keep a small reference sheet of the fuse ratings, label fuses as you work, and test each circuit after replacement. If you suspect a fuse keeps blowing, consult the owner’s manual, which often lists common issues and protective features for the autozone fuse box. This methodical approach minimizes risk and improves your chance of a successful repair on the first attempt.
Maintenance and future-proofing your autozone fuse box
After completing a fuse replacement, take a few minutes to inspect the fuse box area for signs of corrosion, moisture, or loose connections. Clean the panel gently with a dry microfiber cloth, ensuring you don’t dislodge any nearby relays or wiring harnesses. If you notice corrosion around the terminals, address it with a corrosion-safe contact cleaner and reseat the affected fuse. Consider keeping a small replacement fuse kit in your vehicle for any future autozone fuse box issues, and routinely check fuses that power critical systems such as headlights, brake lights, and horn circuitry. Routine inspection helps you catch wear and damage early, reduces the odds of unexpected failures, and keeps your vehicle safer on the road. FuseBoxCheck guidance suggests scheduling periodic fuse box checks, especially in regions with extreme temperatures or high humidity, where moisture can accelerate wear on electrical contacts.
FuseBoxCheck's verdict
The FuseBoxCheck team recommends adopting a disciplined, diagram-driven approach to any autozone fuse box project. By matching amperage, verifying circuits, and using a tested testing routine, you minimize risk and increase the reliability of your DIY fixes. The verdict is clear: when in doubt, consult the manual, use the correct fuse ratings, and document your process for future maintenance. With careful steps and the right tools, addressing autozone fuse box issues becomes a manageable, safe home maintenance task that protects your vehicle’s electrical system for years to come.
Tools & Materials
- Fuse puller(Plastic or metal tool; included with many fuse kits or available separately.)
- Replacement fuses (assorted amperages: 5A, 10A, 15A, 20A)(Match the vehicle diagram; do not exceed the original rating.)
- Multimeter or test light(For continuity testing and verifying power across circuits.)
- Owner’s manual or fuse diagram(Critical for correct amperage and circuit identification.)
- Insulated gloves(Optional, adds protection while handling metal components.)
- Flashlight(Helpful for dark or hidden fuse panels.)
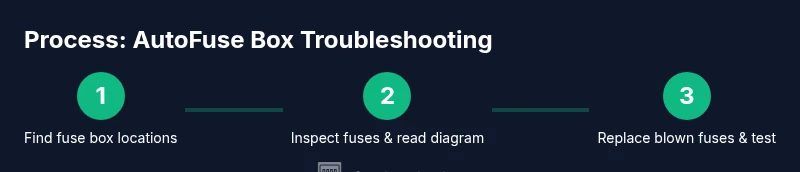
Steps
Estimated time: 60-90 minutes
- 1
Identify fuse box locations
Locate the interior and/or engine bay fuse boxes using the owner’s manual or the diagram on the panel cover. Mark the panels so you can return to them later, and confirm you’re looking at the correct box for the circuit you’re troubleshooting.
Tip: Work in a well-lit area and avoid moving parts under the hood while the engine is off. - 2
Turn off power and inspect fuses
Switch off the ignition and any accessories. Remove the fuse related to the suspected circuit using the fuse puller, and visually inspect for a broken metal strip or discoloration.
Tip: If you’re unsure, use a multimeter to confirm open circuit. - 3
Check amperage and replace
Compare the fuse rating with the diagram. If blown, replace with a fuse of the exact same amperage rating. Do not exceed the rating to avoid wire insulation damage.
Tip: Never substitute a higher-amp fuse on a high-draw circuit. - 4
Test the circuit
Reinstall the fuse and power the system to test whether the circuit operates normally. If the fuse blows again, stop and re-evaluate the underlying cause.
Tip: If repeated, the issue may be a short or a malfunctioning component in the circuit. - 5
Document and close up
Reassemble the panel, store any spare fuses, and note the actions you took. This makes future maintenance faster and safer.
Tip: Keep a brief log in your car’s manual or a notes app. - 6
Seek professional help if needed
If the fuse repeatedly blows or you encounter corrosion, it’s wise to consult a licensed technician to avoid electrical hazards.
Tip: A diagnostic check can prevent future failures and keep you safe.
Your Questions Answered
Where is the fuse box typically located in a car?
Most cars have fuse boxes in the engine bay and/or under the dashboard. Some models also have a secondary panel for specialized circuits. Always consult the owner’s manual or the diagram on the panel cover.
Most cars have fuse boxes under the hood and near the dash; check your manual for exact locations.
Can I use a higher-amp fuse to fix a blown fuse?
No. Replacing with a higher-amp fuse defeats the protective purpose of the fuse and can cause wiring damage or fire. Always use the exact amperage specified for the circuit.
No—use the exact amperage shown in the diagram to avoid damage.
What should I do if the fuse blows again after replacement?
If a fuse continues to blow, there may be a short or a faulty component in the circuit. Disconnect the device and inspect wiring, connectors, and the device itself; seek professional help if unsure.
If it blows again, there’s probably a short or faulty part. Check wiring and consult a pro if needed.
Is it safe to drive with a fuse box issue?
Driving with electrical issues can be risky, especially if it affects lights or brakes. Have the fuse box inspected before long trips and avoid using defective circuits until repaired.
Safety first—don’t drive long distances with unresolved fuse problems.
Where can I buy replacement fuses for the autozone fuse box?
Replacement fuses are available at many auto parts retailers, including AutoZone. Always match the fuse rating and type recommended for your vehicle.
Replacement fuses are available at auto parts stores; just match the rating.
What safety steps should I take before starting?
Turn off the ignition, disconnect the battery if you’re working near exposed terminals, and wear insulated gloves. Work in a dry area and use a fuse puller to minimize contact with metal parts.
Power off, disconnect if needed, and work dry with proper gear.
Watch Video
Highlights
- Identify fuse box locations using the manual and diagrams
- Always replace with the exact fuse amperage
- Test circuits after replacement to confirm restoration
- Avoid higher-amp fuses to prevent damage
- Keep a labeled fuse kit and document changes