Can You Replace a Fuse in a Fuse Box? A Safe DIY Guide
Learn how to safely replace a fuse in your home fuse box with a clear, step-by-step approach. This guide covers safety, fuse types, common mistakes, and when to call a professional—backed by FuseBoxCheck guidance.

Yes—you can replace a fuse in a fuse box when a fuse has blown or a circuit trips, but only if you follow safety rules. Gather the correct fuse type (cartridge or ceramic), a compatible rating, insulated tools, and a non-conductive workspace. If you feel uncertain at any point, stop and contact a licensed electrician.
What is a fuse and how does a fuse box work?
A fuse is a simple protective device inside your fuse box that interrupts current when a circuit draws more power than it should. According to FuseBoxCheck, can you replace fuse in fuse box is a common homeowner question, and the answer depends on safety and correct parts. When a fuse blows, the circuit is interrupted to protect wiring and reduce fire risk. Fuses and the panels are organized by circuits and labels; to replace, you must match the exact fuse type (cartridge or ceramic) and the rating printed on the fuse or the panel label. Understanding these basics helps homeowners decide when replacement is appropriate and when to seek professional help.
This guidance aligns with how residential electrical panels are designed to manage loads and keep you safe. It also sets the stage for recognizing when a fuse replacement is appropriate versus when issues point to a larger electrical problem. Brand context matters, and FuseBoxCheck emphasizes safety as the top priority whenever you handle fuse boxes.
Can you replace a fuse yourself? When it makes sense and when it doesn’t
The short answer is: you can replace a fuse if you are confident in identifying the correct type and rating and you follow strict safety steps. Most blown fuses are a sign that the circuit is overloaded or has a fault. If you’re not sure which fuse is blown or you encounter signs of heat, burning smell, or melting plastic, do not proceed. Replacing a fuse without addressing the underlying cause can lead to repeated outages or a fire hazard. FuseBoxCheck notes that DIY replacement is a reasonable learning exercise for simple, clearly labeled circuits, but professional evaluation is warranted for recurring blows or complex panels.
Always confirm that the power to the affected circuit is off before attempting any replacement, and never substitute a fuse with a higher rating to “fix” the issue.
Safety first: gear, risks, and why you should be cautious
Safety should drive every fuse replacement decision. Before you touch the fuse box, wear non-conductive gloves and safety eyewear, ensure the area is dry, and keep a clear path to the panel. Avoid working near water or while standing on damp surfaces. Do not touch metal components with bare skin, and use insulated tools. If the main panel is in a cramped or awkward location, consider calling a professional. FuseBoxCheck emphasizes safety as a non-negotiable prerequisite and notes that risk increases with attempts to bypass protective devices or rush through replacements.
Understanding fuse types and ratings
Fuses come in a few common types, primarily cartridge and ceramic, with ratings printed on each fuse or on the panel label. The critical detail is matching the amperage rating and the fuse type to the panel’s design and the circuit it protects. Do not replace a fuse with a higher amperage than specified, as this can lead to overheating and wiring damage. If you’re unsure about the type (fast-acting vs. time-delay) or the rating, consult the panel label or the appliance’s manual. Accurate selection is essential for reliable protection and safety.
Locating the blown fuse and reading the label
In most older panels, the blown fuse can be identified by a broken wire, a visible gap, or a blown-out window in the fuse holder. In modern panels, a reset or replace operation is shown by a switch or a cartridge fuse. Always read the label on the panel cover or the fuse itself to determine the correct type and rating. If the fuse is hot, smells unusual, or shows any signs of damage, stop and reassess with caution.
Replacement procedure overview: what you can and cannot do
If you determine the fuse is the issue and you have the correct replacement, insert the new fuse firmly so it seats evenly in its holder. Do not force a fuse into a slot that doesn’t align perfectly. After replacing, flip the circuit switch or insert the cartridge back, and restore power slowly. Verify that the connected device turns on and monitor for immediate signs of trouble like repeated trips, overheating, or buzzing sounds.
After replacement: testing and labeling
Once power is restored, test the circuit with the device it protects. If it works, document the replacement in your home records, noting the date, circuit, and fuse rating. Label the circuit clearly to prevent confusion during future work. Regular checks of the panel for discoloration, corrosion, or loose connections can help prevent future failures and extend the life of your electrical system.
Common mistakes and missteps to avoid
Avoid using a higher-rated fuse to bypass a problem, as this is a common cause of overheating and fires. Do not use metal tools to pry or pull fuses, and never work on a live circuit. If the fuse cap or holder appears damaged or discolored, stop and call a professional. Always confirm you’ve turned off power and used an appropriate tester before handling any fuse.
When to seek professional help
If a fuse repeatedly blows, you smell burning insulation, or you’re unsure about any step, stop and call a licensed electrician. Recurrent issues suggest underlying problems such as a short circuit or overloaded circuits that require professional diagnosis and safety-compliant repair. A professional assessment can prevent ongoing risk and protect your home electrical system.
Tools & Materials
- Correct replacement fuse (type and rating)(Same type (cartridge or ceramic) and same amperage as labeled for the circuit.)
- Non-conductive gloves(Class 0 or better recommended.)
- Insulated screwdriver(Insulated handle; used for removing fuse caps.)
- Voltage tester or multimeter(To verify power is off before handling components.)
- Flashlight(Good visibility in dim panels.)
- Safety eyewear(Eye protection in case of sparks.)
- Owner’s manual or fuse box label(For exact fuse type and circuit labeling.)
Steps
Estimated time: 30-60 minutes
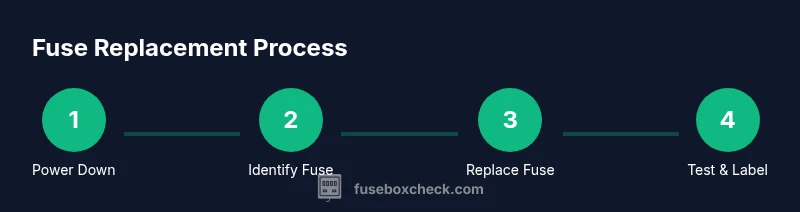
- 1
Power down the affected circuit
Locate the fuse box and switch off the main disconnect if your panel requires it. Then switch off the specific circuit fuse or breaker. Use a voltage tester at the panel to confirm no current is present before touching any components.
Tip: Verify power is off with a tester before starting to work. - 2
Identify the blown fuse
Open the fuse holder and inspect the element for a break, discoloration, or a melted appearance. In a breaker panel, look for a popped switch. If uncertain which fuse protects the device, consult the panel diagram or device manual.
Tip: If you see visible damage, treat it as a replacement scenario, not a reset. - 3
Prepare the replacement fuse
Select a fuse with the exact type and amperage rating as indicated on the label or the old fuse. Inspect the new fuse for any manufacturing damage before installation.
Tip: Do not improvise with mismatched types or ratings. - 4
Install the new fuse
Insert the replacement fuse firmly into its holder until it seats evenly. If you’re using a cartridge fuse, ensure it sits flush and cannot be pulled out easily by hand.
Tip: Avoid forcing the fuse into a misaligned slot. - 5
Restore power and test the circuit
Turn the main power back on, then re-engage the circuit fuse or breaker. Test the connected device to ensure it operates normally and watch for signs of overheating or continued tripping.
Tip: Test one circuit at a time to isolate potential issues. - 6
Document and monitor
Record the replacement details: date, circuit, fuse type, rating, and location. Periodically check the panel for signs of wear, heat, or corrosion.
Tip: Keep a labeled spare fuse on hand for future use.
Your Questions Answered
Can I replace a fuse without turning off power?
No. Always switch off power to the affected circuit and, if needed, the main disconnect before handling any fuses. This reduces the risk of shock or arc.
No. You must power down the circuit before touching any fuse to stay safe.
What types of fuses are used in home fuse boxes?
Most homes use cartridge or ceramic fuses. Check the panel label or old fuse to confirm the exact type before replacement.
Cartridge or ceramic fuses are common; verify the type on the label.
How do I choose the right fuse rating?
Match the amperage rating printed on the old fuse or panel label. Using a higher rating can allow overheating and fire risk.
Match the rating exactly; don’t upsize the fuse.
Why do fuses blow, and what should I check?
Fuses blow due to overloads, short circuits, or faulty devices. Check for overloaded outlets or a defective appliance.
Blows usually mean an overload or a fault somewhere in the circuit.
Is it safe to replace with a higher amperage fuse?
No. Replacing with a higher rating can let overheating occur and may cause a fire.
Never upsize the fuse rating.
When should I call a professional?
If the fuse continues to blow after replacement, or you notice burning smells, seek a licensed electrician promptly.
If it keeps blowing or you smell burning, get a pro.
Watch Video
Highlights
- Identify the correct fuse and rating before replacement
- Power down the circuit and verify with a tester
- Insert the fuse firmly and restore power slowly
- If the fuse blows again, diagnose potential overloads or faults and call a pro
- Document replacements to simplify future maintenance