How to Fix a Fuse Box: A Practical DIY Guide
Learn safe, practical steps to fix common fuse box issues at home. Identify fuse types, test connections, and know when to call an electrician with guidance from FuseBoxCheck.

This guide helps you safely diagnose and fix common fuse box issues, starting with identifying fuse types, checking for blown fuses or tripped mains, and reseating loose connections with the power off. You’ll learn essential safety steps, the right tools, and when to call an electrician. Follow the step-by-step actions and avoid risky bypassing, so you protect your home’s electrical system.
Understanding fuse box basics
If you're asking how to fix fuse box safely, you first need to understand what a fuse box does and how it protects your home. According to FuseBoxCheck, a fuse box is the central hub where branch circuits connect to power, and each fuse or cartridge delays or interrupts current to prevent overheating. The phrase how to fix fuse box is common among homeowners who want to restore power after a fault, but proper practice starts with recognizing the types of fuses you might encounter, and the basic rules of isolation and labeling. A typical residential box may use cartridge fuses or a bank of re-settable breakers. In older homes you might see blown fuses, while newer designs often use circuit breakers. Regardless of style, the goal is the same: ensure the safe, reliable distribution of electricity while preventing fire hazards. For homeowners, this knowledge reduces risk and helps you make informed decisions about when to DIY and when to call a pro.
Types of fuse boxes and fuses
Residential fuse boxes come in several designs, and the feel of the panel matters for how you approach maintenance. Cartridge fuses are common in older homes, and they require replacing the blown element with a fuse of the same amperage rating. Modern panels may use blade fuses or a bank of breakers; these are resettable and can trip to interrupt current when a fault occurs. Understanding the difference between these types is essential because it dictates how you test, replace, and label circuits. Regardless of type, always verify the rating printed on the fuse holder or panel door, and never substitute a device with a higher rating than specified. FuseBoxCheck’s guidance emphasizes matching ratings and keeping a clean, labeled panel to reduce confusion during future fixes.
Safety first: essential precautions before you begin
Safety should be your primary concern when working near a fuse box. Before you touch anything, turn off the main service disconnect and, if possible, the individual circuit’s switch. Wear protective gear such as gloves and eye protection, and work on a dry, non-conductive surface. Keep children and pets away, and ensure tools are insulated and in good condition. Never work on a live panel or attempt to bypass fuses to restore power. If you detect burning smells, melted insulation, or arcing sounds, stop immediately and evacuate the area. These precautions are non-negotiable and are designed to prevent electric shock, burns, and fire hazards.
Diagnosing common symptoms and what they mean
Fuses protect circuits by interrupting current, so a blown fuse or a tripped breaker indicates a fault in a specific area or appliance. A blown cartridge fuse typically leaves a darkened fuse body, a visible gap, or a melted tip. A tripped main or branch breaker may feel loose or click with a hard reset. If lights dim when turning on a large appliance, it can indicate an overloaded circuit or a faulty connection. Corrosion at the terminals, warm surfaces, or buzzing sounds are warning signs that a professional should assess the panel. Use these observations to guide your next steps and document what you find for reference.
Visual inspections you can perform safely
A clean, careful visual check can reveal obvious issues without tools. Look for signs of corrosion on terminal screws, loose conductors, or bent blades. Check for gaps between the fuse and holder, cracked plastic, or scorch marks around the panel interior. If you notice any of these conditions, stop and plan the next steps with safety in mind. A careful inspection helps you decide whether to proceed with replacement or seek professional help. Keep a labeled, organized stack of notes for future maintenance.
Testing with a multimeter: principles and cautions
Testing voltage and continuity with a multimeter is a core skill in fuse box troubleshooting, but it must be done safely. Always verify the main power is off before testing, and set the meter to the correct AC range for household circuits. Test on non-live components only, and never touch exposed conductors while the meter leads are connected. If you’re unsure about the readings or the meter’s behavior, stop and consult a professional. Multimeters can prevent guesswork by confirming whether a circuit is truly open or carrying current.
Replacing fuses or cartridges: guidelines and ratings
When a fuse is confirmed blown, replace it with a device that matches the original amperage rating and type. Do not install a fuse with a higher rating in a circuit, as this defeats the protective purpose and can cause overheating or fire. For cartridge fuses, insert the new fuse fully and ensure it seats firmly. For breakers, reset or replace only with the balance of the panel’s design. Always inspect the area after replacement for any signs of heat or damage, and keep a record of the replacement date and rating for future reference.
When to call a licensed electrician
DIY can fix many minor fuse box issues, but certain problems require a licensed electrician. If you notice burning odors, melted insulation, buzzing noises, heat at the panel, water intrusion near the panel, or repeated fuse blows despite proper replacements, professional intervention is necessary. Electrical work beyond a basic replacement carries risks of shock, arc flash, and fire hazards. FuseBoxCheck recommends erring on the side of caution and obtaining an expert opinion when uncertainty arises.
Maintenance and routine checks to prevent future problems
Regular maintenance reduces surprises. Schedule a yearly visual inspection, verify labeling accuracy, and replace aging components before failure. Keep the panel clean and dry, update the labeling as circuits change, and monitor for changes in performance like flickering lights or tripping under normal loads. Document service dates and component types to streamline future fixes. A proactive approach saves time, money, and risk over the life of your electrical system.
Tools & Materials
- Insulated screwdriver set (Phillips and flat-head)(Insulated handles, rating at least 1000V)
- Voltage tester or non-contact tester(Check for live conductors before touching any components)
- Multimeter(Digital, auto-range preferred; set to AC voltage on appropriate range)
- Replacement fuses or cartridges/breakers(Match the panel’s amperage rating and type)
- Flashlight or headlamp(Better visibility inside panel)
- Safety gloves and eye protection(Wear protective gear; keep tools dry and clean)
- Owner’s manual or panel labeling(Helpful for circuit identification; optional)
- Dry, clean workspace(Keep area free of liquids; avoid wet conditions)
Steps
Estimated time: 40-60 minutes
- 1
Power down and verify isolation
Go to the main service disconnect and switch OFF. Use a non-contact tester to confirm no current is present inside the panel before removing the cover. If the tester still detects live voltage, wait and recheck after a cooldown period or call a professional.
Tip: Pro tip: document the time you shut off power and mark the circuits affected. - 2
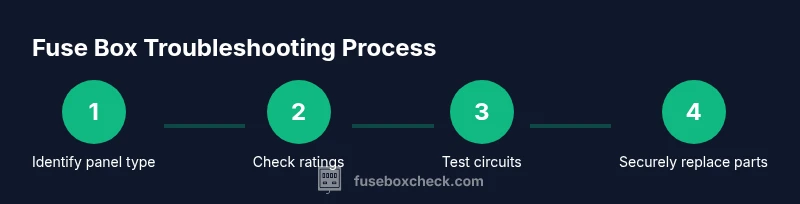
Identify fuse box type and locate rating labels
Examine the panel door or interior for amperage ratings and fuse types. Note whether you have cartridge fuses or breakers, and record the rating for each circuit. This guides safe replacement and prevents mismatches.
Tip: Pro tip: keep a small cheat sheet near the panel with circuit names and ratings. - 3
Inspect visually for obvious damage
With the panel open and power confirmed OFF, look for scorch marks, melted plastic, or loose wires. Do not touch any damaged components; proceed only if you are confident in your evaluation or call a pro.
Tip: Pro tip: use a bright light to catch signs of heat damage that may be invisible in shadows. - 4
Test circuits with a multimeter
Set the multimeter to the appropriate AC range and verify that the circuit wrongfully connected is de-energized. Check for continuity where safe and confirm there is not a short to ground. Do not test live components without proper PPE and training.
Tip: Pro tip: test one circuit at a time to isolate faults clearly. - 5
Replace blown fuses or reset breakers
Install a fuse of the same type and rating; ensure it seats fully. If replacing a breaker, use the correct type and rating and snap it into place firmly. Do not substitute higher-rated devices to compensate for a fault.
Tip: Pro tip: after replacement, gently reseat all neighboring fuses or breakers to ensure solid connections. - 6
Close the panel and restore power
Reattach the panel cover, turn the main back ON, and test affected circuits one by one. Observe for any signs of overheating or unusual behavior during operation. If issues recur, power down again and seek professional help.
Tip: Pro tip: monitor for a few minutes and listen for buzzing or sizzling sounds that indicate a lingering problem. - 7
Label circuits and document changes
Update labeling to reflect current wiring and any new replacements. Accurate labels help future DIYers and speed future troubleshooting.
Tip: Pro tip: take a quick photo of the panel layout for easy reference. - 8
Review safety and plan maintenance
Before finishing, review the safety checklist and plan routine inspections. Establish a basic maintenance schedule to prevent future failures and keep the panel in good condition.
Tip: Pro tip: set a yearly reminder to inspect the panel and confirm labeling accuracy.
Your Questions Answered
What is the first step when a fuse blows?
First, turn off the main power and verify the area is safe before inspecting the fuse. Then replace the fuse with the correct rating or reset the breaker. If the problem recurs, seek professional help.
First, switch off the main power, inspect the fuse, and replace it with the correct rating. If it keeps blowing, contact an electrician.
Can I replace a fuse with any rating?
No. Use the exact amperage rating and type specified for the circuit. Using a higher rating defeats protection and risks overheating or fire.
No. Always use the exact rating and type; higher ratings can be dangerous.
Is it safe to touch a fuse box cover if it feels warm?
A warm cover can indicate an overload or poor connection. Stop and disconnect for safety, then inspect further or call a professional.
If the cover is warm, stop and disconnect to be safe, then seek help if it continues.
When should I call an electrician vs DIY?
DIY is suitable for simple, clearly labeled tasks with the main power off. If you encounter burning smells, melted components, or recurrent faults, hire a licensed electrician.
DIY works for basic tasks, but call a pro if you smell burning or repeatedly blow fuses.
What is the difference between a fuse and a breaker?
A fuse is a one-time protective device that must be replaced after a fault. A breaker can reset after a fault. Both serve to interrupt current when unsafe conditions arise.
Fuses burn out and need replacement; breakers can be reset after a fault.
How often should I inspect the fuse box?
Aim for an annual visual inspection and a full panel check every few years or after major electrical work. Regular labeling and cleaning help prevent issues.
Check the panel at least once a year and document changes.
Highlights
- Know your fuse box type and ratings before touching anything.
- Always isolate power and use insulated tools.
- Replace only with matching fuses or breakers; avoid improvised fixes.
- Document labels and maintenance tasks for future DIYers.
- Call a licensed electrician for complex or unsafe conditions.