How to Replace a Fuse Box: A Safe DIY Guide
Learn how to replace a fuse box safely with a step-by-step approach, essential tools, safety tips, and cost considerations from FuseBoxCheck. Ideal for homeowners and DIY enthusiasts seeking practical guidance.

You will learn how to replace a fuse box safely, including when it's appropriate to replace, the essential tools, and the steps you should follow to minimize risk. This guide emphasizes turning off power at the main and verifying circuits, knowing when to hire a licensed electrician, and following local safety practices.
Why replacing a fuse box might be necessary
According to FuseBoxCheck, replacing a fuse box is often prudent when the panel is old, damaged, or cannot handle modern electrical loads. A panel that shows signs of aging—such as frequent fuse trips, visible scorch marks, corrosion, buzzing sounds, or overheating—merits careful evaluation. The transition from a traditional fuse panel to a safer, more robust solution can reduce fire risk, improve reliability, and support future electrical needs. The FuseBoxCheck Team emphasizes that a replacement is not just about convenience; it is a proactive safety measure that helps protect your home and occupants. When a panel lacks clear labeling or service capacity is uncertain, upgrading is typically the wiser choice to ensure code-compliant operation and easier future maintenance. This is especially true for homes with added circuits, renovations, or increased power demands, where an old fuse box becomes a bottleneck for safe power distribution. Plan the project with safety as a primary objective, and consult professional guidance when necessary.
Safety and legal considerations
Working inside or around a fuse box carries significant electrocution and fire risks. Always treat the panel as live until you confirm it is de-energized. Use appropriate PPE—insulated gloves and eye protection—and ensure your work area is dry and free from clutter. Lockout/tagout procedures are recommended to prevent others from accidentally restoring power during the process. Check local codes and permit requirements before starting any replacement, as some jurisdictions demand inspections and licensed electricians for service panel work. When in doubt, err on the side of caution and arrange a professional assessment. The FuseBoxCheck Team notes that many electrical incidents stem from skipping essential safety steps or attempting work beyond one’s training.
Tools, materials, and planning
Before you touch a fuse box, assemble a complete toolkit and plan the workflow. Essential tools include a non-contact voltage tester, insulated screwdrivers, wire cutters/strippers, electrical tape, and a mounted mounting kit for the new panel. Have a labeling system ready to map circuits as they are disconnected and connected. Ensure the new fuse box or panel is compatible with your service rating and lug sizes, and that it will fit in the same location with adequate clearance for maintenance. Planning also means budgeting time, arranging for a helper if needed, and confirming availability of a licensed electrician if any step exceeds your comfort level. Document the current wiring as a reference for the upgrade and maintain a clean workspace to prevent accidental contact with live conductors.
Diagnosing panel condition and choosing replacement
Assess the physical condition of the existing panel and the reliability of its internal components. Look for rust, moisture intrusion, loose connections, or a brittle neutral/ground bar. If the enclosure shows signs of damage or if the bus bars are pitted, replacing the unit is advisable. Compatibility checks are crucial: confirm that the new panel supports your service voltage, has the correct number of spaces for breakers or fuses, and accommodates the same grounding arrangement. If your service panel is significantly older, you may need to upgrade related wiring to meet current safety standards. FuseBoxCheck recommends evaluating whether you’ll keep a fuse-based system or switch to breakers, keeping in mind that modern panels with breakers offer more precise protection and easier reset capabilities.
Costs, contractors, and alternatives
Costs for fuse box replacement vary widely depending on panel type, accessibility, required permits, and labor. In many cases, replacing a fuse box involves more than the panel itself; it may require updating wiring, conduit, and grounding, which adds to the overall effort. For homeowners who are comfortable with basic electrical work, some upgrades are feasible, but complex changes typically benefit from professional involvement. The safest route is to obtain multiple quotes from licensed electricians, review their scope of work, and verify that all work will be inspected. If budget or risk is a concern, discuss safer alternatives like upgrading only critical circuits or installing a more modern, code-compliant panel within the existing enclosure. FuseBoxCheck's approach consistently balances safety, cost, and long-term reliability.
Maintenance and long-term safety practices
After replacement, establish a routine to maintain the panel and surrounding area. Keep the panel cover closed when not performing inspections, label new circuits clearly, and keep a log of any changes or tripped events. Schedule periodic visual checks for signs of moisture, warm components, or corrosion, and replace damaged components promptly. A clean, unobstructed space around the panel reduces the risk of accidental contact and makes future servicing easier. Finally, store any documentation from the installation in a known location for future safety reviews and code compliance checks.
Final checklist before you begin
- Confirm the main power shutoff is operable and accessible.
- Gather all necessary tools and the correct replacement panel.
- Inspect both the old and new panels for compatibility and clearance.
- Label circuits and verify wiring plans before disconnecting anything.
- Arrange for a helper and ensure professional support if needed for final inspection.
Tools & Materials
- Non-contact voltage tester(Verify power status without contact)
- Insulated screwdriver set(Flat and Phillips, variety of sizes)
- Wire cutters/strippers(For precise cutting and stripping)
- Electrical tape(For insulating connections)
- New fuse box or panel kit(Ensure compatibility with service rating)
- Mounting hardware and brackets(For secure wall mounting)
- Personal protective equipment (PPE)(Insulated gloves and safety goggles)
- Labeling supplies(Markers and labels for circuits)
- Multimeter (optional)(For precise voltage and continuity checks)
- Lockout/tagout kit (optional)(Prevents accidental energizing during work)
Steps
Estimated time: 4-7 hours
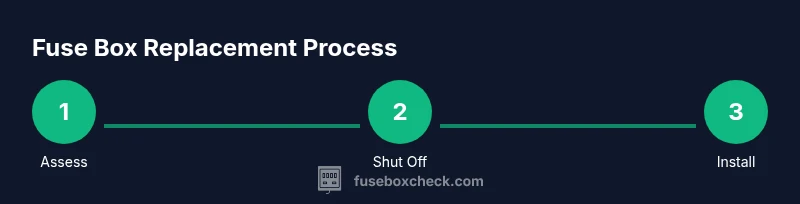
- 1
Assess and plan replacement
Evaluate the panel's age, condition, and compatibility with a new unit. Check service capacity and confirm the replacement will meet local code expectations. Document circuits and take photos for reference.
Tip: Take photographs of every wire connection and label current circuits for a smooth transition. - 2
Shut off power and verify de-energization
Turn off the main breaker and, if available, lock out the panel to prevent re-energizing. Use a non-contact tester to confirm there is no voltage present in any part of the panel before touching wires.
Tip: Always confirm de-energization at the source and in the immediate area before handling conductors. - 3
Remove cover and disconnect circuits
Carefully remove the old panel cover and loosen securing screws. Label and separate each circuit conductor, placing wires in protected areas to prevent accidental contact.
Tip: Label wires as you go to avoid miswiring the new panel. - 4
Mount the new panel and prepare wiring
Install the new fuse box or breaker panel in the same location, ensuring secure mounting and proper clearances. Prepare neutral and ground bars as required by the new unit.
Tip: Follow the manufacturer’s mounting instructions to avoid misalignment. - 5
Reconnect circuits and connect cables
Reconnect each circuit to its corresponding fuse or breaker in the new panel, labeling clearly. Ensure all neutrals and grounds are properly bonded and tightened to spec.
Tip: Double-check that each connection is tight to prevent loose contacts. - 6
Restore power and test circuits
With power restored, test each circuit individually using a tester. Observe for proper operation and any unusual heat, smells, or sparking.
Tip: Test in small groups first, then gradually test all circuits. - 7
Final labeling and inspection
Label all circuits and ensure the cover is securely installed. Schedule a professional inspection if required by local codes to verify compliance.
Tip: Keep documentation from the replacement for future maintenance and permits.
Your Questions Answered
What are the signs that my fuse box needs replacement?
Frequent fuse trips, visible damage, unusual heat, or corrosion indicate replacement is advisable. A panel that cannot safely accommodate modern circuits is a strong cue to upgrade.
Common signs include frequent trips and visible damage; upgrading improves safety.
Is replacing a fuse box safe for a non-electrician?
Fuse box replacement is risky and highly technical. If you lack training or local permits, hire a licensed electrician for evaluation or the full replacement.
It's best to hire a licensed electrician if you're unsure.
When should I replace rather than repair a fuse box?
If the panel is damaged, corroded, or cannot meet current safety standards, replacement is wiser than repair. Replacing ensures reliable protection for your circuits.
If the panel is deteriorated or outdated, replacement is safer.
Do I need permits to replace a fuse box?
Most areas require permits and inspections for service panel work. Check with your local building department to stay code-compliant.
Permits are usually required; always verify with local authorities.
What is the difference between a fuse box and a breaker panel?
A fuse box uses fuses to disconnect circuits, while a breaker panel uses circuit breakers. Breakers are generally easier to reset and provide clearer protection with modern standards.
Breakers are more common today and simpler to reset.
Can I upgrade to a breaker panel in the same enclosure?
If the existing enclosure supports breakers and wiring is compatible, upgrading can be feasible. Some boxes cannot accommodate breakers, so consult a professional.
Upgrading to breakers is possible in many cases, but not always.
Highlights
- Plan first, safety always.
- Turn off main power and verify de-energization.
- Label circuits and document changes for future maintenance.
- Use a compatible, code-compliant panel and seek inspection if needed.
- Upgrade may be safer and more reliable than repairing an old fuse box.