How to Put Fuse Safely: A DIY Guide
Learn how to put fuse safely in your home fuse box with a clear, step-by-step guide, essential tools, safety tips, and expert insights from FuseBoxCheck.

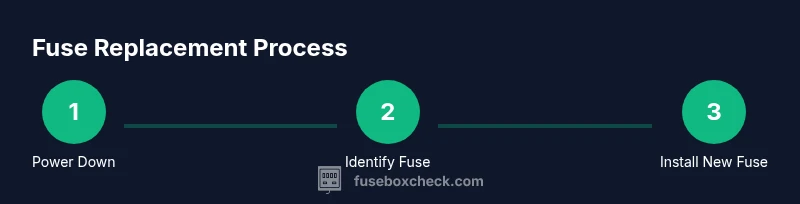
This guide explains how to put fuse safely and correctly in your home's fuse box. You’ll learn how to identify the right fuse type, turn off the main power, test circuits, and replace a blown fuse with the correct rating. Follow the steps carefully to avoid shocks, overloads, or electrical fires.
Understanding Fuse Boxes and How to Put Fuse Safely
According to FuseBoxCheck, understanding fuse box basics reduces shock risk and helps homeowners fix minor issues safely. When you ask yourself how to put fuse, the first step is to recognize the two common panel designs: fuses and breakers. In older homes you may still encounter fuse holders with replaceable cartridges, while newer panels rely on circuit breakers. In either case, the goal is to restore a circuit without creating new hazards. This section lays the groundwork for safe handling, including how to assess the panel, read labels, and choose the appropriate fuse type. Knowing the difference between cartridge fuses, glass fuses, and blade-type fuses will influence your approach to replacement and maintenance. The information here sets up the practical steps that follow, and it emphasizes safety and preparedness as you work through any repair.
Fuse Types You’ll Encounter
Not all fuses are created equal. Cartridge fuses, blade fuses, and glass fuses come in different shapes and ratings. Before you attempt to put fuse, verify you have the correct type and amperage for the circuit. Using the wrong fuse can lead to nuisance trips or, worse, overheating. Always check the panel label for the exact specification. If the label is faded or missing, stop and consult a wiring diagram or a qualified technician. Fuse ratings are chosen to protect wires and devices from overheating, so precision matters when you replace a fuse. In this section, you’ll learn how to identify type by shape, color coding, and labeling, so you can proceed with confidence in the next steps.
Safety First: Power Off and Lockout Procedures
A core part of the process for how to put fuse safely is ensuring power is fully disconnected. Start by turning off the main breaker or disconnecting the service from the meter if accessible. Then, turn off the specific circuit breaker if one is present, and use a non-contact voltage tester to verify that the panel interior is dead before touching anything. Personal protective equipment (PPE) like safety glasses and insulated gloves adds a margin of safety. Working with live electrical systems is dangerous, and even a small slip can cause shock. Take your time, test repeatedly, and keep the workspace dry and well-lit. This section helps you build a safety-first mindset before proceeding to the mechanical steps.
Recognizing a Blown Fuse vs. a Tripped Breaker
One frequent question when learning how to put fuse is whether the problem is a blown fuse or a tripped breaker. A blown fuse is usually a visible sign—often a broken link inside the cartridge or a melted element—and it cannot reset. A tripped breaker, by contrast, simply flips to the OFF position and can be reset once the underlying issue is resolved. Understanding which symptom you’re dealing with helps you choose the right repair path. If you’re unsure, consult the panel label or seek professional help. For DIY attempts, always ensure power is off before inspecting any fuse or breaker components.
Choosing the Right Fuse Rating and Type
After you identify the fuse type, the next step is to verify the rating. The replacement fuse must match the amperage rating and the physical type used by the panel. Using a fuse with a higher rating can let wires overheat, while a lower rating may cause nuisance trips. If you’ve lost the label, consult a wiring diagram or manufacturer guidance to determine the correct rating. This section also covers safety margins and common scenarios, such as older homes with smaller gauge wires or panels that require high-rupturing capacity fuses. Correct selection is essential to keep circuits protected and avoid recurring issues.
Replacing a Blown Fuse: Safe Handling and Installation
With the right fuse type and rating selected, the replacement process becomes straightforward—provided you follow steps carefully and keep safety at the forefront. Begin by confirming power is off, then remove the blown fuse using an appropriate tool (fuse puller or insulated screwdriver, depending on the design). Inspect the fuse holder for any signs of corrosion or damage, and ensure the replacement fuse seats fully in its socket. After installation, restore power and test the circuit to verify normal operation. This section walks you through a careful, methodical replacement, emphasizing alignment with the panel’s design and safety features.
Post-Repair Safety Checks and Clean-Up
Once the new fuse is in place and power is restored, perform a quick safety check. Listen for buzzing noises, watch for signs of overheating, and confirm that the circuit powers devices normally. If you notice any abnormal heat or smell, shut down power immediately and re-evaluate the setup. Clean up tools, return components to their original location, and document the replacement for future reference. Regular, careful checks help prevent future faults and extend the life of electrical components in your home.
Maintenance Tips for Fuse Boxes
Maintenance is an often-overlooked aspect of safe electrical care. Keep your fuse box clean and dry, and replace any missing labels so future work is easier. Periodically inspect for signs of corrosion on fuse holders and contacts, and test non-critical circuits to ensure ongoing reliability. If your home uses old fuse technology, consider upgrading to a modern panel with replaceable breakers while following local codes. Routine maintenance reduces the likelihood of unexpected outages and keeps your electrical system working smoothly.
When to Call a Licensed Electrician
There are scenarios where DIY work isn’t the best route. If you encounter frequent fuse blows, a panel that’s hot to the touch, or you’re unsure about the panel’s wiring, it’s time to seek professional help. Trained electricians can perform a safe diagnostic, identify hidden faults, and ensure that upgrades meet current safety standards. When in doubt, trust your instincts and contact a licensed professional. A quick consultation can prevent costly damage and improve overall safety.
Real-World Scenarios: Old vs Modern Panels
Old fuse panels often require different handling than modern breaker panels. In some homes, you’ll encounter one-time fuses with cartridge holders, while newer installations use resettable breakers that can simplify maintenance. Understanding these differences helps you approach repairs confidently. If you’re upgrading, plan for compatibility with the home’s wiring, the service entrance, and any local electrical codes. This section helps you anticipate common issues and plan safer, more scalable electrical care.
Quick Troubleshooting Guide After Replacing a Fuse
If the circuit trips again after replacement, re-check the load on that circuit—appliances that overdraw current or shared circuits can cause repeated trips. Inspect for a short circuit along the wiring harness or damaged outlets. If you identify a fault, isolate it and avoid using the affected outlets until a repair is completed. A simple, repeatable checklist helps you stay organized and reduces the risk of mistakes when addressing fuse-related problems.
Tools & Materials
- Non-contact voltage tester(Verify that the panel is de-energized without touching live wires)
- Insulated screwdriver set(PH2 or flat-head as appropriate for fuse type)
- Replacement fuse(s) of correct rating and type(Match amperage and physical design (cartridge/glass/blade))
- Fuse puller or needle-nose pliers(Use minimal force to remove cartridge or blade fuses)
- Safety glasses(Eye protection in case of sparks)
- Insulated gloves(Extra protection for handling live components (if applicable))
- Flashlight(Ensure good visibility inside the panel)
- Multimeter (optional)(For verifying continuity or voltage after replacement)
Steps
Estimated time: 20-40 minutes
- 1
Power down and prepare the panel
Turn off the main power at the service disconnect and switch off the targeted circuit if accessible. Verify with a voltage tester before touching anything inside the panel. This minimizes the risk of shock while you work.
Tip: Double-check the main disconnect label and keep your hands dry. - 2
Identify the correct fuse type and rating
Inspect the fuse holder for the type (cartridge, glass, or blade) and locate the amperage rating shown on the fuse or panel labeling. If you can’t read the label, pause and look up the panel model or consult a diagram.
Tip: Using the wrong rating is a common cause of nuisance trips or overheating. - 3
Remove the blown fuse
Carefully pull the blown fuse from its socket using a fuse puller or insulated pliers. Do not twist or bend the fuse; inspect for visible signs of damage. If the fuse is fused shut, do not use extra force.
Tip: Keep the blade/contacts clean and dry to ensure a good seat for the replacement. - 4
Install the replacement fuse
Insert a new fuse of the same type and rating, ensuring it seats fully in the socket. Align the fuse with the orientation shown on the panel and avoid touching metal parts. Do not exceed the rated capacity of the circuit.
Tip: If you’re unsure, test the continuity with a multimeter after seating. - 5
Restore power and test the circuit
Turn the main power back on, then switch the circuit back on. Test connected devices to confirm that the circuit operates normally. If the fuse trips again immediately, there may be an underlying fault in the circuit.
Tip: If immediate trips occur, power down again and re-check wiring and loads. - 6
Close up, document, and monitor
Replace any panel covers, tidy tools, and note the replacement for future reference. Monitor the circuit for the next 24–48 hours for any signs of overheating or repeated trips.
Tip: Keep a simple log of fuse replacements and notable circuit loads.
Your Questions Answered
What should I do if a fuse blows repeatedly?
Repeated fuse blows usually indicate an overload, a short circuit, or a faulty appliance. First unplug devices on that circuit and assess loads. If the fuse continues to blow, stop and consult a licensed electrician to diagnose wiring faults safely.
If a fuse keeps blowing, unplug devices on that circuit and check for overloads. If it continues, contact a licensed electrician for a safe diagnosis.
Can I reuse a blown fuse after inspecting it?
No. A blown fuse has fulfilled its purpose and cannot be safely reused. Replace with a new fuse of the same type and rating to restore protection.
No, you should replace it with a new fuse of the same type and rating.
Is there a difference between a fuse and a circuit breaker?
Yes. A fuse is a one-time protective device that must be replaced after a fault, while a breaker can be reset after inspecting the load. Modern panels typically use breakers, but some homes still use fuses.
Fuses are single-use; breakers can be reset after addressing the fault.
Do I need special training to replace a fuse safely?
Basic safety training helps, but most homeowners can perform fuse replacement with careful steps and the right tools. If you’re unsure about any step, stop and consult a professional.
Basic safety steps are often enough, but don’t hesitate to call a professional if unsure.
What if my panel has no labels or the label is faded?
A missing label makes it risky to guess fuse ratings. Try to locate the panel model number and consult a factory diagram or a licensed electrician for the correct replacement.
Without labels, don’t guess the rating—consult the diagram or a professional.
Watch Video
Highlights
- Identify fuse type and rating before replacement
- Always power down and verify de-energization
- Match the fuse rating to the circuit and panel specifications
- If repeated blows occur, consult a licensed electrician